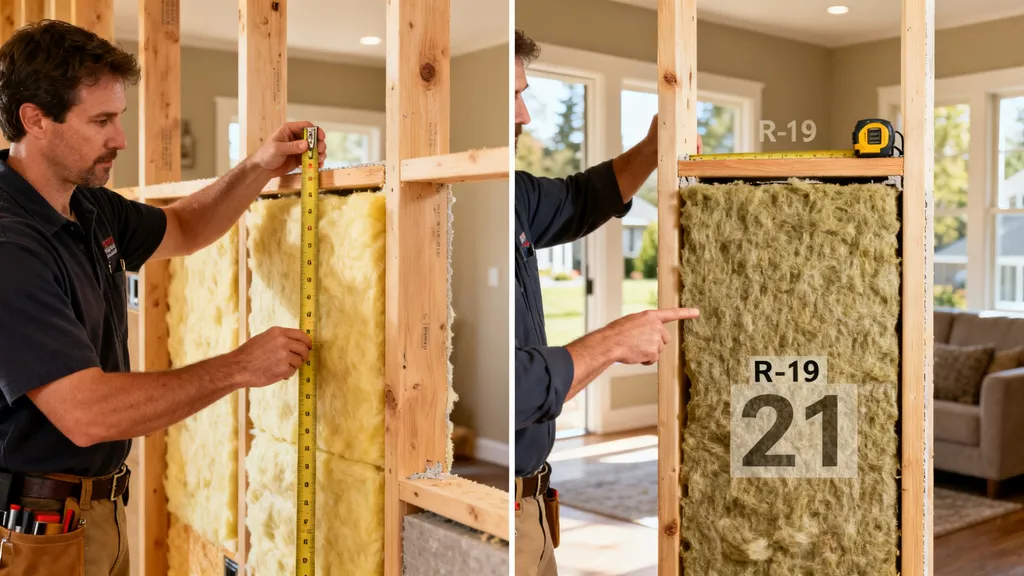
Clear, practical comparison of R-19 and R-21 insulation — performance, installation, costs, and which option fits common DIY wall and retrofit projects.
R-19 vs R-21 Insulation: Which Do You Need?
Choosing between R-19 and R-21 insulation is a common decision for DIY homebuilders working on framed walls and retrofits. This article on r19 vs r21 insulation explains the practical differences you’ll notice in real builds — how much heat loss changes, when cavity fit becomes the deciding factor, and which option makes sense for budget-conscious DIY projects. Read on for a short comparison table, installation tips, retrofit notes, and scenario-based recommendations so you can pick the right product for your wall cavities.
TL;DR:
- R-21 offers a small nominal R bump over R-19 in similar cavities; the real benefit depends on fit, compression, and air sealing.
- If framing depth matches the batt thickness and budget is tight, R-19 is often the practical DIY choice; if you want a modest upgrade inside a 2x6 wall, consider R-21 or add continuous insulation.
- Prioritize proper installation, air barrier, and thermal-bridge reduction; these factors usually have more impact than a one- or two-point R increase.
R-19 vs R-21 Insulation: Quick Overview and Why This Comparison Matters
A Short Scenario: a Diyer Choosing Insulation for Framed Walls
A first-time self-builder choosing between batts labeled R-19 and R-21 faces a simple-sounding question with practical nuances. Both labels describe nominal thermal resistance, but installation realities — stud depth, compression, cavities around windows, and whether you’re retrofitting or building new — determine which product will perform best in the finished wall.
How Small R Differences Translate Into Real Decisions
R-values are useful shorthand, but they don’t tell the whole story. The Department of Energy defines R-value as the material’s thermal resistance per unit area; however, air leakage, framing fraction (the share of wall area taken by studs), and continuity of insulation change the actual heat flow. For a quick primer on R-value recommendations and context, see the Energy Star page on recommended home insulation R‑values: Energy Star recommended insulation R‑values.
R-19 vs R-21 Insulation: Quick Comparison (TL;DR) — Comparison Table
Comparison Table Fields (how to Read It)
| Feature | Typical material forms | Nominal R-value | Typical cavity thickness | Relative cost | Best use case | Notes on installation sensitivity |
|---|---|---|---|---|---|---|
| R-19 | Fiberglass batt, some mineral wool | R-19 | 2x6 cavities commonly; some 2x4 compress-fit in retrofits | Low | Standard new builds where budget matters | Forgiving for DIY; avoid compressing batts |
| R-21 | Denser fiberglass batts, higher-density mineral wool | R-21 | Designed for 2x6 cavities; some products slightly thicker | Medium | Incremental performance boost without exterior CI | Denser product may be harder to fit; compression reduces R |
| Continuous insulation alternative | Rigid polyiso, mineral wool board | Varies (adds thermal resistance outside studs) | Applied to sheathing — thickness varies | Medium–High | Reduce thermal bridging; better whole-wall performance | Requires flashing and detailing at openings |
| Dense-pack or spray foam | Cellulose dense-pack, SPF (open/closed cell) | Varies by material | Fits existing cavities | Medium–High | Retrofit air-sealing and fill voids | Dense-pack needs blower; SPF often needs pro installers |
Note: Values are nominal. Always confirm product datasheets and local code (IECC) requirements before specifying insulation. The Department of Energy's Building Technologies Office offers guidance on whole-building efficiency and codes at the Department of Energy's building technologies office.
Also see our r-19 vs r-23 comparison for how small R steps stack up in performance.
R-19 vs R-21 Insulation: What R-values Mean for Real-world Performance
R-value Basics and Why Nominal R Isn't the Whole Story
R-value is a lab-measured property describing thermal resistance. Higher R means greater resistance per inch, in ideal lab conditions. In a framed wall, however, studs, electrical boxes, and gaps create thermal bridges and convective paths. Wall cavity insulation only affects part of the wall assembly; continuous exterior insulation or improved air sealing can reduce whole-wall heat loss more than a small rise from R-19 to R-21.
Role of Air Sealing, Thermal Bridging, and Continuous Insulation
A common outcome: adding exterior continuous insulation (CI) reduces the effective heat flow by addressing studs as thermal bridges. For example, 1 inch of polyiso outside sheathing can improve the effective wall R by changing the temperature gradient across studs. Likewise, dense-packed cellulose or closed-cell spray foam can add airtightness and reduce convective losses inside cavities — benefits not captured by nominal R alone.
Illustrative Example: Small Heat-loss Comparison (label as an Example)
Example only: Suppose a 100 sq ft wall section has an R-19 cavity assembly and surface area with framing that yields an effective whole-wall R of about 12 (including studs and finishes). Upgrading the cavity to R-21 might raise the whole-wall R to roughly 12.5; that’s a modest gain. By contrast, adding 1 in. of continuous insulation (approx R-6 for some rigid foams) could raise whole-wall R more significantly, because it reduces stud bridging. The point: a 1–2 point cavity R bump gives incremental improvement; assembly-level changes often produce larger gains.
For higher-performance targets (Passive House/PHIUS), teams focus on whole-wall metrics, airtightness, and continuous insulation rather than chasing small cavity R increases alone.
R-19 vs R-21 Insulation: R-19 — Overview, Strengths, Weaknesses, Best For
Overview: Common Materials and Typical Installations
R-19 is commonly available as fiberglass batts sized for 2x6 stud cavities and as some mineral wool variants. In new construction, R-19 batts are widely used in 2x6 exterior walls, cathedral ceilings, and floors over unconditioned spaces. In retrofits, installers sometimes compress thicker batts into 2x4 cavities — a practice that reduces the effective R and is not recommended when the goal is to meet a specific code R.
Strengths — Cost, Availability, Ease of DIY Installation
- Widely stocked at big-box stores and insulation suppliers.
- Lower material cost relative to denser products.
- Batts are simple to cut and fit; they work well for many DIYers with basic PPE (gloves, eye protection, a dust mask or N95).
- For straightforward new builds with matched cavity depth, R-19 gives predictable results when installed correctly.
Weaknesses — Thinner Thermal Margin vs Higher-r Options
- Nominally lower thermal resistance than R-21; if the goal is to maximize year-round savings in cold climates, it may fall short of code or performance targets.
- Compressing R-19 to fit into a shallower cavity reduces its R-value.
- Batts don’t provide air sealing; additional work is needed to install a continuous air barrier.
Best For: Common Use Cases
- Budget-sensitive new builds with 2x6 framing where the goal is adequate insulation at low cost.
- DIYers comfortable installing batts and performing separate air-sealing steps.
- Situations where adding continuous insulation is planned later.
R-19 vs R-21 Insulation: R-21 — Overview, Strengths, Weaknesses, Best For
Overview: How Manufacturers Achieve R-21 (denser Batts, Different Fibers)
Manufacturers achieve R-21 by increasing batt density, changing fiber geometry, or using higher-performance mineral wool. Some R-21 products are slightly thicker than R-19; others reach the R by packing more fibers per cubic inch. Always check the product datasheet to confirm nominal thickness and thermal performance at the stated density.
Strengths — Higher Nominal R in Similar Thickness, Better Performance in Some Products
- Provides a modest bump in thermal resistance without changing stud depth.
- Denser batts can hold their shape better in cavities, reducing sag over time.
- In new 2x6 walls, R-21 can be a direct upgrade with little change to detailing.
Weaknesses — Cost, Fitting Issues in Shallow Cavities
- Higher density typically means higher cost per bag or batt.
- If forced into a shallow cavity, compression reduces R; tight-fitting into irregular cavities can be harder than with less dense batts.
- Does not solve air-leakage unless paired with air barrier strategies.
Best For: Use Cases Where R-21 Makes Sense
- New builds with 2x6 studs where builders want a modest performance increase without adding CI.
- Owners replacing old insulation in walls where a denser batt fits the cavity and budget allows.
- Situations where small R gains are part of a staged upgrade plan; for decisions about one-point steps, see our r-20 vs r-21 comparison for more nuance.
R-19 vs R-21 Insulation: Alternatives and Upgrades to Consider
Combining Materials to Reach Targeted Performance
Two-layer strategies can beat a single batt for whole-wall performance. For example, pair cavity batts with 1–2 inches of exterior rigid insulation to reduce thermal bridging and raise effective wall R. Alternately, a layer of interior rigid foam under finish drywall combined with good air sealing can be useful in specific retrofit scenarios.
Adding Continuous Exterior Insulation vs Bumping Batt R
Adding exterior CI changes the whole assembly: studs operate closer to interior temperature, and the assembly’s effective R increases more than the same nominal gain in cavity insulation. For many DIY builders aiming for higher performance, adding CI is a more efficient use of materials than stepping from R-19 to R-21 alone. If you’re comparing options, our r-21 vs r-23 comparison covers small-step trade-offs; for larger upgrades see r-19 vs r-49 comparison.
When Spray Foam or Dense-packed Cellulose is a Better Route
- Dense-pack cellulose fills cavities and reduces convective loops; it’s a strong retrofit option where cavities are open from the top or sides.
- Spray polyurethane foam (SPF) combines insulation and air-sealing; closed-cell SPF adds vapor control and structural benefits, but cost and the need for professional application are significant factors.
Choose dense-pack or SPF when air-sealing and cavity fill are priorities and when budget or access allows.
R-19 vs R-21 Insulation: Installation, Thickness, and Cavity Fit
Framing Sizes and Nominal R: 2x4 vs 2x6 Examples
- 2x4 stud cavities are nominally 3.5 in. deep and commonly use R-13 or R-15 batts; forcing an R-19 batt into a 2x4 cavity compresses the batt and lowers its effective R.
- 2x6 stud cavities (5.5 in. nominal) commonly accept R-19 or R-21 batts without compression. Confirm product thickness: some R-21 batts are slightly thicker than standard R-19 batts, so measure cavity depth before buying.
For background on mapping nominal R to cavity depth, see our article on r-13 vs r-19 differences.
Common Installation Pitfalls That Reduce R (compression, Gaps, Voids)
- Compression at top plates and around wiring reduces effectiveness; cut batts to fit rather than stuffing.
- Gaps at corners, behind electrical boxes, and around windows create thermal bypass paths; seal these with backer rod and spray foam or caulk.
- Leaving ventilation chutes blocked in cathedral ceilings can cause moisture issues; keep baffles clear.
Practical checklist:
- Measure stud depth and buy batt nominal thickness that matches.
- Cut and fit batts to fill the cavity without compressing.
- Seal around penetrations and top plates with low-expansion foam.
- Install a continuous air barrier (housewrap, taped sheathing, or interior air barrier) and follow manufacturer seams sealing guidance.
Moisture, Vapor Control and Ventilation Considerations
Moisture management matters more as assemblies get tighter and R increases. In colder climates, interior vapor control strategy (e.g., smart vapor retarder, taped air barrier) must be coordinated with wall drying paths and insulation choice. Building Science Corporation and code guidance (IECC) offer best practices; err on the side of allowing at least one reliable drying direction and follow manufacturer guidance when pairing insulation with vapor-control layers.
Before you watch the installation video below, note it shows practical tips for fitting batts without compressing them.
Watch this step-by-step guide on choosing the best insulation for your home:
R-19 vs R-21 Insulation: Cost, Availability and DIY Considerations
Material Cost Ranges and Budget Framing (illustrative Example)
Material costs vary by region, supplier, and product density. As a rule:
- R-19 fiberglass batts are typically the lowest-cost option per batt.
- R-21 denser batts usually cost more per batt.
- Continuous insulation and spray foam are higher-cost per square foot but yield bigger assembly gains.
Illustrative example only: If batt materials for an average 2x6 wall run you a modest amount per linear foot, adding 1–2 in. of rigid CI increases material cost but reduces whole-wall heat loss more than a batt upgrade alone. Get local quotes before budgeting.
Tools, Skills, and Time for a DIY Install
- For batt insulation: utility knife, straightedge, measuring tape, staple gun (for faced batts), basic PPE (gloves, goggles, N95 mask), ladder. A confident DIYer can install exterior wall batts in phases; expect more time for careful air sealing.
- For dense-pack cellulose: rent a blower and learn the filling technique, or hire a contractor experienced with dense-pack to avoid over- or under-density.
- For spray foam: handheld kits exist for small gaps; but large-area SPF typically requires professional application because of mixing and safety controls.
Where to Source Materials and How to Read Product Labels
Buy from insulation distributors, big-box stores, or local green-building suppliers. Read labels and datasheets — check nominal R, thickness, density (if listed), and any formal certifications (e.g., GREENGUARD, recycled content). If you need a deeper cost-performance decision, compare against larger upgrades such as in our r-19 vs r-38 comparison.
R-19 vs R-21 Insulation: Which Should You Choose?
If You're on a Tight DIY Budget
Choose R-19 for matched 2x6 cavities when cost is the primary constraint. Install carefully and spend time on air sealing; that will deliver more practical value than squeezing the cavity R a point or two higher.
If You're Aiming for High-performance or Passive-house Levels
Don't stop at a small batt upgrade. Consider continuous exterior insulation, tighter air barriers, and intersection detailing. Passive House and PHIUS guidelines emphasize whole-wall metrics and airtightness; for high-performance goals, combine CI with high-quality cavity insulation and mechanical ventilation with heat recovery.
If You're Retrofitting a 2x4 Wall or Older Home
Avoid compressing thick batts into 2x4 cavities. Dense-pack cellulose or spray foam (applied properly) is often a better retrofit choice because it fills voids and improves airtightness. If you must use batts, select a product sized for the cavity and accept the realistic R that fits without compression.
If You Live in a Cold Climate or Under Strict Code
Check local code and IECC zone requirements before deciding. In cold climates, assembly-level upgrades and CI pay off faster; a small cavity R gain might not meet code or performance goals. Consult code tables and consider professional input if you must meet a specific prescriptive R.
The Bottom Line
R-21 gives a modest nominal improvement over R-19, and it can be the right choice for 2x6 new builds seeking incremental gains. Still, installation quality, air sealing, and whole-wall strategies like continuous insulation usually have a larger effect on comfort and energy use than shifting from R-19 to R-21. Match batt thickness to cavity depth, avoid compression, and choose the assembly approach that fits your climate, budget, and performance targets.
Frequently Asked Questions
Is R-21 worth the extra cost over R-19?
Generally, R-21 is worth the extra cost only if your cavity depth accepts it without compression and you want a small, immediate increase in thermal resistance. For many builds, money spent on better air sealing or adding continuous exterior insulation yields a larger reduction in heat loss per dollar than a one- or two-point increase in cavity R. Get local price quotes and compare assembly-level changes before deciding.
Can I get R-21 performance by compressing R-30 or using different materials?
Compressing a higher-R batt into a shallower cavity reduces its effective R; compressed R-30 will not deliver R-30 performance. Some higher-density batts can deliver R-21 in a given thickness, but the only reliable route to the stated nominal R is to use the product as specified by its datasheet without compression. For retrofits, dense-pack cellulose or spray foam may be better ways to reach higher whole-wall performance.
Will R-21 fit in a standard 2x6 wall without compression?
Most R-21 batts are designed for 2x6 cavities and will fit without compression. However, not all products share the exact thickness; always measure your stud bay and check the manufacturer’s nominal thickness before purchase. If a batt looks tight or bulging when you insert it, it may be slightly oversized or denser than typical R-19 products and could compress if forced.
Which is better for retrofits: R-19 or R-21?
For retrofits, the choice depends on cavity depth and access. If you have full-depth 2x6 bays, R-21 can be a direct replacement. If you’re working with 2x4 walls, avoid compressing batts—use dense-pack cellulose, appropriate foam, or consider adding exterior insulation. Retrofit strategies that improve air sealing and cavity fill often outperform small nominal R upgrades.
How does a small R increase affect long-term energy bills?
A small increase from R-19 to R-21 reduces heat loss slightly, but the impact on energy bills is typically modest. Long-term savings depend on climate, heating fuel, building airtightness, and the percentage of wall area relative to the whole building envelope. Studies and guidance from the Department of Energy show that assembly-level improvements (CI, reduced thermal bridging, and airtightness) often deliver more measurable savings than small cavity R increments.