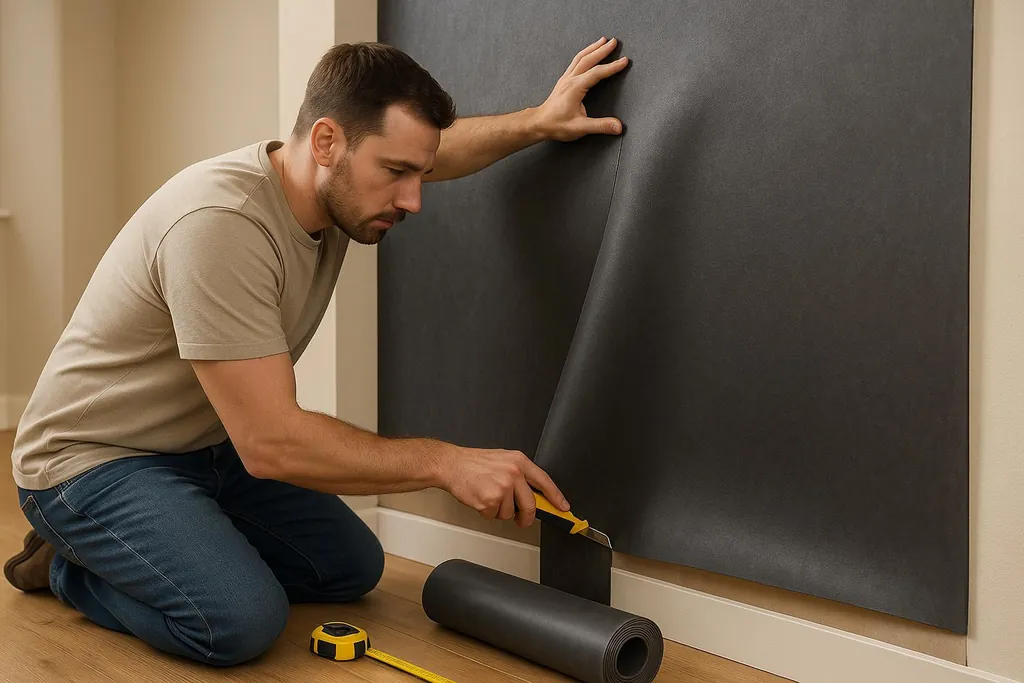
Learn how to effectively install Mass Loaded Vinyl (MLV) for soundproofing your walls and create a quieter, more comfortable environment.
How to Install Mass Loaded Vinyl for Walls
Mass Loaded Vinyl (MLV) is a highly effective soundproofing material used to block noise in spaces like homes, studios, and offices. Here's a quick guide to get started:
- What is MLV?: A dense, flexible vinyl material combined with mineral fillers. It's available in two weights: 1 lb per sq ft (STC 26) and 2 lbs per sq ft (STC 32).
- Why use it?: MLV blocks airborne noise like conversations and traffic, is eco-friendly (up to 15% recycled content), and works well in tight spaces due to its thin profile.
- Where to use it?: Ideal for walls, ceilings, and floors in bedrooms, home theaters, music studios, and basements.
- Tools & Materials: Tape measure, utility knife, stud finder, acoustical sealant, vinyl tape, and fasteners (staples or screws with washers).
- Installation Steps:
- Measure and cut MLV to fit your wall.
- Attach MLV to studs or furring strips using staples or screws.
- Seal all seams and edges with acoustical sealant and vinyl tape.
- Cover with drywall for a finished look.
Key Tip: Ensure complete coverage and airtight sealing - just a 1% gap can let 50% of sound through.
| MLV Weight | STC Rating | Best For |
|---|---|---|
| 1 lb/sq ft | 26 | Talking, light noise |
| 2 lbs/sq ft | 32 | Road noise, louder sounds |
Follow these steps to create a quieter, more comfortable space. Proper installation and sealing are crucial for maximum soundproofing results.
How to Hang Mass Loaded Vinyl (MLV) on Wood Studs
Tools and Materials Needed for Installation
Before starting your installation, make sure you have all the necessary tools and materials ready to go. Here's a breakdown of what you'll need.
Tools You'll Need
Gather a tape measure, utility knife, T‑square, fastening device, stud finder, and caulking gun. The T‑square or a straight edge is especially handy for making accurate cuts. For fastening, you can use a staple gun or nail gun if you're working with wood studs, or self‑drilling screws with pan heads for steel studs. If you're tackling a larger project, a pneumatic cap stapler or nail gun can save you a lot of time and effort [\[4\]](https://www.soundproofcow.com/how-to-install-mass-loaded-vinyl).
The caulking gun is essential for applying acoustical sealant, which plays a key role in sealing gaps and seams effectively. To locate wall studs and ensure proper attachment, a stud finder will also come in handy.
Materials You'll Need
The star of the show is Mass Loaded Vinyl (MLV). It's available in various weights, typically 1 lb per square foot or 2 lb per square foot, so choose based on your soundproofing needs and budget. Be sure to measure your space accurately and buy a little extra to account for waste.
You'll also need acoustical sealant, which stays flexible after curing and ensures airtight seals along edges, seams, and penetrations. This is critical for achieving the best soundproofing performance [\[1\]](https://acoustiguard.com/resources/the-complete-guide-to-mass-loaded-vinyl).
For sealing seams between MLV sheets, use vinyl tape (like Quiet Barrier® tape). Regular tape won't cut it - it doesn't provide the durability or acoustic seal you need. Another must-have is putty pads, which are used to seal around electrical outlets and switches, blocking sound leaks through these common weak points [\[1\]](https://acoustiguard.com/resources/the-complete-guide-to-mass-loaded-vinyl) [\[4\]](https://www.soundproofcow.com/how-to-install-mass-loaded-vinyl).
Optional Extras for Better Results
If you want to take your soundproofing to the next level, consider these additional materials and tools.
- Furring strips can be helpful in retrofits where wall studs aren't accessible [\[4\]](https://www.soundproofcow.com/how-to-install-mass-loaded-vinyl).
- Self-adhesive MLV might simplify installation, especially for certain applications, though it's generally more expensive [\[4\]](https://www.soundproofcow.com/how-to-install-mass-loaded-vinyl).
- For ceiling installations, a drywall lift is a game-changer, particularly if you're working with heavier 2 lb MLV sheets [\[1\]](https://acoustiguard.com/resources/the-complete-guide-to-mass-loaded-vinyl).
- When installing MLV on floors, a construction adhesive is recommended [\[4\]](https://www.soundproofcow.com/how-to-install-mass-loaded-vinyl).
- Sound isolation clips can be used to decouple drywall from joists, which reduces impact noise beyond what MLV alone can achieve [\[1\]](https://acoustiguard.com/resources/the-complete-guide-to-mass-loaded-vinyl).
For even better soundproofing, pair MLV with acoustic foam or fiberglass insulation. While MLV blocks sound transmission, acoustic foam absorbs any residual noise, giving you a more complete solution \[1\]. Lastly, when fastening MLV, make sure screws are tight but not cutting into the material - this helps maintain its effectiveness as a sound barrier [\[1\]](https://acoustiguard.com/resources/the-complete-guide-to-mass-loaded-vinyl).
Preparing the Wall Surface for Installation
Getting the wall ready is a crucial step to ensure effective soundproofing.
Marking Wall Studs
Start by finding the wall studs using a stud finder. You can choose between magnetic stud finders, which locate the metal fasteners in the studs, or electronic stud finders, which use signals to identify the studs' position [\[6\]](https://www.popularmechanics.com/home/a28842874/best-stud-finders). Magnetic stud finders work particularly well with wooden studs.
> "Most studs are spaced at 16-inch intervals - find one, and the next stud should be about that same distance in either direction. Changes in spacing usually happen near the ends of walls or doors and windows." - Bradley Ford, Test Editor [\[6\]](https://www.popularmechanics.com/home/a28842874/best-stud-finders)
In homes built after 1960, studs are typically spaced 16 inches apart on-center, leaving 14.5 inches of open space between them. However, newer homes may feature 24-inch spacing [\[7\]](https://www.nytimes.com/wirecutter/reviews/best-stud-finder).
A handy trick: use painter's tape over the wall area you're scanning. This way, you can mark the studs without writing directly on the wall [\[6\]](https://www.popularmechanics.com/home/a28842874/best-stud-finders). Once your stud finder detects a stud, mark its center point. For magnetic finders, use the pointed tip to pinpoint the screw's center. For electronic models, you can use the small hole in the display to mark the spot without moving the device [\[7\]](https://www.nytimes.com/wirecutter/reviews/best-stud-finder).
If your stud finder detects something in between studs, it might be identifying plumbing, electrical wires, or ductwork. To double-check, scan vertically to ensure the stud runs consistently. If it doesn't, you've likely found something other than a stud [\[6\]](https://www.popularmechanics.com/home/a28842874/best-stud-finders).
Once you've confirmed the stud locations, adjust your approach based on whether you're working with bare studs or finished walls.
Preparation for New Construction vs. Retrofits
Your method will vary depending on whether you're dealing with new construction or retrofit projects.
- New construction: Install MLV (Mass Loaded Vinyl) directly onto the exposed studs and incorporate isolation techniques during the framing process [\[8\]](https://www.soundproofcow.com/how-to-soundproof-new-construction).
- Retrofits: Use a stud finder to locate studs behind the drywall. Attach furring strips to create a new surface for mounting and seal around outlets with putty pads [\[4\]](https://www.soundproofcow.com/how-to-install-mass-loaded-vinyl).
For retrofits, self-adhesive MLV can simplify the process, though it tends to be more expensive [\[4\]](https://www.soundproofcow.com/how-to-install-mass-loaded-vinyl). Additionally, if the flooring was installed after the walls, seal the perimeter of the room with acoustical caulk to prevent sound leakage [\[9\]](https://www.tmsoundproofing.com/How-to-Soundproof.html). For new builds, install flooring before framing the walls to avoid sound traveling through the wall structure [\[9\]](https://www.tmsoundproofing.com/How-to-Soundproof.html).
Once the wall is prepped, it's time to carefully plan the layout of the MLV.
Planning the MLV Layout
Measure the wall height from ceiling to floor, then subtract 1/8 to 1/4 inch to leave room for sealant [\[4\]](https://www.soundproofcow.com/how-to-install-mass-loaded-vinyl). Align MLV seams with the center of the studs to ensure secure attachment [\[4\]](https://www.soundproofcow.com/how-to-install-mass-loaded-vinyl).
Cut the MLV strips about 1 inch longer than needed so you can trim them to fit perfectly [\[1\]](https://acoustiguard.com/resources/the-complete-guide-to-mass-loaded-vinyl). If you need to connect shorter pieces, consider adding a horizontal piece of wood between the studs to create a sturdy attachment point [\[1\]](https://acoustiguard.com/resources/the-complete-guide-to-mass-loaded-vinyl). Arrange the MLV in a brick-like pattern, and use chalk or a pencil to mark any cuts [\[4\]](https://www.soundproofcow.com/how-to-install-mass-loaded-vinyl).
Keep in mind that even small gaps can weaken the soundproofing. Leave a 1/4-inch gap along the edges and fill it with acoustical sealant [\[4\]](https://www.soundproofcow.com/how-to-install-mass-loaded-vinyl). Precise measurements are key to avoiding gaps or overlaps, which can compromise the effectiveness of the soundproofing [\[1\]](https://acoustiguard.com/resources/the-complete-guide-to-mass-loaded-vinyl).
Step-by-Step Guide to Installing MLV
Once your layout is finalized, it's time to install the MLV (Mass Loaded Vinyl). This step requires precision to ensure complete coverage and optimal soundproofing.
Positioning and Attaching MLV
Begin by hanging the MLV vertically, starting at one end of the wall and working your way across. Each strip should run from ceiling to floor, leaving a small gap of about 1/8 to 1/4 inch for sealant application.
When positioning the strips, aim to align the seams with the center of the wall studs. This alignment provides a stronger attachment point and ensures a more secure installation. Use a pneumatic cap stapler or nail gun to fasten the MLV, placing staples or nails every 8 inches along the top edge and down each stud's length [\[4\]](https://www.soundproofcow.com/how-to-install-mass-loaded-vinyl).
For walls with steel studs, replace staples with 3/4-inch wafer head tek self-tapping screws and washers. The washers help distribute the pressure around the fastener, reducing the risk of tearing [\[10\]](https://isostore.com/guides/how-to-install-totalmass-mlv-on-walls-ceilings).
Where two pieces of MLV meet at a stud, butt them together without overlapping. This creates a tight joint that eliminates gaps while keeping the surface smooth [\[4\]](https://www.soundproofcow.com/how-to-install-mass-loaded-vinyl). If the seams don't align with a stud, overlap the pieces by about 2 inches and secure them with adhesive. For a seamless drywall installation, notch the top and bottom of overlapping seams [\[5\]](https://www.secondskinaudio.com/sound-blocking/how-to-install-mlv).
Cutting Around Obstacles
As you install, you'll encounter outlets, switches, and other wall features. Address these obstacles as they come up to avoid missing them later.
Press the MLV firmly against each outlet or switch box and use a utility knife to cut a 1/8-inch gap around the box [\[4\]](https://www.soundproofcow.com/how-to-install-mass-loaded-vinyl). You can locate the edges of the box by touch and carefully cut along the inside edge of the opening [\[5\]](https://www.secondskinaudio.com/sound-blocking/how-to-install-mlv)[\[10\]](https://isostore.com/guides/how-to-install-totalmass-mlv-on-walls-ceilings).
Don't forget to use putty pads around electrical boxes. These pads add an extra layer of soundproofing behind outlets and switches. After cutting, press the MLV snugly over the box edges to form a tight seal.
Once you've worked around all obstacles, you're ready to seal the seams and edges.
Sealing Seams and Edges
Sealing is a critical step - any gaps will undermine your soundproofing efforts. Apply acoustical sealant to all seams, edges, and penetrations. Before taping the seams with acoustic tape, clean the surface with isopropyl alcohol to ensure proper adhesion [\[5\]](https://www.secondskinaudio.com/sound-blocking/how-to-install-mlv)[\[12\]](https://www.diymobileaudio.com/threads/mlv-sealant.464193). For overlapping sections between studs, apply sealant before pressing the layers together.
Pay extra attention to the perimeter of the wall. Run a generous bead of acoustical sealant where the MLV meets the ceiling, floor, and adjacent walls [\[11\]](https://tranquilglobal.com/blog/troubleshooting-tips-for-mass-loaded-vinyl-sound-barrier-installation-issues-solutions). This creates an airtight barrier that stops sound from bypassing the main installation.
Finally, seal the areas around electrical outlets and other penetrations. Apply a bead of sealant around the perimeter of each outlet box to block sound transfer through these weak points [\[10\]](https://isostore.com/guides/how-to-install-totalmass-mlv-on-walls-ceilings).
Inspect your work as you go, checking for any gaps to ensure the entire installation is airtight [\[5\]](https://www.secondskinaudio.com/sound-blocking/how-to-install-mlv).
Finishing the Installation and Wall Completion
With the MLV securely installed and sealed as explained earlier, it's time to wrap up with these final steps to ensure top-notch soundproofing.
Inspecting and Resealing
Before moving on to drywall installation, give the MLV a thorough inspection. Even the tiniest gaps can significantly impact soundproofing. For instance, just a 1% opening in a partition can allow 50% of sound to pass through, while a 5% gap can let in a staggering 95% [\[13\]](https://www.reddit.com/r/soundproof/comments/vzcevx/mass_loaded_vinyl_noise_reduction).
Carefully check all seams, edges, and areas around electrical boxes. Use both your eyes and hands - running your hand along seams can help you detect hidden gaps or shifts. If you find any, reapply acoustical sealant to close them. Pay extra attention to electrical boxes and penetrations; make sure the MLV is snugly pressed over these areas and add more sealant if needed [\[1\]](https://acoustiguard.com/resources/the-complete-guide-to-mass-loaded-vinyl).
Don't forget the perimeter where the MLV meets the ceiling, floor, and neighboring walls. These transition points are notorious for sound leaks. If you spot any gaps, seal them up with acoustical sealant.
> "Remember: where air can pass through, so can sound. Pretend whatever you are working on will be filled with water. If it's waterproof, it's leakproof and will do a much better job of sound control." - Acoustiguard [\[1\]](https://acoustiguard.com/resources/the-complete-guide-to-mass-loaded-vinyl)
This "waterproof test" is a great way to evaluate your work. If water could seep through any area, sound will likely follow the same path.
Once you've sealed all gaps, you're ready to move on to the drywall installation, taking care to protect the MLV layer.
Installing Drywall Over MLV
When adding drywall over the MLV, handle it with care to avoid damaging the soundproofing layer. To maintain the barrier's effectiveness, try to minimize seams during installation.
After the drywall is in place, seal the edges where it meets the ceiling, floor, and adjacent walls with acoustical sealant [\[4\]](https://www.soundproofcow.com/how-to-install-mass-loaded-vinyl). This step ensures that the soundproof barrier remains continuous from the MLV to the finished wall.
Tips for Long-Term Maintenance
Once your wall is complete, regular upkeep will help maintain its soundproofing performance. Over time, acoustical sealant can shrink or crack, so it's wise to periodically inspect the seals - particularly around MLV edges and electrical outlets - and reapply sealant as needed.
Avoid unnecessary drilling or cutting into the finished wall, as every hole risks compromising the MLV layer. If modifications are unavoidable, proceed cautiously. Make small, precise cuts and seal any new openings thoroughly.
To ensure your soundproofing is still effective, test it occasionally. Play sound on one side of the wall and listen on the other. If you notice a significant increase in sound transmission, it's time to check for gaps and reseal as needed.
Pros, Cons, and Key Considerations
Before diving into your project, it's important to weigh the strengths and challenges of Mass Loaded Vinyl (MLV). This overview highlights key points to help you plan effectively.
Comparison Table: Advantages, Limitations, and Considerations
| Advantages | Limitations | Key Considerations |
|---|---|---|
| High STC Rating: MLV #1 (1/8" thick) offers an STC of 26, while MLV #2 (1/4" thick) delivers an STC of 32 [\[3\]](https://www.soundproofcow.com/product-category/soundproofing-materials/soundproofing-barriers/vinyl-barriers-mlv) | Weight Challenges: Heavy and floppy, making ceiling installation tricky - usually requires two people [\[1\]](https://acoustiguard.com/resources/the-complete-guide-to-mass-loaded-vinyl) | Complete Coverage Required: Even a small gap (1%) can allow 50% sound transmission; a 5% gap permits 95% [\[13\]](https://www.reddit.com/r/soundproof/comments/vzcevx/mass_loaded_vinyl_noise_reduction) |
| Cost-Effective: Cheaper than adding extra drywall while achieving better STC ratings [\[14\]](https://www.soundacousticsolutions.com/blog/2022/11/30/mass-loaded-vinyl) | Limited Impact Noise Control: Doesn't address structural sounds like footsteps or vibrations [\[2\]](https://www.secondskinaudio.com/soundproofing/does-mlv-work) | Building Code Compliance: Check fire regulations and local building codes before installation [\[1\]](https://acoustiguard.com/resources/the-complete-guide-to-mass-loaded-vinyl) |
| Flexible Installation: Retains flexibility post-installation, helping to control vibrations and dissipate sound energy [\[3\]](https://www.soundproofcow.com/product-category/soundproofing-materials/soundproofing-barriers/vinyl-barriers-mlv) | Aesthetic Impact: Not visually appealing and needs to be covered with drywall or other materials [\[15\]](https://www.soundproofingproducts.com.au/what-are-the-benefits-of-mass-loaded-vinyl) | Professional Consultation: Complex setups may require expert advice [\[1\]](https://acoustiguard.com/resources/the-complete-guide-to-mass-loaded-vinyl) |
| Minimal Thickness: Adds mass with only a 2–4 mm profile, avoiding major structural changes [\[15\]](https://www.soundproofingproducts.com.au/what-are-the-benefits-of-mass-loaded-vinyl) | Low-Frequency Limitations: Some low-frequency sounds may still penetrate [\[1\]](https://acoustiguard.com/resources/the-complete-guide-to-mass-loaded-vinyl) | Load-Bearing Capacity: Ensure your structure can handle the added weight of MLV [\[1\]](https://acoustiguard.com/resources/the-complete-guide-to-mass-loaded-vinyl) |
| Material Properties: Odorless, heat-resistant, waterproof, and tear-resistant [\[2\]](https://www.secondskinaudio.com/soundproofing/does-mlv-work) | Installation Precision: Requires perfect coverage and sealing for maximum performance [\[1\]](https://acoustiguard.com/resources/the-complete-guide-to-mass-loaded-vinyl) | Quality Sourcing: Stick to reputable suppliers to avoid quality and compliance issues [\[1\]](https://acoustiguard.com/resources/the-complete-guide-to-mass-loaded-vinyl) |
| Versatile Applications: Works well in residential, commercial, automotive, and marine environments [\[15\]](https://www.soundproofingproducts.com.au/what-are-the-benefits-of-mass-loaded-vinyl) | Higher Material Costs: Costs around $2.50–$3.50 per sq ft, which can add up [\[2\]](https://www.secondskinaudio.com/soundproofing/does-mlv-work) | Combination Strategy: Best results when used with other soundproofing techniques [\[1\]](https://acoustiguard.com/resources/the-complete-guide-to-mass-loaded-vinyl) |
To get the most out of MLV, precise installation and complete coverage are non-negotiable. Even minor gaps can drastically reduce its effectiveness. For example, covering a 30' x 8' wall with MLV, including acoustical sealant and supplies, might cost about $1,000.
Matching MLV to Noise Types
MLV works well against airborne noise - like conversations, music, or street sounds - but struggles with impact noise, such as footsteps or structural vibrations [\[2\]](https://www.secondskinaudio.com/soundproofing/does-mlv-work). If impact noise is a concern, pairing MLV with decoupling techniques, like sound isolation clips, can significantly improve results [\[1\]](https://acoustiguard.com/resources/the-complete-guide-to-mass-loaded-vinyl).
Installation Complexity
Installing MLV on walls is generally DIY-friendly, but ceilings are another story. A 2 lb MLV sheet is heavy and requires a drywall lift and extra hands for proper installation [\[1\]](https://acoustiguard.com/resources/the-complete-guide-to-mass-loaded-vinyl). Factor this into your project timeline to avoid delays.
A Broader Soundproofing Plan
MLV performs best as part of a layered soundproofing strategy. Combine it with absorptive materials and proper construction methods to maximize your investment. Use these insights to fine-tune your approach as you move into the final stages of planning.
Conclusion
Installing MLV on your walls is an effective and budget-friendly way to enhance soundproofing. With precise measurements, secure fastening, and proper sealing, your DIY efforts can achieve results that rival professional installations.
Key Takeaways
To ensure long-lasting soundproofing, focus on the basics: complete coverage, secure fastening, and sealing every edge. Start with accurate measurements, locate the studs, and plan your layout carefully. When cutting the MLV, leave a small gap around the perimeter and apply acoustical sealant to block sound leakage effectively [\[10\]](https://isostore.com/guides/how-to-install-totalmass-mlv-on-walls-ceilings).
Attach the MLV directly to the studs using a cap stapler or screws with washers. Align the sheets at the studs, and seal the seams to create a continuous sound barrier [\[5\]](https://www.secondskinaudio.com/sound-blocking/how-to-install-mlv) [\[10\]](https://isostore.com/guides/how-to-install-totalmass-mlv-on-walls-ceilings).
MLV's thin profile makes it ideal for soundproofing without requiring significant structural changes. Its durability and affordability make it a smart investment that provides long-term benefits.
Getting Started with Your DIY Project
With the essentials in mind, you're ready to get started. Begin by measuring your space accurately and gathering the necessary tools. Pay special attention to sealing and fastening to ensure lasting results. For the best outcome, think of MLV as one piece of a larger soundproofing plan that complements other improvements in your home.
At [DIY Eco Homes](/), we believe that creating a comfortable, energy-efficient home doesn't have to mean hiring expensive professionals. Installing MLV is a great example of how thoughtful material choices and careful DIY work can deliver impressive results while staying within your budget and aligning with eco-friendly values. Soundproofing not only enhances comfort and privacy but also adds value to your home.
FAQs
What should I consider when choosing between 1 lb and 2 lb mass-loaded vinyl for soundproofing walls?
When deciding between 1 lb and 2 lb mass-loaded vinyl (MLV), think about how much soundproofing you need and how easy you want the installation process to be.
• 1 lb MLV is a lightweight, flexible option that's easier to work with. It's a solid choice for general soundproofing and works well for most standard walls.
• 2 lb MLV, on the other hand, offers stronger noise-blocking capabilities, making it ideal for thicker walls or areas with high noise levels. However, it's heavier, less flexible, and can be trickier to install.
Remember, heavier MLV blocks sound more effectively, but it might require extra support or help during installation.
How do I make sure my mass-loaded vinyl (MLV) installation is completely airtight for the best soundproofing results?
To get the best soundproofing performance from your MLV installation, it's essential to seal every seam, edge, and gap with acoustical caulk or barrier tape. Pay close attention to where the MLV meets walls, floors, and ceilings - small gaps in these areas can let sound sneak through.
For even better results, overlap the MLV sheets slightly and secure the seams with vinyl adhesive or a specialized sealant. Don't forget to carefully seal around penetrations like outlets and light switches. Taking the time to ensure everything is airtight will significantly reduce sound leaks and improve the overall effectiveness of your soundproofing.
What other materials can I use with Mass Loaded Vinyl (MLV) to improve soundproofing?
To boost the soundproofing capabilities of Mass Loaded Vinyl (MLV), pair it with materials such as acoustic insulation, soundproofing blankets, or sound isolation clips. Together, these materials are highly effective at cutting down both airborne noise and vibrations.
Another great approach is adding heavier or multiple layers of drywall. For even better results, apply Green Glue between the drywall layers. This helps absorb sound and reduces how much noise passes through. Combining these methods can make a noticeable difference in the soundproofing of your space.