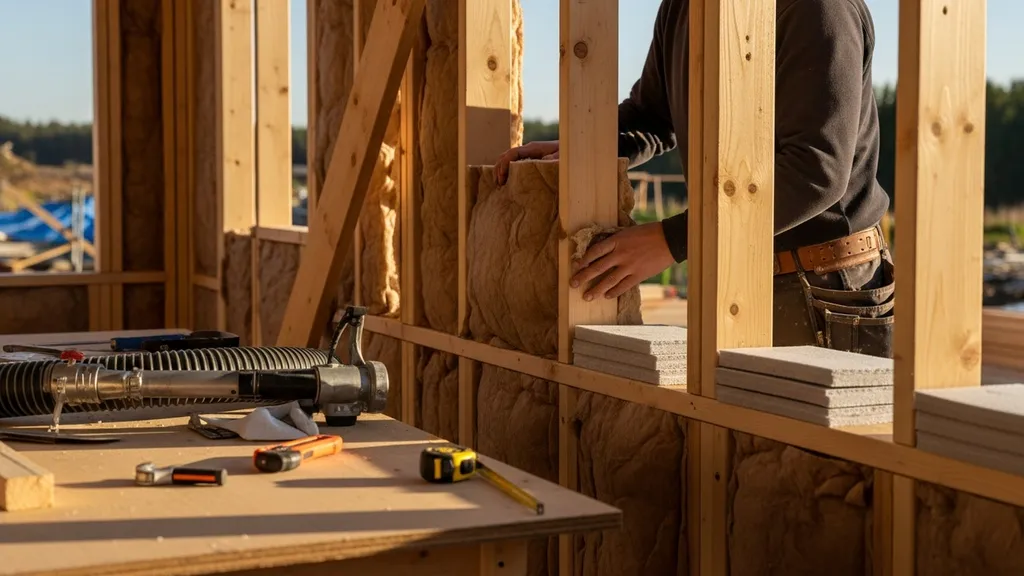
Practical guide to designing and building a double stud wall assembly — materials, step-by-step build sequence, performance checks, costs, and alternatives.
Double Stud Wall Assembly: Design and Build
A double stud wall assembly is two separated framed stud walls that create a thick insulation cavity with reduced thermal bridging and higher installed R-value than a single-stud wall. For DIY self-builders trying to hit passive-house-adjacent airtightness and high R-values on a budget, a double stud wall can deliver R-30 to R-50 (or higher) using low-cost insulation like dense-packed cellulose or mineral wool while avoiding the material expense of continuous exterior foam. This guide explains design principles, materials, a step-by-step build sequence, common details, testing, and how double stud walls compare with other high-performance wall systems.
TL;DR:
- A properly built double stud wall assembly can reach effective R-30 to R-50 using dense-packed cellulose or mineral wool in a 12–18" cavity, while cutting thermal bridging versus a single-stud wall.
- Prioritize a continuous interior air barrier, careful vapor control (climate-dependent), and quality dense-packing to avoid moisture and settling; plan blower-door tests at two stages.
- Consider alternatives if footprint or labor are limited: exterior insulation or SIPs reduce wall thickness but usually raise material costs and detailing requirements.
Why Choose a Double Stud Wall Assembly?
A double stud wall assembly separates the structural inner stud wall from an outer stud wall, creating a deep cavity for insulation and dramatically reducing thermal bridging through studs. Research and field studies show well-built double-stud walls achieving R-values comparable to R-40 assemblies and performing acceptably in many cold climates when detailed correctly. See the Department of Energy Building America guide for construction techniques and sealing strategies: Double walls for more insulation - building america solution center.
Typical Performance Goals
- Effective installed R-value: Expect R-20–R-30 for a 2x4 + 2x4 stacking with 12" cavity filled with low-density cellulose; 2x6 + 2x6 with 16–18" cavity can reach R-40+. Measured studies (R-40 double-stud wall monitoring) show seasonal thermal behavior similar to other high-R assemblies when moisture is managed.
- Airtightness: DIY high-performance self-builds commonly target 1.0–2.5 ACH50; Passive House targets 0.6 ACH50. Aim for sub-2 ACH50 on first build and refine to lower leakage with iterative sealing.
- Moisture: Monitor RH and wood moisture content during the first winter when using permeable insulation like cellulose.
Who Benefits: DIY Self-builders, Cold Climates, Retrofit Projects
- Budget-focused builders who can trade wall footprint for lower material cost will find the double stud approach attractive.
- Retrofit and small new-build projects where adding exterior continuous insulation is difficult or expensive are good candidates.
- Do not choose a double stud assembly if lot size or interior square footage is constrained, or if you need the thin profile and speed of SIPs or ICF.
Compare the pros and cons with continuous exterior insulation and other systems in the linked comparison to help decide: see compare to exterior foam.
Core Design Principles for Double Stud Walls
Design a double stud wall around three controlling variables: thermal bridging and cavity depth, airtightness and vapor strategy, and structural detailing to resist wind, shear, and loads.
Thermal Bridging and Cavity Depth
- Deeper cavities reduce conduction through studs and increase total insulation volume. Typical cavity depths: 12", 14", 16", or 18" depending on desired R-value and stud sizes.
- Example numbers: dense-packed cellulose ~R-3.7–R-3.8 per inch; mineral wool ~R-3.0–R-3.3 per inch; fiberglass batts ~R-2.9–R-3.2. A 16" cavity of cellulose (~16" × 3.8 ≈ R-60 nominal in cavity) yields an installed effective wall R lower than that (studs, air films, and compression reduce effective R to ~R-40 in practice).
- Design the inner and outer stud spacing (common is 24" o.c. for both, offset) so the studs don't line up, which reduces thermal bridging.
Air Barrier and Vapor Control Strategy
- Place a continuous air barrier on the warm side (interior) — drywall taped at seams, sealed service penetrations, and sealed rim board — to reduce convective moisture and heat loss.
- For cold climates, choose a vapor control approach that balances drying potential: a vapor retarder (intelligent or Class II) may be appropriate, or rely on a permeable interior air barrier plus exterior drying. Consult climate guidance in cold-climate design.
- Use taped sheathing or a dedicated membrane when exterior wind washing is a risk. If using permeable exterior cladding and no continuous exterior foam, ensure the assembly can dry to the exterior.
Structural Considerations and Stud Spacing
- Outer wall can be non-load-bearing if inner wall carries floor/roof loads, or both walls can share loads; clarify on plans.
- Provide continuous blocking, proper rimboard details, and shear bracing — either structural sheathing on one wall or let the inner wall provide shear and tie the outer with ledgers or rigorous tie hardware.
- Follow nailing schedules and fastening requirements per local code and the framing guide at framing guide.
For more technical background and tested guidelines, review the Pennsylvania Housing Research Center webinar handout on double stud walls: Double stud wall assemblies.
Materials and Components: What to Specify
Choosing compatible materials reduces risk and simplifies construction. Below are recommended components and trade-offs.
Framing Lumber, Sheathing, and Bracing Options
- Inner studs: 2x6 or 2x8 depending on ceiling heights, load, and service cavity needs. Use grade-stamped lumber sized per structural design.
- Outer studs: Often 2x4 when paired with inner 2x6, offset so they do not line up.
- Sheathing: Structural sheathing on inner wall provides shear; the outer wall can use non-structural sheathing if interior takes shear. For taped-sheathing air barriers versus rigid options, consult our wall sheathing options review and the durability comparison between plywood vs OSB.
- Fasteners: Use long screws or nails sized to penetrate load path; specify connectors for ledger ties and rim board attachments.
Insulation Options: Dense-packed Cellulose, Mineral Wool, Fiberglass
| Insulation | R/inch | Moisture tolerance | Acoustic | Typical installed cost/ft² (material) |
|---|---|---|---|---|
| Dense-packed cellulose | 3.7–3.8 | Good drying capacity, hygroscopic | Good | $0.50–$1.25 |
| Mineral wool (semi-rigid) | 3.0–3.3 | High moisture tolerance, inorganic | Very good | $0.80–$1.50 |
| Fiberglass batt (high-density) | 2.9–3.2 | Lower moisture tolerance | Moderate | $0.40–$1.00 |
- Dense-packed cellulose is popular for double stud walls because it resists air movement when installed tightly and offers good thermal and acoustic performance. If choosing cellulose, plan for dense-packing equipment and protective PPE. The Oak Ridge National Laboratory monitored R-40 double-stud wall performance and provides moisture/temperature data relevant to material choice: Measured Performance of an R-40 Double-Stud Wall in Climate Zone 5A.
Air/vapor Barrier, Cavity Ventilation, and Exterior Cladding Choices
- Interior air barrier: taped gypsum board, INTELLO or smart membrane, or fully taped polyethylene in some retrofit cases. Seal at top plates, electrical boxes, and HVAC penetrations.
- Cavity ventilation: Most double stud walls are non-vented; ensure insulation is dense and contiguous. A ventilated rainscreen behind cladding can help exterior drying.
- Cladding: Wood siding, fiber cement, or masonry veneer are common. Include a rainscreen gap and robust flashing at windows and sills.
- Window flashing and mounting: Use an extended sill (or sill pan) and integrated flashing that brings water out and over the exterior WRB; account for thick wall jamb depth with bucks or extension jambs.
Sustainable sourcing
- Prioritize recycled-content cellulose and FSC-certified lumber if within budget. Dense-packed cellulose often has lower embodied energy than spray foam.
Step-by-step Build Sequence (with Video Embed)
This sequence is written for a small crew or experienced DIYer. Time estimates assume a crew of two and are conservative; single builders will take longer.
Before you start: run the plan through your local structural engineer if loads are split between walls. Book inspections where required.
What viewers will learn from the video: inner/outer wall framing methods, dense-packing techniques, window flashing for thick walls, and airtightness detailing.
Watch this step-by-step guide on building a stud wall:
- Layout and foundation-to-wall connection (4–8 hours)
- Layout plates on foundation with inner wall and outer wall offsets. Verify sill plate location and anchor bolt spacing.
- Install sill sealer, anchor the inner sole plate to foundation, and pre-drill for through-bolts or hold-downs.
- Double-check corners and window openings in plan dimensions.
- Build inner wall, insulate service cavity, and install air barrier (1–3 days)
- Frame the inner wall with top plate, studs, rim board, headers, and blocking for cabinets/mechanical runs.
- Run electrical and plumbing in the inner wall where possible. If services must cross the thermal boundary, seal service chases and provide insulated, sealed boxes.
- Install the interior air barrier: tape gypsum board seams, seal drywall to foundation and top plate, and seal around boxes with gaskets and sealant. Test continuity with a blower-door pre-test if possible.
- Time tip: Plan service routing before drywall so the air barrier remains continuous.
- Build outer wall, sheathe, and tie-in details (1–3 days)
- Install ledger strips or blocking on inner wall to support outer wall plates if outer is non-load-bearing.
- Frame outer studs at the planned offset so studs don’t align with inner studs.
- Sheath the outer wall or use breathable sheathing depending on ventilation strategy. Tape seams if the sheathing is intended to act as an exterior air barrier.
- Install window and door bucks sized to the thick wall. Flashing sequences must bridge the deep reveal and tie into the WRB.
- Insulation installation tips and how to avoid common mistakes (0.5–2 days)
- Dense-pack cellulose: Use a professional blower or rent machine. Target density of 3.5–4.0 lb/ft³ for cellulose; probe and test pockets to confirm density. Seal access holes and plaster over or install backer boards.
- Batts: Install faced or unfaced batts snugly. Avoid compressing batts; compression reduces R-value.
- Avoid air gaps and channels: stop and fill voids immediately. Pay attention around windows, sill plates, and corners.
- Safety: Use NIOSH-approved respirators for cellulose dust and proper fall protection during framing.
Tools and references: See the insulation tools guide for dense-packing equipment and the framing guide for nailing schedules and temporary bracing. Field monitoring case studies suggest checking wall moisture for the first winter after dense-packing to verify drying performance; the Building America monitoring report provides guidance on moisture observation and settling risk: Building america case study: monitoring of double stud wall moisture.
Inspection points
- After inner drywall and seals: run a blower-door baseline.
- After insulation and before exterior cladding: probe insulation density and run another blower-door test to find and fix remaining leaks.
- After cladding and finishes: thermal imaging during a cold night can reveal weak spots.
Common Construction Details and Drawings
Detail drawings should show how the assembly manages thermal, air, and moisture continuity at every junction.
Typical Wall Section Drawings for 2x6/2x4 Double Stud Walls
- Include both inner and outer stud profiles, insulation fill depths, air-barrier plane, WRB placement, siding, and a rainscreen gap.
- Indicate stud offsets, blocking locations, and fastener lengths to ensure proper tie-throughs.
- Show continuous lines for the interior air barrier and external WRB; label primary drying directions.
Window and Door Jamb Details for Thick Walls
- Use bucks or extension jambs sized for the full wall thickness. Flash windows with a stepped sill pan and integrated WRB connections.
- Show thermal break at sills where cantilever loads or masonry lintels occur.
- For deep reveals, include a trim/backband detail and consider mounting jamb extensions on the inner wall for easier interior finishing.
Top Plate, Roof-wall and Foundation-wall Junctions
- Detail the top plate with air-barrier continuity into the ceiling plane and roof assembly. Show how attic ventilation, if present, is separated from the conditioned cavity.
- For foundation connections, illustrate sill sealer, anchor bolt placement, and how the interior air barrier ties to the foundation wall.
Alternative detail: Larsen truss
- The Larsen truss is a single wall method that creates a deep exterior truss for insulation while preserving interior framing; it can be easier to detail for continuous exterior insulation approaches. For design differences and cold-climate options, see the Larsen truss guide: Larsen truss details.
- Industry evaluations have discussed moisture risk and drying for double-stud and similar assemblies; an analysis on Green Building Advisor explores perceived risks vs monitored performance: The mythical threat to double-stud walls.
Fastening schedules and nailing patterns
- Specify nail length so that fasteners penetrate a minimum of 1.5" into bearing members or as required by code.
- Use construction adhesive selectively to avoid cold bridging when attaching sheathing on outer studs.
- If using long screws to tie the outer to inner, verify screw pull-through capacity and spacing.
Performance Testing, Commissioning, and Quality Checks
Testing and commissioning confirm the assembly functions as intended and catch issues early.
Blower-door Testing and Target Leakage Rates
- Recommended staged tests:
- Test A: After interior air barrier installed and sealed (pre-insulation) — target <3.0 ACH50 for tighter DIY builds; achieve <2.0 ACH50 if possible.
- Test B: After insulation and exterior WRB/shingles but before finish cladding — identify leaks through thick wall junctions.
- Passive House target (for reference): 0.6 ACH50. Most DIY double-stud builds will find 0.6 ACH50 challenging without advanced detailing and practice.
Thermal Imaging and Spot Checks
- Use infrared imaging during a cold night to find thermal bridges and insulation voids. Scan window reveals, corners, and rim joist areas.
- Probe dense-packed cavities to measure density at several heights and locations; aim for consistent densities across the wall.
Moisture Monitoring and Cure Time After Insulation
- Dense-packed cellulose may contain some moisture from manufacture or installation; allow a drying period and monitor relative humidity and wood moisture content in the first year.
- Use moisture meters and humidity sensors in representative locations. If moisture stays elevated (>20% wood MC or interior RH consistently above 60%), investigate air leaks or external water intrusion.
Common failure modes and fixes
- Leaky top plates and rim joists: seal with gaskets and canned foam; install continuous sealed drywall or membrane.
- Poor dense-pack density: re-blow pockets at problem areas and patch.
- Flashing failures around windows: remove and reflash sill pans where water intrusion is observed.
For typical air-leakage points and inspection checklists, consult the guide on air leakage points builders miss and the moisture control guide for interactions with plumbing and site drainage.
Key Design and Build Takeaways — Quick Checklist
Design Checklist for Plans and Permits
- Ensure structural plans clarify which wall carries vertical and lateral loads.
- Verify wall thickness fits zoning setbacks and window jamb depths.
- Include air-barrier details on construction documents and written testing requirements.
On-site Pre-build Checklist
- Site prep: Confirm foundation level and anchor bolt locations match plate layout.
- Material staging: Order dense-pack cellulose or mineral wool with lead time; rent blower equipment if needed.
- Tooling: Prepare screw guns, long fasteners, and air-sealing materials per the insulation tools and framing guide.
Finish and Commissioning Checklist
- Air barrier testing: Complete staged blower-door tests and document results.
- Insulation verification: Record probe densities for cellulose and inspect for voids.
- Flashing and cladding: Verify WRB continuity and window flashing before siding installation.
- For interior vapor/air-barrier installation steps, see the vapor barrier guide.
Copy this checklist to your project binder to ensure inspections, testing, and commissioning are scheduled and documented.
Cost, Build-time, and Alternatives Comparison
Cost Drivers and Labor Estimates
- Main cost drivers: insulation type and density, additional framing lumber, sheathing and WRB, and labor for dense-packing. Windows and complex flashing for deep walls often add cost.
- Labor estimate rules of thumb:
- Framing and sheathing for 100 ft² of wall (interior+outer): 6–12 labor hours.
- Insulation (dense-pack) for 100 ft²: 1–3 hours plus blower setup.
- Airtightness detailing: 2–6 hours per 100 ft² depending on complexity.
Comparing Double Stud to Exterior Continuous Foam and Larsen Truss
| Assembly type | Typical wall thickness | Approx installed R-value | Material cost/ft² (installed) | Labor difficulty | Moisture risk notes |
|---|---|---|---|---|---|
| Double stud | 12–18" | R-30 to R-50 | $8–$18 | Medium–High | Higher drying reliance; monitor moisture |
| Exterior continuous foam | 6–12" (plus sheathing) | R-20 to R-40 (with foam) | $12–$28 | Medium | Improves sheathing temp, lowers moisture risk |
| Larsen truss | 8–16" | R-30 to R-50 | $10–$20 | Medium | Similar to double stud; more controlled exterior cavity |
| SIPs | 6–12" | R-30 to R-50 (factory) | $18–$35 | Low (install) | Low moisture risk if joints sealed; transport limits |
Notes:
- Cost ranges are project-dependent and exclude windows, labor variance by region, and finish trades.
- Choose exterior insulation when footprint or wall thickness is limited, or where rapid enclosure and lower on-site labor are priorities.
- SIPs and ICF reduce onsite labor and simplify airtightness, but increase materials cost and require tight tolerances and panel transport.
When to Choose Alternatives (ICF, Sips, Exterior Foam)
- SIPs: Choose when speed and airtightness are priorities, and budget supports panel costs.
- Exterior foam: Choose when preserving interior square footage matters or to reduce wood-framing thermal bridging.
- Double stud: Choose for lower material cost per R, local lumber availability, and willingness to accept a thicker wall and more on-site labor.
For R-value comparisons and how depth translates to installed R, see the R-value notes in R-value comparison.
The Bottom Line
A double stud wall assembly is a cost-effective route to high installed R-values with reduced thermal bridging, especially for DIY self-builders willing to accept a thicker wall and invest time in airtightness and moisture control. Manage risks with staged blower-door testing, proper dense-packing, and clear air-barrier details; consider a mock-up wall and early moisture monitoring. For material sourcing and greener options, review the sustainable materials guide.
Frequently Asked Questions
What R-value can I reasonably expect from a double stud wall?
Expect effective installed R-values in the range of R-30 to R-50 depending on cavity depth and insulation type. A 12" cavity dense-packed with cellulose typically yields an effective wall R in the low 30s, while 16–18" cavities can reach the high 30s to 40s in practice. Measured field performance accounts for stud framing, air films, and small gaps that reduce the nominal R calculated from thickness alone; consult monitoring studies like the ORNL R-40 case study for real-world data: [2013%20b12%20papers](https://web.ornl.gov/sci/buildings/conf-archive/2013%20B12%20papers/022_Arena.pdf).
Is there a high moisture risk with double stud walls?
There is some debate, but monitored studies indicate that properly detailed double stud walls can perform well without elevated rot risk. Key controls are a continuous interior air barrier to prevent driven moisture, correct vapor strategy for your climate, and ensuring insulation is installed at the right density to avoid settling and voids. Building America guidance reviews finish and sealing techniques for double walls: [Double walls more insulation](https://basc.pnnl.gov/resource-guides/double-walls-more-insulation).
Do double stud walls meet code and passive house targets?
Double stud walls can meet building code insulation requirements and can be part of passive-house-adjacent projects, but achieving Passive House airtightness (0.6 ACH50) is challenging and requires meticulous sealing and testing. Many DIY high-performance projects target 1.0–2.5 ACH50 and improve from there with iterative sealing. Always verify structural and thermal compliance with local code officials and an energy modeler if aiming for certification.
How should I insulate service cavities without breaking the air barrier?
Route services within the inner wall where possible so the interior air barrier remains intact. If services must cross the thermal boundary, use sealed service chases, gaskets at electrical boxes, and sealed conduit. Plan mechanical runs on construction drawings and sequence service installation before interior air-barrier installation to simplify sealing. Refer to the vapor barrier installation guide for step-by-step interior air-barrier work: /blog/vapor-barrier-installation-for-walls-step-by-step-guide.
Should I use dense-packed cellulose or batts in a double stud wall?
Dense-packed cellulose is often preferred because it blocks convective air movement, has good acoustic performance, and can be more forgiving around irregular cavities. Mineral wool offers good moisture tolerance and fire resistance. Batts are lower cost but require careful fitting to avoid compression and voids. Choose based on budget, available tools (blower), moisture strategy, and desired acoustic performance.