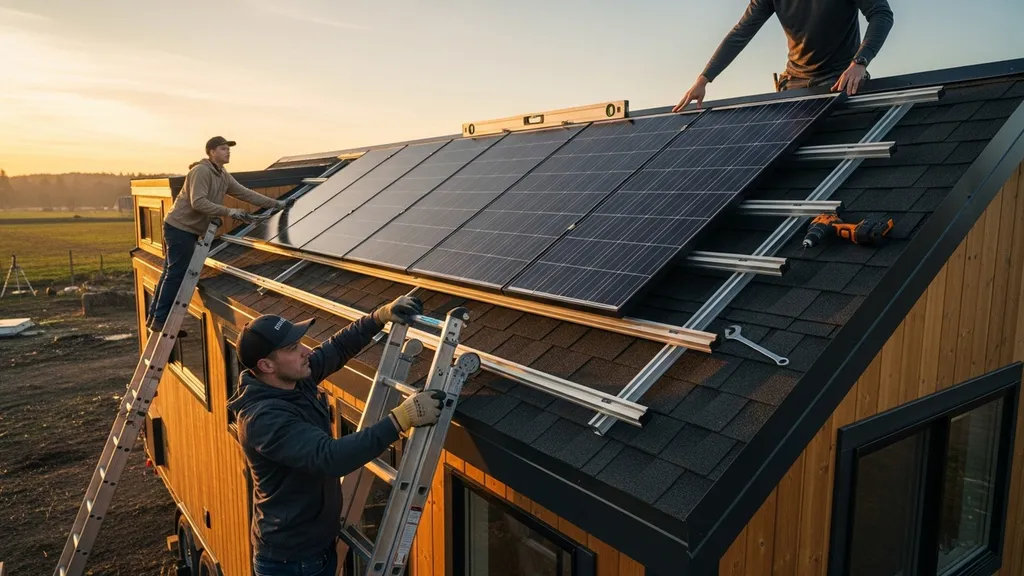
Step-by-step guide to sizing a 5kW solar system for a tiny house — panels, inverter, batteries, expected output, costs, and DIY install checklist.
5KW Solar System for Tiny House: Complete Sizing Guide
A 5kw solar system for tiny house owners is a common sweet spot: large enough to run a modest all-electric tiny home, small enough to fit on most tiny roofs or trailer racks. Solar photovoltaic systems convert sunlight directly into electricity, but the right array and battery size still depend on the site and actual loads. This guide explains what "5kW" means in practice, how to estimate your daily energy needs, how many panels and batteries you’ll likely need, expected output in different climates, permit and cost considerations, and a DIY-friendly installation checklist you can follow step by step.
TL;DR:
- A 5kW array typically produces ~12–28 kWh/day depending on location; use PVWatts or similar to model your site.
- Expect ~13–17 panels to reach ~5 kW (300–410W modules); plan for 10–20 kWh battery bank for 1–2 days autonomy.
- Do a room-by-room load calc, size panels to exceed average daily use after 15–25% system losses, and get an electrician to sign off.
How a 5KW Solar System Fits a Tiny House: First Principles
What "5kw" Actually Means for Small Homes
"5kW" refers to the peak DC power rating of the PV array under standard test conditions — roughly the maximum instantaneous output, not daily energy. Real output is measured in kWh/day and depends on sunlight, tilt, orientation, shading, and system losses. A 5kW array in a high-sun site (about 5.5 peak sun-hours) will produce roughly 5 kW × 5.5 h = ~27.5 kWh on a clear day. In a low-sun site (2.5 peak sun-hours), the same array yields closer to 12.5 kWh/day.
Use the Department of Energy's homeowner's guide to solar alongside PVWatts to model site production. Treat the result as an estimate: PVWatts documents that its projections depend on the location and system inputs you supply.
When 5kw is the Right Size — Common Scenarios
- Minimalist off-grid tiny homes (3–6 kWh/day): 5kW is oversized but useful if you expect occasional high loads (microwave, power tools) or want battery charging speed.
- Typical all-electric tiny homes (10–20 kWh/day): 5kW is a practical choice; paired with a 10–20 kWh battery bank it can cover daily use and offer 1–2 days autonomy in moderate climates.
- High-heat or electric heating loads (20+ kWh/day): 5kW may be undersized unless you dramatically reduce heating demand with passive measures or supplement with propane/wood for heat.
For contrast, see a larger system example like the 7kW cabin sizing guide if you expect heavy loads or want multi-day autonomy without a big battery bank.
Quick Sizing Summary & Key Takeaways
- Estimate production: Use PVWatts or similar: average kWh/day ≈ system kW × peak sun-hours × 0.75–0.85 (derate).
- Panel count: 5kW needs roughly 13–17 panels depending on module wattage (e.g., 13×400W = 5.2kW).
- Battery bank: For 1 day autonomy of 15 kWh use, plan for 15–20 kWh usable; that is ~18–25 kWh nominal lead-acid or ~12–16 kWh LiFePO4.
- Loss & safety margins: Add 15–25% to energy needs for inverter, wiring, temperature, and soiling losses.
- For a site-specific output estimate, enter your location, tilt, azimuth, and modeled losses in PVWatts rather than relying on a universal daily-kWh rule of thumb.
Estimate Your Tiny House Energy Needs (step-by-step)
List Common Tiny-house Appliances and Typical Watt-hours
Create a simple worksheet listing each appliance, its wattage, hours used per day, and daily Wh. Example typical items:
- LED lighting: 8W × 6 hours = 48 Wh/day
- 12V fridge (efficient): 50–100 W average → 1,200–2,400 Wh/day
- Laptop: 50W × 4 h = 200 Wh/day
- Induction cooktop (occasional): 1,800 W × 0.5 h = 900 Wh/session
- Water heater (tankless electric): 3,000 W × 0.5 h = 1,500 Wh (per event)
- Space heating (resistive): 1,500 W × 4 h = 6,000 Wh/day — avoid heavy electric heating
- Propane/wood heating: near-zero electrical load (pump & controls only)
- Well pump: 400 W × 0.25 h = 100 Wh per event
Use conservative averages and remember that heating and hot water dominate energy use. Passive-house techniques (high insulation, airtightness, heat recovery ventilation) can reduce heating loads by 50–80%.
Build a Daily Load Profile and Peak Demand Estimate
- Sum daily Wh to get kWh/day.
- Calculate peak simultaneous demand (kW) by adding the expected concurrent running loads (e.g., induction cooktop + kettle + fridge compressors starting).
- Add a 15–25% margin for inefficiencies (inverter, wiring, dirt).
For example, a modest tiny house: lights (0.05 kWh), fridge (1.5 kWh), laptop & devices (0.3 kWh), cooking (0.9 kWh), small pump & fans (0.2 kWh) → ~3.95 kWh/day base. Add 20% derate → ~4.7 kWh. A 5kW array in a temperate sunny site will easily cover this.
If you want to test scenarios, use the solar sizing calculator to model different loads and system choices. Also compare to smaller options such as the 3kW tiny-house guide and minimalist examples like the 1kW off-grid example to see how lifestyle changes scale with system size.
Seasonal and Lifestyle Adjustments
Heating, water heating, and reduced daylight in winter can double daily demand. Plan for worst-case season if going off-grid; otherwise grid-tied tiny homes can size PV for annual production and rely on the grid in winter. When off-grid, target battery autonomy for multiple low-sun days (1–3 days common), or include a generator as backup.
Solar Panel Array Sizing and Roof/trailer Constraints
Choosing Panel Wattage and Calculating Panel Count
Panel wattages commonly used on tiny roofs: 300W, 370W, 400W, 410W. To reach ~5kW:
- 300W: 17 panels → 5.1 kW
- 370W: 14 panels → 5.18 kW
- 400W: 13 panels → 5.2 kW
- 410W: 13 panels → 5.33 kW
Higher-watt modules reduce panel count and roof area but cost more per watt and may be heavier. If roof area is tight, prioritize high-efficiency panels; see our guide on how to choose solar panels that match your roof and how to compare solar panel efficiency ratings.
Layout, Tilt, Orientation, and Shading Trade-offs
For trailer-mounted tiny houses, flat-roof mounts or low-profile rails are common. Tilted racks increase winter production but add wind load and weight. Shading from vents, chimneys, or trees can reduce output dramatically — consider microinverters or module-level power electronics (MLPE) like optimizers or microinverters when partial shading is unavoidable.
Mounting options:
- Roof-mounted rails (standing seam clamps or lag bolts into reinforced framing)
- Trailer-mounted rails with cradle mounts and extra reinforcement
- Adjustable ground racks (if you can park near the house)
Also see small-roof layout case studies: the 5kW cabin sizing guide and the 5kW shed example for ideas.
Comparison/specs Table: Common Panel Sizes and Required Roof Area
| Panel wattage | Panels for ~5.0 kW | Approx. panel size (ft²) | Approx. roof area needed (ft²) |
|---|---|---|---|
| 300W | 17 | 17.5 | 298 |
| 370W | 14 | 18.0 | 252 |
| 400W | 13 | 18.5 | 240 |
| 410W | 13 | 19.0 | 247 |
Note: Panel size varies by manufacturer. These area numbers include small spacing for rails and access. Real-world derates for tilt, soiling and shading typically reduce rated kW by 5–15%.
For shading-heavy sites, MPPT charge controllers, microinverters, or module optimizers can reduce mismatch losses. The Department of Energy’s PV system design overview explains the role of mounting and inverter choices; use measured shade conditions and the component manufacturer’s design limits for the final layout.
See also seasonal shading tactics in passive shading strategies.
Inverter, Battery, and Balance-of-system (BOS) Sizing for a 5kw System
Choosing the Right Inverter: Continuous vs Surge and Sizing Rules
Pick an inverter with a continuous AC rating that covers expected simultaneous loads and a surge capacity for motor starts (fridge, pump). For most tiny homes, a 3–5 kW inverter covers continuous loads; a 5 kW inverter with a 10 kW surge rating handles short peaks. String inverters, hybrid inverters, and all-in-one AC-coupled inverters each have trade-offs:
- String inverter: Lower cost, efficient for unshaded arrays.
- Hybrid inverter: Manages PV + battery charging; convenient for off-grid or UPS-style systems.
- Microinverters: Per-module MPPT for shaded or odd-orientation roofs.
Allow 10–20% margin between your calculated peak demand and the inverter continuous rating.
Battery Bank Sizing (kwh) for Autonomy and Chemistry Options
Rule-of-thumb autonomy:
- 1 day: usable battery size ≈ average daily kWh × 1
- 2 days: ×2
- 3 days: ×3
Account for Depth of Discharge (DoD) and inverter inefficiency. Example: If your daily need is 10 kWh and you want 2 days autonomy (20 kWh usable), with LiFePO4 at 90% usable (practical), you need about 22–24 kWh nominal. For flooded lead-acid at 50% DoD, you’d need ~40 kWh nominal.
Small battery chemistry comparison:
| Chemistry | Typical usable DoD | Cycle life (cycles) | Notes |
|---|---|---|---|
| LiFePO4 (LFP) | 80–90% | 3,000–5,000+ | Long life, high energy density, higher upfront cost |
| Lithium NMC | 70–80% | 1,000–3,000 | Higher energy density, temperature sensitive |
| Sealed lead-acid (AGM, GEL) | 30–50% | 300–1,000 | Low upfront cost, heavy, short life |
Real projects use LiFePO4 for tiny-home systems because of weight, usable capacity, and cycle life despite higher cost.
Charge Controllers, Wiring, Breakers, and Safety Components
- Charge controllers: Use MPPT controllers sized for array current or choose hybrid inverter with built-in MPPT. For 48V battery systems, keep array voltage within inverter/MPPT input limits.
- Wiring & protection: Size DC conductors for current, include proper fusing at the positive conductor near the battery and PV string combiner fuses when needed. Use AC breakers per code.
- Grounding & surge protection: Ground PV frames and include AC & DC surge protective devices.
- Codes: Follow NEC (US) or local electrical code. For safety and code compliance, consult a licensed electrician even for DIY installs.
Performance Estimates: Expected Daily Output by Climate and Season
Using Pvwatts or Similar to Model Site Output
NREL PVWatts is a practical free tool to estimate hourly and monthly energy production using local solar data and system specs. Input the system kW, tilt, azimuth, and location to get realistic kWh/month and kWh/day figures.
Sample Outputs for Three Climates (sunny Southwest, Temperate Coast, Northern Cold)
| Climate | Peak sun-hours (avg) | Estimated kWh/day (5 kW) |
|---|---|---|
| Sunny Southwest (AZ, NM) | 5.5 | ~27.5 kWh/day |
| Temperate coast (CA coast) | 3.5–4.5 | ~17.5–22.5 kWh/day |
| Northern cold (PNW, New England winter) | 2.5–3.0 | ~12.5–15 kWh/day |
Seasonal variance: winter months can be 30–70% lower depending on latitude and weather. Snow and low sun angles reduce output; summer may exceed the average.
For heat effects and actual performance in warm sites, see solar panel efficiency in hot climates.
How Tilt, Orientation, and Snow Impact Production
Tilt optimized for winter or annual production will change monthly yield. South-facing arrays at latitude tilt maximize annual yield; shallower tilt helps summer. Snow can temporarily block panels; steep pitch and smooth glass help shedding. Regular maintenance (snow clearing, cleaning) improves winter performance.
Costs, ROI, Permits, and When to DIY vs Hire
Rough Cost Components and Budget Ranges (panels, Inverter, Batteries, BOS, Labor)
Costs vary widely by region, but typical component breakdown for a DIY 5kW off-grid-capable system:
- Panels: 13 × 370–410W panels — material cost varies; expect 25–40% of system materials.
- Inverter/charger: Hybrid inverter for off-grid use — moderate to high cost.
- Battery bank: 10–25 kWh LiFePO4 — largest single cost for off-grid setups.
- BOS (racking, wiring, breakers, combiner): 10–15% of materials.
- Labor: DIY reduces labor cost but allow budget for a licensed electrician sign-off or permit inspections.
Compare to smaller systems like the 2kW cabin sizing for rough scaling of costs. See regional costs comparison for examples of how geography affects budgets.
Permits, Inspections, and Interconnection Basics
Most jurisdictions require electrical permits and inspections for PV and battery installations. Grid-tied systems need interconnection agreements with the utility. Off-grid systems may have fewer interconnection steps but still require code compliance. Contact your local Authority Having Jurisdiction (AHJ) early.
When It Makes Sense to Hire an Electrician or Installer
Hire professional help for:
- Main service panel modifications or meter upgrades
- Complex battery installations or high-voltage DC wiring
- Final sign-off for permitting or interconnection
DIY is sensible for mounting rails, panel installation, and basic wiring when you have the skills, but always have a licensed electrician perform AC connections and sign required inspections.
Installation Checklist & Step-by-step Guide (DIY-focused)
Site Prep, Structural Checks, and Roof Reinforcement
- Site assessment: Check shading patterns and wind exposure.
- Structural check: Confirm roof or trailer framing can carry panel and rack loads; reinforce rafters or add cross-bracing if necessary.
- Permits: Secure required permits before mounting.
Mounting Panels, Wiring Path, Inverter and Battery Install
- Mount rails: Use appropriate fasteners for your roofing material; seal penetrations.
- Install panels: Lift with help; secure modules and torques per manufacturer.
- String or parallel wiring: Keep positive and negative runs protected; use MC4 connectors and proper cable sizing.
- Battery room: Dry, ventilated, and secured. Bolt down batteries, use battery boxes if required.
- AC connection: Have a licensed electrician tie inverter output to your subpanel or main service and install required breakers and transfer switches if off-grid.
This video provides a helpful walkthrough of the key concepts:
Commissioning, Safety Checks, and First-week Monitoring
- Pre-commissioning checks: Open-circuit voltage checks, string current checks, proper fuse placement.
- Commissioning: Follow inverter manufacturer sequence; verify battery voltage, charging parameters, and backup operation.
- Monitoring: Log daily kWh production and battery state-of-charge for 7–14 days. Compare to predicted PVWatts numbers and your load calc. Adjust if array suffers from unexpected shading or connection issues.
Safety reminders: use fall protection on roofs, proper PPE, and secure batteries when transporting. Check local requirements before installation: the Department of Energy’s permitting and inspection guide notes that permits, inspections, and utility interconnection rules vary by jurisdiction. For detailed fault diagnosis, consult the troubleshooting guide.
Common Problems, Maintenance, and Troubleshooting
Frequent Causes of Low Production
- Shading from vents or trees
- Dirty panels or bird droppings
- Loose or corroded electrical connections
- Incorrect tilt or orientation
- Battery SOC protections limiting inverter output
Start troubleshooting by visually inspecting panels, checking inverter fault codes, and comparing string current readings to expected values. If problems persist, isolate strings and test open-circuit voltage and current.
Battery Performance Decline and Preventive Care
Battery life shortens with:
- High depth of discharge and frequent full cycles
- High temperature exposure
- Poor charge regulation
Keep battery temperature within recommended range, use appropriate charge profiles, and avoid routinely discharging beyond recommended DoD. For lead-acid banks, maintain electrolyte levels and equalize if specified.
Basic Maintenance Schedule and Seasonal Tasks
- Quarterly: Visual inspection of mounts, wiring, and inverter logs.
- Biannually: Clean panels if dusty; check torque on rail fasteners.
- Annually: Full electrical inspection, test battery health, update software/firmware on inverters/charge controllers.
- Winter: Remove heavy snow as needed and check for ice-related damage.
If you hit persistent issues, escalate to a licensed solar technician. For an in-depth diagnostic checklist see the troubleshooting guide.
The Bottom Line
Run a careful load calculation first, then model your site with PVWatts or a sizing tool. A 5kW array paired with a 10–20 kWh battery bank suits many tiny houses aiming for comfortable near-off-grid living; however, battery sizing and tilt/orientation matter more than headline kW. For safety and code compliance, complete the install with proper permits and a licensed electrician’s sign-off.
Frequently Asked Questions
Will a 5kW system power a tiny house off-grid?
It can, depending on your actual daily energy use and location. A 5kW array often produces 12–28 kWh/day depending on site sun-hours; if your tiny house uses under ~15 kWh/day, a 5kW array plus a 10–20 kWh battery bank can provide comfortable off-grid operation in many climates. For multi-day autonomy or heavy electric heating, you’ll need a larger battery bank or supplemental generator.
How many solar panels are needed for 5kW on a tiny roof?
Panel count depends on module wattage. Expect ~13 panels of 400W or ~14 panels of 370W. If you use 300W modules you’ll need roughly 17 panels. Choose higher-efficiency modules if roof area is limited, and account for spacing, rails, and shading when planning layout.
What size battery bank pairs well with a 5kW array?
A common pairing is 10–20 kWh usable battery capacity for typical tiny-house loads, giving about 1–2 days of autonomy. For LiFePO4 batteries, factor 80–90% usable DoD; for lead-acid, plan for much larger nominal capacity because of 30–50% usable DoD. Match battery voltage and inverter input requirements when choosing components.
Can I install a 5kW system on a trailer-mounted tiny house?
Yes, with careful structural checks. Trailer roofs need reinforcement for panel loads and wind uplift; consider low-profile mounts and secure rail attachment methods. Trailer weight, center of gravity, and road safety also matter if you plan to move. When in doubt, consult a structural engineer or review case studies like the 5kW shed example for mounting ideas.
How much does a DIY 5kW tiny-house system cost?
Costs vary by region and choices. Material costs typically include panels, inverter/charger, battery bank, and BOS; batteries often form the largest portion for off-grid systems. Labor savings from DIY can be significant, but permit, inspection, and electrician fees still apply. For budgeting context and regional variation see the regional costs comparison and compare to smaller systems like the 2kW cabin sizing.