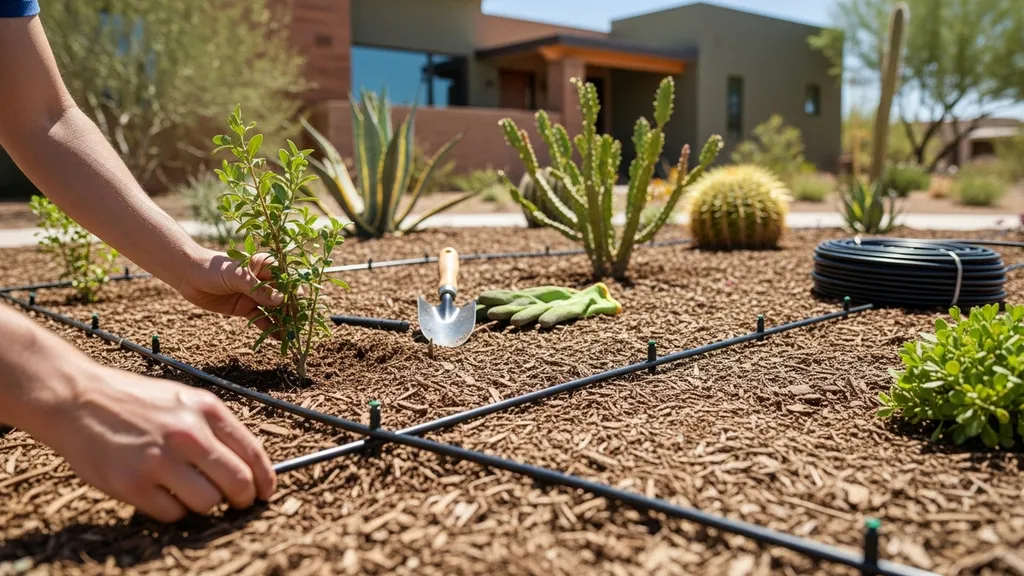
Practical xeriscaping guidance for DIYers: plan, plant, and install water-wise landscaping that cuts irrigation and fits a tight budget.
Xeriscaping: Water-Wise Landscaping Guide
Xeriscaping is a practical approach to designing outdoor areas so plants thrive with minimal supplemental irrigation. For budget-conscious DIYers, xeriscaping can cut summer watering, lower bills, and reduce garden chores — often establishing in 1–3 growing seasons. This guide explains what xeriscaping is, the seven core principles, how to plan a site, pick drought-tolerant plants, install efficient irrigation, and phase a project on a tight budget.
TL;DR:
- Xeriscaping can reduce outdoor irrigation by roughly 30–60% depending on design and climate; plan with a site map and water budget.
- Start with soil and plant selection, add 2–4 in of mulch, and use a drip irrigation system with a smart controller for best results.
- Phase installation: pilot a 100–200 sq ft bed first, test rainwater or greywater capture, then expand to save money and learn local permitting.
Key Points: Xeriscaping at a Glance
- Xeriscaping defined: A design method that combines planning, plant choice, soil improvement, mulching, and efficient irrigation to reduce supplemental watering and maintenance.
- Typical water savings: Extension programs and guides report irrigation reductions in the 30–60% range when xeriscape principles are applied correctly (see the New Mexico xeric guide for plant examples and methods: xeric planting guide).
- Who benefits: Homeowners, DIY self-builders, tiny-house and homestead planners, and small-site contractors working in arid to temperate climates.
- Establishment period: Most drought-tolerant shrubs, perennials, and grasses need 1–3 seasons of regular watering to establish roots before tapering to low supplemental watering.
- Cost vs maintenance: Upfront savings come from phased installation and recycled materials; ongoing savings come from lower water bills and reduced mowing/fertilizing.
- Not "no maintenance": Expect seasonal pruning, mulching refresh, and occasional irrigation checks, especially during extended drought.
What Xeriscaping is and Why It Matters
Definition and Core Goals
Xeriscaping is a design philosophy aimed at water-wise outdoor areas. It’s not simply ripping out grass; it’s a set of methods — from planning to soil work to irrigation — that place plants where they need the least supplemental water. The core goals are to minimize outdoor water use, lower maintenance, and create plantings suited to local conditions and wildlife.
Industry and university resources explain how xeriscape differs from quick turf replacement. Colorado State University's outreach provides a clear overview of the approach and the seven principles that guide it: the 7 principles of xeriscape landscaping.
Why Water-wise Landscaping Matters for DIY Builders
Outdoor water use can account for a large portion of household consumption during warm months. Reducing irrigation lessens demand on wells, municipal systems, and household budgets. It also reduces fertilizer and pesticide needs, offers habitat benefits, and often improves resilience to drought. For self-builders working on a limited budget, the biggest wins come from good early planning and starting small rather than replacing every lawn at once.
Core Principles of Xeriscaping
The Seven Design Principles (overview)
- Plan and design: Map sun, shade, slopes, and water flow before buying plants.
- Improve the soil: Add organic matter or coarse amendments based on soil texture for better water retention and drainage.
- Efficient irrigation: Use drip, micro-spray, or targeted systems instead of overhead sprinklers where practical.
- Appropriate plant selection: Choose drought-tolerant, climate-adapted, and low-input plants.
- Mulch heavily: Mulch reduces evaporation, moderates soil temperature, and suppresses weeds.
- Practical turf areas: Limit turf to functional uses like play areas and set them apart from low-water beds.
- Maintenance: Plan for seasonal pruning, mulch replacement, and irrigation checks.
Each principle guides specific decisions. For example, grouping plants by water need (hydrozoning) comes from "plan and design." Improving soil helps reduce the need for frequent top-up irrigation that shallow soils demand. Compared to a typical lawn, a well-executed xeriscape shifts water use from frequent shallow watering to infrequent deeper wetting and more resilient plantings.
How to Prioritize Principles for Small Budgets
Start with planning and plant selection — these cost little but yield big water savings. Next, add mulch and amend the worst soil patches. Delay full irrigation installs by piloting small beds with a simple soaker or drip kit. Phasing work lets you reuse materials, buy bare-root plants, and spread labor costs over seasons.
Planning Your Xeriscape: Site Assessment and Design
Mapping Sun, Shade, Slope and Drainage
Create a simple site map: sketch property lines, existing trees, buildings, hard surfaces, slope direction, and obvious runoff paths. Spend several days noting sun hours in each area. Mark microclimates: south-facing slopes, shady north corners, wind-exposed ridges. These microclimates determine plant placement and irrigation needs. When siting sheds or storage, check drainage and follow standard foundation guidance — see our outbuilding foundation tips at shed foundation options.
Soil Testing and Amendments
Test soil texture with a jar test (soil, water, shake, observe layers) and pH with an inexpensive kit. For clay, add coarse sand and organic matter to improve structure; for sandy soils, add compost to increase water-holding capacity. Aim for 2–4% organic matter in beds over time. Small, regular additions of compost are cheaper than a single massive amendment. Simple DIY soil tests and amendment recipes are widely covered in extension literature and by home-garden resources like the beginner guides listed at A beginner's guide to xeriscaping.
Rainwater and Greywater as Water Sources
Rainwater harvesting can supply supplemental irrigation. Start with a 55–100 gallon barrel for a pilot bed; size up if you capture roof runoff from larger areas. For remote properties, pair storage with pump options described in our off-grid water systems guide. Greywater reuse (laundry-to-landscape systems) can stretch supplies but is subject to local codes — check your local permit requirements before installing greywater plumbing. For basics on collecting and sizing systems, see our rainwater collection basics.
Choosing Plants for Xeriscaping: Drought-tolerant, Native, and Low-water Options
Plant Selection by Function (groundcover, Shrubs, Trees, Grasses)
Pick plants by their role. Use groundcovers to reduce open soil and suppress weeds; choose shrubs for structure and shade; select trees for long-term canopy and evapotranspiration reduction. Example groups:
- Succulents and low-water perennials for sunny exposed beds.
- Mediterranean shrubs (lavender, rosemary) in temperate-summer regions.
- Native grasses for low-maintenance massing and seasonal interest.
Rather than generic lists, consult regional extension plant lists. The New Mexico xeric planting guide offers hundreds of medium- and low-water species useful for planning: xeric planting guide.
Using Native and Climate-adapted Species
Native plants often outperform ornamentals because they evolved with local rainfall patterns and soils. They tend to need less irrigation after establishment and support native pollinators. Search your state university extension or native plant societies for region-specific lists. The phrase "native plants for xeriscape" should guide your local research rather than one-size-fits-all choices.
Planting Plans for Establishment and Spacing
Space plants for mature size to avoid future crowding; packing plants tightly to reduce weeds is fine if you select shallow-rooted groundcovers. For establishment:
- Water newly planted shrubs deeply twice weekly for the first 6–12 weeks in hot seasons, then taper.
- For perennials, water 1–2 times per week for the first season, then reduce.
- Use companion planting and wood-chip mulch (2–4 in) to reduce evaporation and retain soil moisture.
Buy bare-root perennials or container plants on sale in early spring to save money. Group plants with similar watering needs into the same hydrozone to reduce wasted water.
Water-wise Irrigation: Drip, Micro-spray, and Smart Controls
Comparing Systems (table): Drip, Soaker Hose, Micro-spray, Rotor/rotating Sprinklers
| System | Typical flow rate | Ideal use-case | Water efficiency | Installation difficulty | Cost range |
|---|---|---|---|---|---|
| Drip tubing with emitters | 0.3–2 GPH per emitter | Shrub beds, individual plants | High (30–60% more efficient than overhead) | Medium | $0.50–$2.00/ft installed DIY |
| Soaker hose | Variable, 0.5–2 GPH/ft | Narrow beds, borders | Moderate | Low | $0.20–$1.00/ft |
| Micro-spray | 1–4 GPH per head | Groundcovers, dense plantings | Moderate to good | Medium | $2–$6/head |
| Rotor/rotating sprinklers | 0.5–3 GPM | Lawns or large turf | Lower for beds, better for turf | High (zoning) | $50–$300 per zone installed |
Data from extension sources and installation case studies indicate drip systems usually outperform overhead sprinklers for beds by delivering water to the root zone and cutting evaporation losses.
Smart Controllers, Timers and Sensors
Smart irrigation controllers with weather-based scheduling or soil moisture sensors reduce overwatering. Look for controllers that accept soil moisture probes and rain sensors. For DIY wiring and integration with home hubs, see our DIY smart irrigation guide and our note on connect smart water systems for tying controllers to hubs. When connecting irrigation to household plumbing, refresh yourself on water efficiency best practices in the water-efficient plumbing guide.
DIY Installation Tips and Common Pitfalls
Small tips that save headaches:
- Flush supply lines before adding emitters.
- Use pressure regulators and filters on drip systems to avoid clogging.
- Lay out tubing during dry weather so you can see elevation and run lengths.
- Avoid over-pressurizing micro-emitters; use pressure-compensating components for long runs.
- Consider solar-powered pump options if pairing cisterns with remote zones — see guidance on solar pump power sizing.
For a visual demonstration, check out this video on this new way to install drip irrigation is:
Refer to micro-spray for dense groundcovers and drip for shrubs and trees. A common retrofit approach is to convert one existing sprinkler zone to drip at a time.
Soil, Mulch, and Hardscaping Choices That Reduce Water Use
Soil Improvement and Amendments
Soil structure controls how water moves and is stored. For clay soils, incorporate coarse sand and organic compost to increase porosity; for sandy soils, build organic matter with repeated compost top-dresses and mulches. Aim to improve soil biology with small, regular organic inputs rather than a single heavy chemical amendment. Compost at planting and then top-dress annually to maintain structure and infiltration.
Mulch Types, Depth, and Placement
Mulch cuts evaporation. Recommended depths:
- Organic mulches (wood chips, shredded bark): 2–4 in around perennials and shrubs.
- Coarse gravel or decomposed granite: 1–3 in in hot, very dry climates where heat retention is acceptable.
Avoid mulch piled against stems and trunks. Replenish wood-chip mulch every 1–2 years depending on decomposition.
For paths and patios, choose permeable options to slow runoff and boost infiltration. See our guide on permeable paving options for recycled aggregate concrete and permeable mixes. For eco-friendly materials and low-energy hardscaping, consult our sustainable building materials and rammed earth options pages. For low-energy exterior lighting that pairs with xeriscaped paths, check solar options at solar lighting options.
Also consider swales or dry creek beds to direct runoff into planting zones rather than storm drains; these features both add interest and recharge soil moisture.
Installation, Maintenance, and Budgeting for Xeriscaping
DIY Installation Checklist and Seasonal Timeline
- Phase 1 (Weeks 0–4): Site map, soil tests, basic grading, install rain barrel(s).
- Phase 2 (Month 1–3): Soil amendments in planting beds, first mulch layer, install irrigation for pilot bed.
- Phase 3 (Planting season): Install plants during cool season or early spring, water to establish.
- Months 3–12: Reduce irrigation frequency, monitor growth, prune as needed.
- Year 2–3: Expand beds, replace mulch, transition established plants to low supplemental water.
Use numbered lists for ordered tasks where order matters. Planting in spring or fall reduces heat stress during establishment.
Ongoing Maintenance: Pruning, Mulching, Irrigation Checks
- Prune for form and airflow once per year, usually late winter or early spring.
- Top up mulch annually where it thins below 2 inches.
- Inspect drip fittings each season for leaks or clogs; clean filters quarterly.
- Adjust smart controller schedules seasonally or use soil sensors to avoid waste.
Budgeting: Cost Items, DIY vs Contractor, and Simple Cost-saving Hacks
Budget items: plants, soil amendment, mulch, irrigation hardware, smart controller, pump (if using stored water), and labor. Contractors will charge more but may save time on grading and complex irrigation. Cost-saving hacks:
- Phase installation over several years.
- Buy bare-root shrubs or local nursery clearance stock.
- Reuse reclaimed stone or timber for edging.
- Install a simple timer and add smart sensors later.
For regional cost variance, compare local data such as our regional cost estimates to set expectations. Watch for hidden costs: local permits for greywater or major grading changes; check local permit requirements before big installs.
The Bottom Line
Xeriscaping reduces irrigation and maintenance when you plan thoughtfully: map your site, improve soil, and choose the right plants. Prioritize efficient irrigation like drip systems with smart controls, and phase work to match your budget. Start small: map a pilot bed, test rainwater capture, and expand once plants are established.
Frequently Asked Questions
What about keeping some turf?
Keeping limited turf for play or aesthetics is reasonable. Use drought-tolerant turf species, size turf areas to the minimum functional footprint, and treat turf as a separate hydrozone with efficient rotors or micro-spray only where needed.
How much water can xeriscaping save?
Savings vary by climate and design, but extension sources and regional guides report irrigation reductions commonly in the 30–60% range when xeriscape principles are applied. Local utility calculators and WaterSense materials can give a more precise estimate for your area.
Can xeriscaping increase property value?
Well-executed, low-maintenance plantings often improve curb appeal and can be attractive to buyers who value water efficiency. Value impacts depend on local market preferences, so consult local real-estate data for your region.
Is xeriscaping wildlife-friendly?
Yes. Choosing native plants and adding structure (trees, shrubs, native grasses, and nectar sources) supports pollinators and birds better than sterile turf. Avoid broad-spectrum pesticides and provide seasonal water sources where safe.
Do I need permits for rainwater or greywater systems?
Permit requirements vary by jurisdiction. Check your local permitting office and the local permit requirements page before installing greywater or large cisterns; small rain barrels are often allowed but rules differ.