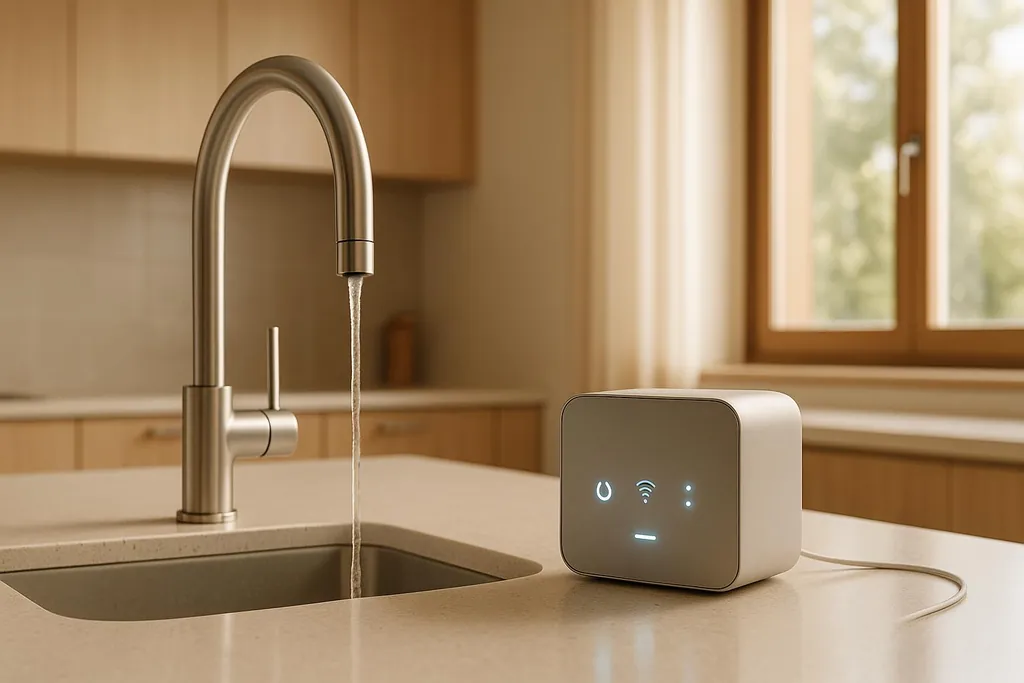
Learn how to effectively connect smart water systems to automation hubs, ensuring efficient water management and conservation in your home.
How to Connect Smart Water Systems to Hubs
Want to manage your water system smarter? Connecting smart water devices to hubs like Amazon Alexa, Google Home, or Samsung SmartThings can help you monitor, control, and conserve water with ease. From detecting leaks early to automating water usage, these systems save money and prevent damage.
Key Takeaways:
- Compatibility is crucial: Ensure your smart water devices match your hub's communication protocol (Wi-Fi, Zigbee, Z-Wave, or Bluetooth).
- Setup basics: You'll need tools like wrenches or screwdrivers, a strong Wi-Fi connection, and your device's app.
- Automation benefits: Set alerts for leaks, create water-saving schedules, and integrate with other smart devices for better control.
- Troubleshooting tips: Restart devices, update firmware, and strengthen wireless networks to fix common issues.
- Maintenance matters: Regular system checks and filter replacements keep everything running smoothly.
Whether you're installing a leak detector, flow meter, or smart shut-off valve, follow safety guidelines and consult professionals for complex installations. These systems not only protect your home but also help reduce water waste.
#RainPoint | How To Setup RainPoint 203WRF WiFi Sprinkler Timer, Hose Water Timer.
Check Smart Water System Compatibility
Make sure your smart water devices are compatible with your home automation hub to save yourself the hassle of returns and setup issues.
Common Smart Water Device Types
Smart water systems include various devices, each designed to monitor or control water use differently. For instance, flow meters keep track of water usage and can help detect leaks throughout your home.
Another essential device is the leak detector. These sensors are typically placed near water heaters, under sinks, or in basements - areas prone to water damage. Considering that leaks waste almost a trillion gallons of water annually in the U.S. , catching them early can make a big difference.
Other devices include smart shut-off valves, which automatically stop water flow when a problem arises, and systems for managing water filtration. There are even smart faucets that let you control water use directly at the tap. Keep in mind that each type of device has its own power and communication needs. For example, battery-powered leak sensors often use low-energy protocols, while smart water heaters generally rely on Wi-Fi for their operations.
Once you know the types of devices you need, it’s time to check how they communicate with your hub.
Device Communication Methods
Matching communication protocols is key to ensuring your devices work with your hub. If the protocols don’t align, the devices won’t connect.
- Wi-Fi is widely used and perfect for devices like smart water heaters that require a lot of data. However, Wi-Fi devices use more power and might interfere with other wireless equipment .
- Zigbee and Z-Wave are known for their low power use and mesh networking. Zigbee is great for battery-operated sensors, while Z-Wave, which operates on a different frequency than Wi-Fi, reduces interference risks. That said, Z-Wave can face compatibility challenges with some third-party devices .
- Bluetooth and Bluetooth Low Energy (BLE) are energy-efficient and ideal for direct device-to-device communication. However, their short range limits them to devices close to each other .
Here’s a quick comparison:
| Communication Protocol | Benefits | Limitations | Ideal For |
|---|---|---|---|
| Wi-Fi | Wide coverage; versatile | Higher power use; interference risk | Smart water heaters, flow meters |
| Zigbee | Low power; mesh networking | Shorter range | Battery-powered leak detectors, smart valves |
| Z-Wave | Reduced interference; self-healing networks | Limited third-party support | Smart shut-off valves |
| Bluetooth/BLE | Energy-efficient; direct communication | Short range; limited data transfer | Battery-powered sensors, leak detectors |
As Lemberg Solutions puts it:
> "A smart home protocol is a set of standards that determine how devices within a smart home ecosystem communicate."
Once you’ve identified the communication protocol your devices use, check if your hub supports it.
Hub Support Requirements
Your hub’s compatibility with various protocols determines which smart water devices you can connect. For example, SmartThings supports both Zigbee and Z-Wave, making it compatible with many smart water devices . Amazon Alexa and Google Home work with devices using Wi-Fi, Zigbee, Z-Wave, and Bluetooth, but they often require a hub for non-Wi-Fi protocols .
Always consult updated compatibility charts on product pages for specific details . Note that the Amazon Echo Plus supports Zigbee but not Z-Wave , and some smart speakers that act as hubs may not cover all protocols.
For devices like smart water heaters, enabling the device’s skill in your Alexa or Google Home app and linking it directly is essential to ensure proper functionality . Similarly, smart shut-off valves need a hub that supports their protocol - SmartThings works well for Zigbee or Z-Wave devices .
Lastly, check your hub’s capacity to handle multiple devices, both now and in the future . Some hubs require a direct Ethernet connection to your router, while others connect via Wi-Fi, which could influence your overall setup.
Once your devices and hub are confirmed compatible, you’re ready to move on to setting up your system with the right equipment and following safety guidelines.
Prepare for Setup
Getting your smart water system up and running requires the right tools, equipment, and attention to safety. Here's how to make sure you're ready for a smooth installation process.
Required Equipment and Tools
To set up your smart water system, you'll need the device itself, a compatible hub, and a few additional items to ensure everything works seamlessly. A reliable Wi-Fi connection is crucial, as many smart water devices rely on the internet for monitoring and communication. Before you begin, test the Wi-Fi strength in the area where you plan to install the system - weak signals can cause connection issues.
Keep the manufacturer's setup instructions close by, whether in print or on your phone. These guides often include specific details that general tutorials overlook. Some devices may also require you to download a dedicated mobile app before starting the setup process.
The tools you’ll need depend on the type of device you’re installing:
- Smart shut-off valves: Pipe wrenches, adjustable wrenches, and PTFE Teflon tape for sealing threaded connections.
- Leak detectors: Usually just screwdrivers for mounting.
- Smart water heaters: May require electrical tools if wiring is involved.
If your system includes a smart home hub, it will act as the central control point for integrating water monitoring with other systems like lighting or security. Depending on the hub, you might need specific cables for wired connections, so double-check your setup requirements.
For battery-powered devices like leak sensors, make sure you have fresh batteries on hand. While many devices include batteries, having extras ensures you're prepared if the provided ones are faulty.
Once you’ve gathered your equipment, it’s time to focus on safety.
Safety and Installation Guidelines
Safety is key when installing smart water systems, especially since water and electricity can be a dangerous combination. Follow these precautions to avoid problems during setup.
- Turn off the main water supply: Before working on any plumbing, shut off the water to prevent flooding in case of mishaps.
- Use PTFE Teflon tape: For plumbing connections, wrap the tape clockwise around threaded pipe ends to create a secure seal. Avoid overtightening, as this can damage the threads and lead to leaks. Typically, hand-tightening plus a quarter turn with a wrench is enough.
- Check O-rings: If your device uses O-rings, apply silicone grease generously and ensure they’re seated correctly in their grooves.
- Restore water pressure gradually: Once the installation is complete, slowly turn the water back on and inspect all connections for leaks. Address even minor drips immediately to avoid future problems.
For electrical connections, always turn off the power at the circuit breaker before working on any wiring. Devices like smart water heaters or advanced monitoring systems must be installed in compliance with local electrical codes to ensure safety and functionality.
When to Call a Professional
Even with the right tools and preparation, some installations may require professional expertise. If your setup involves complex electrical work or gas line connections, it’s best to leave it to the experts.
For example, installing systems that shut off the main water supply often requires cutting into the main water pipe - a task that typically calls for a licensed plumber. Moen recommends professional installation for devices like the Flo Smart Water Monitor and Shutoff, as it involves removing a section of the pipe . A professional ensures the system is installed correctly, maximizing its performance and reliability.
Additionally, if your setup includes multiple devices or requires integration with an existing home automation system, a professional can help with troubleshooting and optimizing placement. Their expertise can save you time and ensure your system is configured to protect your home effectively.
Connect to Popular Home Automation Hubs
Once your smart water system is installed, the next step is connecting it to your home automation hub. This brings all your devices under one roof, making management much easier. Below are step-by-step instructions for linking your system to some of the most popular hubs.
Amazon Alexa Setup Process

To connect your smart water system to Alexa, start by enabling the manufacturer's skill in the Alexa app. Here’s how:
- Open the Alexa app on your smartphone.
- Navigate to the Skills & Games section.
- Search for your water system manufacturer's skill (check your device's instructions for the exact name).
- Enable the skill, and you’ll be prompted to log in with the same credentials you used to set up your device.
This login step ensures the system can communicate with Alexa properly.
> "Once authorized, your devices will appear in the Devices section of the Amazon Alexa app, and you can start controlling them using voice commands." - SmartRent
After linking, your smart water system will show up in the Alexa app, ready to respond to voice commands.
Google Home Setup Process
To connect with Google Home, follow these steps:
- Download and open the Google Home app on your Android or iOS device .
- Make sure your Android device is updated, your network supports both 2.4 GHz and 5 GHz frequencies, and Bluetooth is enabled .
- Tap the + icon in the app and select Set up device.
- Choose Works with Google and search for your smart water system's manufacturer.
The app will guide you through the setup process, which typically involves logging into your device’s native app. Google Home also supports devices using Matter, a smart home standard, and Thread technology for better connectivity .
Once the setup is complete, your device will appear in the Google Home app, where you can create routines and control it with voice commands .
Samsung SmartThings Setup Process
For Samsung SmartThings, start by opening the SmartThings app:
- Tap Add Device or the + icon.
- Choose Add device by brand, select Samsung, and then choose Smart Home Hub.
- The app will search for devices on your network .
Some devices may need to be set up in their manufacturer’s app first . If your smart water system isn’t detected, try moving it closer to the SmartThings hub - some devices need to be within one foot for pairing. You might also need to press the On/Off button three times quickly during the pairing process .
Keep in mind, wireless interference can sometimes cause issues. If you’re using Zigbee devices, changing your Wi-Fi router channel to 1, 6, or 11 can help reduce interference . Obstructions like metal objects can also disrupt communication .
If problems persist, try these troubleshooting steps:
- Delete the device from the SmartThings app and re-add it .
- Ensure your SmartThings app is updated .
- Check that the device has properly inserted batteries .
Following these steps will help you smoothly integrate your smart water system with SmartThings.
Set Up Monitoring and Automation
Once your smart water system is connected, the next step is configuring monitoring and automation. These features take your system from simple oversight to a powerful tool for managing water usage and protecting your home. Building on the earlier setup steps, these adjustments enable smarter and more proactive water management.
Configure Alerts and Monitoring
After installation, it's time to fine-tune how your system responds to potential water issues. Set up alerts to catch leaks or unusual water usage early. Many smart water systems can send real-time notifications directly to your smartphone, keeping you informed of any irregularities as they happen . You can even customize thresholds to define what qualifies as a leak or abnormal flow.
> "Bluebot allows you to customize your alerting parameters, enabling you to receive alerts according to your definition of a leak. You can set thresholds for flow rate or usage and choose the type of notification you prefer."
Some systems go beyond water flow and also track temperature and humidity, helping you prevent pipe damage caused by freezing or excess moisture.
The benefits of proper monitoring can be dramatic. For example, at one of QuadReal's Alberta properties, hard water was causing $13,000 in monthly losses due to corrosion and scale buildup. By using the Water Monkey by Connected Sensors, they gained real-time insights into water usage, pinpointed leaks, and reduced water loss by 83%. This change is projected to save $100,000 annually .
Create Automated Schedules
Automation takes water management to the next level by adjusting usage based on your schedule or specific needs. For instance, during vacations, you can activate a mode that reduces water usage while you're away. For irrigation, automated schedules can help conserve water by timing usage during optimal periods, such as early mornings (4:00–8:00 AM), to minimize evaporation . Wrapping up watering before 10:00 AM further reduces water loss .
When it comes to sprinklers, follow the "deep and infrequent" watering rule. Run them for about 30 to 35 minutes twice a week, aiming to deliver at least 1 inch of water weekly . To check if you're hitting the mark, place a container in the sprinkler's range during a session. If it collects about 0.5 inches of water, you're on track . If you notice runoff shortly after watering starts, use your controller's "Cycle & Soak" feature or set multiple start times to allow water to absorb between cycles.
Vacation mode is another handy feature, automatically scaling back water use by pausing irrigation schedules and maintaining only essential flows. These schedules integrate seamlessly with other smart devices, offering a streamlined approach to water management.
Connect with Other Smart Home Devices
To maximize your system's potential, integrate it with other smart home devices. For example, pair it with smart shut-off valves to automatically stop water flow when a leak is detected . You can also link your system to weather-based irrigation adjustments or additional sensors to further refine water usage.
Smart water level sensors are another useful addition. These devices monitor water levels in tanks, reservoirs, or pipes in real time. They can trigger automatic refills, send alerts for low levels, or shut systems down when tanks are empty to avoid pump damage .
Setting up these integrations is usually straightforward. Use your hub's app to create automation routines that link multiple devices, ensuring a coordinated and efficient response for all your water management needs.
Fix Problems and Maintain Your System
Keeping your smart water system in top condition requires regular maintenance and effective troubleshooting. Even the most advanced systems can encounter hiccups, so knowing how to address common issues can save you time, money, and headaches.
Fix Common Connection Problems
Connection issues are by far the most frequent problem with smart water systems. If your devices stop responding or vanish from your hub, don’t panic - start with the basics. Check that your hub is plugged in and powered up. If the indicator light is off, try a different outlet or adapter.
Next, restart your hub by unplugging it for about ten seconds before reconnecting it. While you’re at it, reboot your Wi-Fi router to clear any internet-related hiccups. This simple step often resolves connectivity problems.
If the issue persists, move your hub closer to your water devices. Large homes or areas with lots of obstacles can weaken wireless signals.
Another key step is to update your hub’s firmware regularly. Outdated software can cause compatibility issues, but most hubs will notify you when updates are available. You can also check manually in the app settings.
For devices that still don’t respond, try a full device reset. Remove the device from your app, then pair it again from the beginning. This often fixes recognition problems that develop over time.
Voice control issues, like trouble with Alexa or Google Assistant, are usually tied to account linking problems. Disconnect and reconnect your voice control accounts to refresh the connection.
If you’re using Z-Wave or Zigbee devices, weak mesh networks can cause drops. Add more powered devices between your hub and sensors to strengthen the network, and then perform a network heal in the hub settings to optimize connections.
As a last resort, you can reset your hub completely. Be aware that this will erase all settings, requiring you to re-pair every device. Use this option only if all other troubleshooting steps fail.
Once your system is back online, consistent maintenance will help prevent future disruptions.
Regular System Maintenance
Routine maintenance is key to extending the life of your smart water system and avoiding costly repairs. The specific tasks and timing will depend on your system type, water source, and how often it’s used, but some general guidelines apply to all systems.
- Inspect your system quarterly. Look for leaks, corrosion, or damage around sensors, valves, and connections. Pay attention to changes in water flow, pressure, taste, color, or odor - these can signal underlying issues.
- Check water tanks and major components every six months. Look for cracks, leaks, or wear, and ensure valves and fittings work smoothly. If you use a water softener, check salt levels monthly and add a cleanser every four months to prevent buildup.
- Clean and disinfect water tanks annually. Replace filters based on manufacturer recommendations - typically every 3–6 months for whole-home systems and up to six months for under-sink systems. Reverse osmosis membranes usually last 2–3 years before needing replacement.
Poor water quality can take a toll on your system. For example, even a thin layer of scale can reduce heat transfer efficiency by 12.5%, while poor water quality can increase energy usage by up to 20% . Regular maintenance can help reduce energy consumption by as much as 5–10% .
| Maintenance Task | Frequency |
|---|---|
| Check and add salt to water softener | Monthly |
| Clean strainers | Every 3 months |
| Use water softener cleanser | Every 4 months |
| Clean condenser coils | Every 6 months |
| Analyze compressor oil | Annually |
| Clean evaporator and condenser tubes | Annually |
| Test water quality and treat as needed | Quarterly |
Always stick to the manufacturer’s instructions for maintenance tasks and schedules.
When to Get Professional Help
Sometimes, DIY fixes won’t cut it. If your system alerts you to a leak that you can’t locate, call a plumber immediately. Hidden leaks can cause serious damage if left unresolved.
For persistent device issues, contact technical support. If restarting, updating firmware, or adjusting network settings doesn’t solve the problem, you may need expert assistance or replacement parts.
For installations like smart water shutoff systems, professional help is often recommended. As Moen advises for their Flo Shutoff system:
> "We recommend using a plumbing professional for installation, since the Flo Shutoff is a precision-engineered device and installation requires removing a section of your main water pipe."
If your system detects low water pressure, the issue could be related to corroded pipes rather than the smart devices themselves. In such cases, a professional assessment is necessary. Major plumbing work, like re-piping, should always be left to the experts.
Conclusion
Linking smart water systems to home hubs can revolutionize how you manage water in your home. By ensuring compatibility, gathering the right tools, and prioritizing safety, you’re well on your way to a smooth integration process.
Whether you’re working with Amazon Alexa, Google Home, or Samsung SmartThings, sticking to the specific setup instructions for each hub is key to achieving reliable functionality. Once connected, you’ll be able to set up alerts and create automated schedules that seamlessly blend into your smart home system, giving you greater control over water usage.
Proper installation and regular maintenance can lead to noticeable savings. For example, families living in WaterSense\-labeled homes have shown that efficient water management can result in significant annual cost reductions .
But the benefits don’t stop there. Smart water systems also play a role in addressing environmental concerns. With nearly 20% of the global population expected to face water scarcity by 2025 , these systems contribute by offering real-time monitoring, predictive maintenance, and improved usage efficiency.
Investing in a smart water system means more than just cutting costs - it’s about early leak detection, automated conservation, and ensuring your home is protected. By following installation guidelines, performing regular checks, and knowing when to seek professional help, you’re not only safeguarding your home but also supporting larger water conservation efforts.
FAQs
How can I tell if my smart water system works with my home automation hub?
To determine if your smart water system works with your home automation hub, start by checking if they share the same communication protocols, like Zigbee, Z-Wave, or Matter. This information is typically available in the product manual or on the manufacturer's website.
You should also review the official compatibility lists provided by your hub's manufacturer. These lists outline supported devices and any specific setup instructions. Taking the time to confirm compatibility beforehand can save you headaches and make installation smoother.
What should I do if my smart water system disconnects from the hub?
If your smart water system loses connection to the hub, there are a few steps you can take to troubleshoot the issue. First, check your Wi-Fi connection to confirm it's stable and functioning properly. A weak or unstable signal can often be the culprit.
Next, unplug the hub, wait for about 10 seconds, and then plug it back in to restart it. This simple step can often resolve minor glitches. If the device remains offline, you might need to reset it to factory settings. Refer to the manufacturer's instructions for guidance - this could involve pressing a reset button or replacing the batteries.
Also, ensure the device is positioned within the hub's range. Too much distance or interference from walls or other electronics can disrupt the connection. If none of these steps work, consider adjusting the network channels on your router. This can help minimize interference and create a more stable connection.
When should I hire a professional to install or fix my smart water system?
If your installation involves complex plumbing tasks - like cutting or replacing pipes - or if you run into problems you can't fix while troubleshooting, it might be time to call in a professional. Issues such as leaks, irregular water flow, or equipment malfunctions often need expert attention.
Hiring a professional ensures the system is installed properly and safely, which can save you time and protect your home from potential damage. When in doubt about your ability to manage the installation or repairs, reaching out to an expert is always the safer choice.