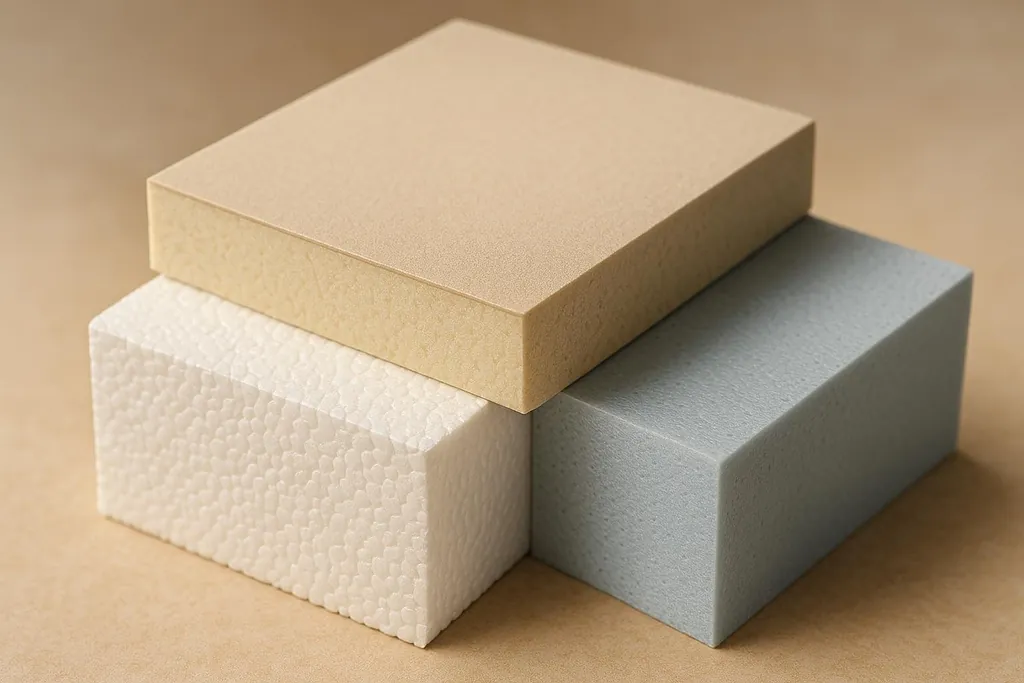
Polyiso, EPS, and XPS compared: R-value per inch, cost per board foot, moisture resistance, and which foam insulation works best by climate zone.
Polyiso vs EPS vs XPS: Which Foam Board Is Best for Energy Efficiency?
When choosing between polyiso, EPS, and XPS foam boards for insulation, your decision depends on climate, application, and budget. Here's a quick breakdown:
- Polyiso: Offers the highest initial R-value (R-6.0 to R-6.8 per inch) but loses efficiency in cold temperatures. Best for roofs and walls in warmer climates or stable indoor conditions.
- EPS: Affordable with consistent R-value (R-3.6 to R-4.2 per inch) across temperatures. Ideal for budget-friendly projects, interior walls, and below-grade insulation.
- XPS: Excels in moisture resistance and compressive strength with a reliable R-value (R-5.0 to R-5.2 per inch). Perfect for basements, foundations, and wet environments, though it’s the most expensive option.
Quick Comparison
| Feature | Polyiso | EPS | XPS |
|---|---|---|---|
| Initial R-Value | R-6.0 to R-6.8 | R-3.6 to R-4.2 | R-5.0 to R-5.2 |
| Cold Performance | Declines | Stable | Stable |
| Moisture Resistance | Moderate | Low-Moderate | Excellent |
| Cost per sq ft | Moderate ($0.50-$1.20) | Low ($0.35-$0.85) | High ($0.70-$1.40) |
| Best Use | Roofs, walls | Interior, foundation | Basements, wet areas |
Each material has strengths, so match your choice to your specific project needs. Proper installation is key for maximizing energy efficiency.
EPS, XPS & Polyiso insulation | everything you need to know
Polyiso Foam Board: Properties and Performance
Polyisocyanurate foam board, or polyiso, is known for its impressive thermal resistance when conditions are just right. By digging into its unique features, you can decide if it’s the right insulation choice for your energy-efficient construction needs.
Material Structure and Composition
Polyiso has a closed-cell foam structure, meaning it traps gas within sealed cells throughout the material. This design is what makes it such an effective barrier against heat transfer, putting it among the top-performing foam boards for insulation, as the U.S. Department of Energy notes that polyiso and polyurethane panels "insulate 30% to 40% better for given thickness" than EPS. Typically, the foam core is enclosed between layers of aluminum foil or other reflective materials, which further boost its insulating abilities.
The material uses pentane-based blowing agents, which are designed to have a lower environmental impact. The aluminum foil facing not only adds structural strength but also serves as a vapor barrier and reflects radiant heat. Depending on the application, some manufacturers offer polyiso boards with alternative facings like fiberglass mats or plastic films, tailored to handle specific moisture or durability requirements.
These structural elements are key to understanding polyiso’s thermal performance, which we’ll explore next.
R-Value and Temperature Performance
Polyiso delivers an initial R-value of approximately R-6.5 to R-7.0 per inch at a standard temperature of 75°F, making it one of the highest-performing foam board insulations under ideal conditions, as documented in manufacturer technical literature from polyiso producers such as Atlas Roof & Wall Insulation. However, this performance can change depending on temperature.
In warmer climates or stable interior conditions, polyiso retains its high R-value effectively. But in colder environments, its performance can drop significantly. The trapped gases in the foam contract as temperatures fall, which reduces its insulating efficiency. This makes polyiso better suited for continuous insulation applications on building exteriors in warmer climates or for interior uses where temperatures remain consistent.
For roofing, polyiso often shines. Dark roofing materials absorb solar heat, keeping the insulation warmer and preserving its R-value. In wall applications, results can vary based on the climate and how the insulation is installed. Continuous exterior insulation can help reduce thermal bridging, which may offset some of the performance loss in colder conditions — a strategy building scientist Joseph Lstiburek details in his "Perfect Wall" framework, which recommends locating insulation outside the structural frame. Most high-performance walls pair this exterior foam with a cavity fill — usually mineral wool or fiberglass batts — so the two strategies work together.
Thermal efficiency aside, cost and environmental considerations also play a big role in determining whether polyiso is the right choice.
Cost and Environmental Considerations
When planning energy-efficient projects, balancing cost and environmental impact is crucial. Polyiso typically costs between $0.50 and $1.20 per square foot for standard thicknesses, placing it in the mid-range of foam board insulation pricing. While the upfront cost may be higher, the long-term energy savings in suitable climates often make it a worthwhile investment. Its high R-value per inch also means you can achieve desired insulation levels with thinner boards, potentially cutting down on material usage and costs.
From an environmental perspective, modern polyiso formulations use blowing agents with zero ozone depletion potential and reduced global warming potential, aligning with EPA restrictions on high-GWP HFCs in foam blowing agents under the Significant New Alternatives Policy (SNAP) program. These advancements not only improve its thermal performance but also lower its environmental footprint. Additionally, the manufacturing process has become more energy-efficient over time, and the energy savings from a well-insulated building can be significant over its lifespan.
However, recyclability remains a challenge for polyiso boards, especially those with foil facings. The mix of materials complicates recycling, though some manufacturers are working on take-back programs to manage construction waste. The main environmental benefits of polyiso come from its durability and the energy savings it delivers throughout a building’s lifetime, rather than from its end-of-life disposal options.
When installed correctly, polyiso can last for decades while maintaining its insulating properties. This longevity reduces the need for replacement, minimizing both costs and environmental impact over the long term. In most cases, the energy saved by improving a building’s efficiency far outweighs the environmental cost of producing and disposing of the material.
EPS Foam Board: Properties and Performance
EPS foam board delivers reliable insulation and moisture resistance, making it a practical choice for energy-efficient buildings. While it may not boast the highest R-values, EPS stands out for its steady performance and cost-effectiveness, particularly in projects where long-term consistency is key. Let’s take a closer look at how its structure and manufacturing process contribute to these qualities.
Material Structure and Manufacturing Process
EPS starts as polystyrene beads that expand when exposed to steam heat, forming a partially closed cell structure filled with air pockets. This process results in a lightweight material that's about 98% air by volume.
Unlike other foam boards, EPS doesn’t rely on chemical blowing agents. Instead, the beads contain pentane, which vaporizes during heating to create the foam structure. As the material cools, pentane is replaced by regular air, giving EPS its stable, long-lasting properties. This straightforward production method keeps costs low while delivering a material with predictable performance.
EPS boards typically have a smooth, white surface and can be left uncovered or paired with various facings. The material’s density can be adjusted during production, with higher-density versions offering greater compressive strength for demanding applications like below-grade insulation. Standard densities range from 1 to 2.5 pounds per cubic foot, each providing distinct performance benefits.
The fused bead structure plays a key role in enhancing insulation performance, particularly in managing moisture and maintaining temperature stability. This unique design ensures EPS delivers consistent R-values and dependable moisture resistance.
R-Value and Moisture Performance
EPS provides an R-value of approximately R-3.8 to R-4.4 per inch, maintaining steady performance across a wide range of temperatures. Unlike polyiso, which can lose effectiveness in cold conditions, EPS performs reliably year-round, making it suitable for diverse climates — the DOE Energy Saver guide on insulation emphasizes that R-value is the standard measure of thermal resistance and that proper material selection by climate zone is key to long-term efficiency.
Its partially closed cell structure allows EPS to handle moisture differently from fully closed-cell foams. EPS absorbs minimal amounts of moisture without compromising insulation and naturally dries over time. These properties make it a great choice for below-grade applications, where contact with ground moisture is common.
For basement walls and foundation insulation, EPS excels. It withstands exposure to soil moisture without losing structural integrity, and any absorbed water evaporates when conditions improve. This moisture tolerance, combined with its consistent R-value, makes EPS a dependable option for challenging installations.
In wall applications, EPS offers steady thermal performance without the temperature-related fluctuations seen in other foam boards. This consistency allows builders to more accurately predict a building's energy efficiency, especially in areas with significant seasonal temperature changes.
Cost and Environmental Considerations
EPS insulation costs between $0.35 and $0.85 per square foot, reflecting its straightforward and economical production process. For budget-conscious DIYers or large-scale projects, EPS provides solid insulation performance at a wallet-friendly price.
Environmentally, EPS has several appealing features. Its manufacturing process avoids ozone-depleting substances and has a very low global warming potential due to its reliance on steam expansion (using pentane) rather than the high-GWP HFC blowing agents that the EPA's Technology Transitions Program is actively phasing out in foam, refrigeration, and aerosol sectors. Additionally, EPS is 100% recyclable, and many communities offer recycling programs that reprocess construction waste into new foam products.
EPS is built to last, retaining its insulating properties for decades without degrading. It resists mold, mildew, and rot, which reduces the need for frequent replacements and minimizes long-term environmental impact.
The energy savings from properly installed EPS insulation often offset the environmental costs of production within just a few years. Over a building's lifetime, reduced heating and cooling demands can significantly lower its carbon footprint. For eco-conscious builders seeking an affordable, durable, and environmentally friendly insulation solution, EPS strikes an excellent balance between performance, cost, and sustainability.
XPS Foam Board: Properties and Performance
XPS foam board stands out for its excellent resistance to moisture and impressive structural strength, making it a top choice for areas exposed to damp conditions. Its distinct colors often serve as a clear identifier. By understanding its features, you can decide if the higher cost of XPS aligns with your project needs. Let’s break down its key properties.
Material Structure and R-Value
XPS is manufactured through an extrusion process, which creates a fully closed-cell structure. This design not only blocks moisture effectively but also provides the compressive strength needed for load-bearing uses. It offers a strong initial R-value per inch, ensuring good thermal insulation. However, over time, the R-value may slightly decrease as the blowing agents dissipate. Even with this gradual change, XPS remains reliable for both hot and cold environments.
Moisture Performance and Applications
Thanks to its closed-cell design, XPS resists moisture absorption exceptionally well. This quality makes it ideal for below-grade installations like basement walls, foundation edges, and under-slab insulation — see our cold-climate slab-on-grade guide for the under-slab and slab-edge detailing where XPS shines. It also holds up against freeze-thaw cycles and resists damage from common construction chemicals. These traits make it a go-to material for challenging setups, such as inverted roof systems, where moisture resistance is critical.
Cost and Environmental Considerations
XPS comes with a higher price tag, reflecting its advanced moisture resistance and structural advantages. However, its historical use of HFC blowing agents contributes to a greater global warming potential — a concern that has driven the EPA's broader HFC phasedown under the AIM Act, pushing manufacturers toward lower-GWP alternatives. Recycling options remain limited. Despite these drawbacks, the energy savings achieved over its lifespan can help offset some of the environmental concerns. For projects where durability and moisture protection are non-negotiable, XPS proves to be a reliable, long-term investment.
Side-by-Side Comparison: Polyiso vs EPS vs XPS
Taking a closer look at these insulation materials side by side makes it easier to evaluate their strengths and weaknesses. This comparison highlights key factors like energy efficiency, cost, and environmental impact, helping you decide which option best fits your project and budget.
Comparison Table
| Feature | Polyiso | EPS | XPS |
|---|---|---|---|
| Initial R-Value per inch | R-6.0 to R-6.8 | R-3.6 to R-4.2 | R-5.0 to R-5.2 |
| Long-term R-Value | Drops to R-5.5 to R-6.0 | Remains stable | Slightly decreases to R-4.8 to R-5.0 |
| Temperature Performance | Declines in colder conditions | Consistent across temperatures | Consistent across temperatures |
| Moisture Resistance | Moderate (improved with facers) | Low to moderate | Excellent |
| Compressive Strength | High | Low to moderate | High |
| Global Warming Potential | Low to moderate (varies by formulation) | Low to moderate | High (HFC-based blowing agents) |
| Recyclability | Limited | Good | Limited |
| Fire Resistance | Good with facers | Needs flame retardants | Needs flame retardants |
| Cost per sq ft (1-inch) | Moderate | Low | High |
| Best Applications | Roofs, above-grade walls | Interior walls, general insulation | Below grade, high-moisture areas |
Key Takeaways
- Polyiso stands out for its high initial R-value, making it a great choice for projects where space is tight. However, its performance can drop in colder temperatures.
- EPS is a budget-friendly option with stable, consistent performance, though its lower R-value per inch may require thicker layers to meet insulation needs.
- XPS offers excellent moisture resistance and structural strength, making it ideal for below-grade or wet environments, though it's the most expensive option.
When it comes to environmental factors, EPS often has an edge due to its better recyclability, while XPS has a higher environmental impact because of its HFC-based blowing agents. Polyiso and EPS use more eco-friendly formulations, which can be an important consideration for sustainability-focused projects.
Finally, while small cost differences per square foot might seem minor, they can add up significantly in large-scale projects. That said, materials with higher R-values might help offset these upfront costs through long-term energy savings.
Selecting the Right Foam Board for DIY Eco Homes
Picking the right foam board for your DIY eco home project depends on factors like your local climate, the type of building, and the specific application. A thoughtful choice can lead to better energy savings over time.
Key Factors to Consider for DIY Projects
Climate matters first. In colder regions, polyiso can lose its efficiency in extreme temperatures. Instead, consider XPS (extruded polystyrene) or EPS (expanded polystyrene), which maintain consistent performance in the cold.
For hot and humid areas, managing moisture becomes critical. XPS stands out for its excellent moisture resistance, making it a solid choice for exterior applications. While it might cost more upfront, its durability and steady performance in damp conditions make it a worthwhile investment.
The type of building and specific applications also play a big role. For below-grade areas like basements - where moisture and pressure are common - XPS is often recommended due to its ability to resist both. On the other hand, for roof insulation, polyiso works well under moderate conditions, especially when paired with reflective facers. Whether you’re dealing with cathedral ceilings or flat roofs, polyiso can be a reliable option.
When insulating above-grade walls, your choice depends on your priorities:
- Use polyiso for tight spaces where you need a high R-value.
- Opt for EPS if you’re on a budget and can accommodate thicker insulation.
- Choose polyiso or XPS if you need added compressive strength.
Your selection will directly influence the installation process, ensuring long-term efficiency.
Tools and Preparation
Before starting any foam board installation, gather the right tools: a sharp utility knife or insulation knife, a measuring tape, a straight edge, a rubber hand roller, and a cordless impact driver with appropriate screws and washers. For sealing, have foam board tape, a caulk gun, and low-expansion foam sealant on hand. Always wear gloves and safety glasses for protection.
Set up your workspace in a dry, sheltered area. Install when temperatures are above 40 degrees F, as cold conditions can make foam boards brittle. For cutting, score the facing with a utility knife, then snap the board along the scored line. For thicker boards, score both sides for a cleaner break. Organize cut pieces by size and location to keep the process efficient.
Wall Installation Tips
For walls, position your first board at the bottom corner, fitting it snugly against the floor and corner. Secure boards using screws with large washers -- for wood framing, use 3-inch screws spaced every 12 inches along edges and 16 inches in the field. If your climate zone requires a vapor barrier, install it on the warm side of the wall using plastic sheeting or foil-faced barriers, overlapping seams by at least 6 inches.
Arrange boards in a staggered, brick-like pattern so vertical joints do not align. This reduces thermal bridging and improves overall performance. Seal all seams with tape designed for foam boards and press firmly with a rubber roller. Fill gaps larger than 1/4 inch with low-expansion foam sealant, and trim flush once cured. Including weep holes at the bottom of wall assemblies helps manage moisture in humid climates.
Roof Installation Tips
Start at the bottom of the roof and work upward, similar to shingle installation, to promote water drainage. Let the first row overhang the roof edge by about 1/2 inch to direct water into gutters. Position boards to span at least three rafters for even weight distribution.
Use longer fasteners -- typically 4 to 6 inches -- ensuring they penetrate the roof deck by at least 1 inch. Space fasteners every 8 inches along edges and 12 inches in the center. Stagger joints between rows by at least 2 feet to minimize thermal bridging. Apply a continuous bead of construction adhesive to the roof deck before placing each board for added security.
Seal seams with tape rated for roof applications, and cover the foam boards within 30 days with a protective layer such as plywood, OSB, or a membrane roofing system to prevent UV degradation.
Foundation Installation Tips
Ensure foundation walls are clean, dry, and free of standing water before beginning. Apply a waterproof membrane or coating to the foundation wall first if moisture is a concern. Attach boards using concrete screws or below-grade adhesive, pre-drilling into concrete to avoid cracking.
Begin below grade and extend the insulation from the footing to at least 2 feet above ground level for continuous thermal protection. Use 2- to 4-inch-thick boards for foundations, as this area demands greater R-values. Protect exposed insulation above grade with fiber cement board, metal flashing, or UV-rated coatings.
Install proper drainage systems -- such as French drains -- to direct water away from the foundation. When backfilling, use clean fill material and compact soil gradually in 6-inch layers to avoid excess pressure on the boards. Seal the top edge where foundation insulation meets the above-grade wall with flexible sealants that accommodate building movement.
Application Comparison: Walls vs. Roofs vs. Foundations
| Factor | Walls | Roofs | Foundations |
|---|---|---|---|
| Recommended R-Value | R-13 to R-20 | R-30 to R-50 | R-10 to R-15 |
| Typical Thickness | 2 to 3 inches | 4 to 8 inches | 1.5 to 2.5 inches |
| Moisture Resistance Needs | Moderate | High (weather exposure) | Very High (ground contact) |
| Primary Fastening Method | Screws with washers | Fasteners + adhesive | Adhesive + protective board |
| Vapor Barrier Requirements | Climate-dependent | Always on warm side | Moisture membrane essential |
| Expected Lifespan | 25-30 years | 20-25 years | 30+ years |
Climate Adjustments and Ongoing Maintenance
In warmer southern regions, vapor barriers are often unnecessary -- the foil facing on polyiso boards typically provides enough vapor control. Focus on sealing air leaks instead. In mid-climate areas like the mid-Atlantic and lower Midwest, install vapor barriers on the interior (warm) side of walls during colder months, and consider vapor-permeable membranes for mixed climates. In northern states, prioritize continuous exterior insulation to reduce thermal bridging across the entire building envelope — climate-zone-specific R-value targets are published in the ENERGY STAR insulation R-value recommendations and reflect cost-effective levels for each U.S. climate zone. In high-humidity areas such as the Gulf Coast, add weep holes and enhanced drainage systems to manage moisture effectively.
After installation, inspect annually -- check where insulation meets other building materials for gaps, loose tape, or signs of pests. Monitor energy bills during the first year to confirm the insulation is performing as expected. If savings fall short, investigate for air leaks or gaps in the vapor barrier. Plan installations for mild weather when possible, as moderate temperatures help adhesives and sealants cure properly.
Conclusion
Deciding between polyiso, EPS, and XPS foam boards comes down to understanding what each material brings to the table. Each has its own set of advantages, making them suitable for different DIY eco home projects.
Polyiso stands out for its high R-value per inch, making it a strong choice for moderate climates and indoor applications like roof insulation, especially when paired with reflective facers. However, its performance can dip in extremely cold conditions, so it’s less ideal for those environments.
EPS is the most cost-effective option, offering dependable insulation with a consistent R-value across various temperatures. While you might need thicker boards to match the performance of other options, its affordability can make it an attractive choice.
XPS, on the other hand, shines in areas exposed to moisture. Its excellent water resistance and compressive strength make it a go-to option for basements, below-grade installations, and humid climates. While the initial cost is higher, its durability can make it a worthwhile investment.
When it comes to environmental impact, EPS generally has a smaller carbon footprint, while XPS tends to use blowing agents that have a greater effect on climate change. Polyiso falls somewhere in the middle, with newer formulations aiming to reduce its environmental impact. If you're trying to avoid foam altogether for health or off-gassing reasons, our roundup of safer alternatives to spray foam covers cellulose, mineral wool, cork, and hemp options.
Choosing the right foam board for your project depends on factors like your climate, budget, and environmental priorities. Whichever material you go with, proper installation is key to maximizing energy efficiency in your eco-friendly home — DOE-funded resources such as the Building America Solution Center (managed by Pacific Northwest National Laboratory) publish detailed how-to guidance on foam board installation, air sealing, and continuous insulation detailing.
FAQs
Does polyiso foam board lose insulation performance in very cold climates, and how can this issue be addressed?
Polyiso foam board insulation can see a drop in its R-value when temperatures dip well below 75°F, making it less effective in freezing or sub-zero conditions compared to some other insulation options.
One way to address this is by pairing polyiso with materials like EPS (expanded polystyrene) or XPS (extruded polystyrene), which tend to perform more steadily in colder climates. Another approach is to use a thicker layer of polyiso to compensate for the decrease in efficiency in colder environments.
What is the environmental impact of XPS foam board, and are there eco-friendly options for moisture-resistant insulation?
Extruded polystyrene (XPS) foam board is known for its [moisture resistance](/blog/cost-strength-moisture-resistance-plywood-vs-osb-showdown), but its production process comes with a hefty environmental cost. Manufacturing XPS requires significant energy and releases greenhouse gases, which contribute to climate change. On top of that, recycling XPS foam is difficult, meaning much of it ends up in landfills, where it adds to long-term waste problems.
If you're searching for a more eco-friendly alternative, options like [cellulose insulation](/glossary/cellulose-insulation) or natural fiber insulation could be worth exploring. Cellulose insulation is crafted from recycled paper, while natural fibers like wool or hemp offer renewable and biodegradable solutions. Both choices come with a much smaller environmental footprint compared to XPS foam board.
What’s the best way to install foam board insulation for maximum energy efficiency?
To get the most out of your foam board insulation, it’s crucial to install it with a snug fit to prevent any air leaks. Seal all seams, edges, and joints using reliable sealants or tape to ensure an airtight finish. Be sure to stick to the manufacturer’s instructions, as each type of foam board may have its own specific installation needs. When done right, proper installation boosts energy efficiency and helps your insulation last longer while performing better over time.