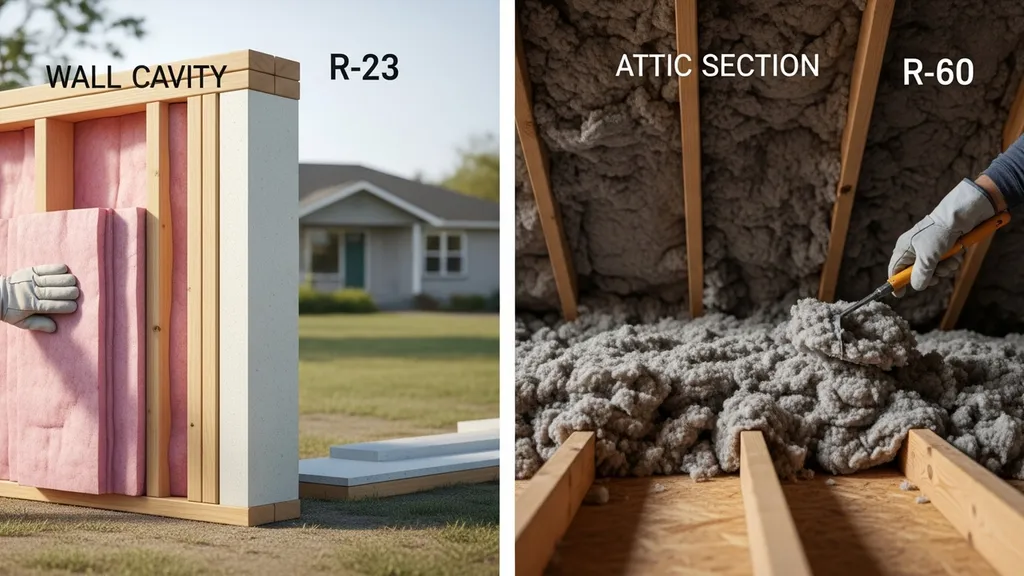
Compare R-23 and R-60: where each R-value makes sense, materials, costs, climate considerations, and practical DIY recommendations.
R-23 vs R-60 Insulation: Which Do You Need?
Choosing between R-23 and R-60 insulation comes down to where heat is being lost, your climate, and how much space and budget you can dedicate to insulation. This article compares R-23 and R-60 by assembly, material, cost implications, and DIY practicality so you can decide whether to upgrade a wall to R-23, pack the attic to R-60, or use a hybrid approach. Read on for practical installation notes, depth estimates, and scenarios that match common DIY projects.
TL;DR:
- Upgrade attic to R-60 when heating-dominated climate zone and attic is primary heat loss path — ~R-60 typically needs 15–20" blown cellulose or 10–12" closed-cell spray foam.
- Target R-23 for exterior walls where a 2x6 cavity plus thin exterior foam or high-density batt gives good thermal performance without large assemblies; often achieved with 5.5" cavity + 1" polyiso or higher-density batts.
- Prioritize air sealing and reducing thermal bridging first; adding continuous exterior insulation can make R-23-level walls perform better than thicker cavity-only assemblies. See the Department of Energy's guide to home insulation for R-value context and material tables.
R-23 vs R-60 Insulation: Quick Overview and Why This Comparison Matters
This comparison frames the practical choices most DIY builders face: should a limited budget and labor go into wall upgrades (aiming for roughly R-23) or into deep attic insulation (R-60)? The trade-offs are spatial (wall cavities vs attic depth), cost per R-value, and the detail work needed for moisture control and air-tightness.
R-value measures thermal resistance: higher R-value slows heat flow. That makes it a useful shorthand, but the whole-assembly performance also depends on thermal bridging (framing, studs), air leakage, and installation quality. The Department of Energy's guide to home insulation explains how recommended R-values change by climate and assembly type; use it when you need official depth tables or manufacturer R-per-inch figures.
Who should care
- Homeowners planning cavity wall construction or wall retrofits and wondering if a 2x6 assembly is enough.
- DIYers preparing an attic retrofit and weighing blown cellulose vs spray foam for R-60 performance.
- Tiny-house builders and low-ceiling projects where space to reach R-60 is limited.
R-23 vs R-60: Quick Comparison Table (TL;DR)
| Feature | R-23 | R-60 |
|---|---|---|
| Typical use | Exterior walls, some floor assemblies | Attics, roof cavities, very cold-climate ceilings |
| Common materials | High-density fiberglass batts, mineral wool, cellulose in deep cavity, closed-cell foam + cavity batt | Blown-in cellulose or fiberglass, stacked batts, open- or closed-cell spray foam, deep rigid foam |
| Approx. thickness (typical R/inch)* | 2x6 cavity (5.5") + 1" polyiso or high-density batt to reach ~R-23; batts ≈ 5.5–7" total | Cellulose ~3.5 R/in → ~17" for R-60; fiberglass blown ~18–20"; closed-cell spray foam ~8–10" at 6–7 R/in to reach R-60 |
| Strengths | Good wall-level performance without massive wall depth; easier to install in new builds | High attic R reduces overall heat loss from roof; big energy savings in cold climates |
| Weaknesses | Susceptible to thermal bridging unless continuous insulation added | Space and cost intensive; diminishing returns past R-60 |
| Best for | Moderate to mixed climates for wall assemblies; new 2x6 wall builds | Cold climates and poorly insulated attics where roof/attic is dominant heat loss |
*R-per-inch numbers are typical ranges; see manufacturer data and the CPUC residential insulation eul study for longevity estimates and retention of R-values over time.
R-23 Insulation: What It Is, How You Achieve It, and Where It Makes Sense
Overview: Common Assemblies That Achieve R-23
R-23 is a common target for exterior walls built with a 2x6 stud cavity. There are several practical ways to reach it:
- High-density batt in a 2x6 cavity: typical batt R-per-inch 3.0–3.7 gives ~R-18 to R-21 in 5.5", so manufacturers offer higher-density batts or slightly deeper cavities to reach R-23.
- Cavity batt + thin exterior continuous foam: pair R-15–R-19 cavity insulation with 1"–2" of polyiso or XPS on the outside to add thermal resistance and reduce thermal bridging.
- Spray foam: closed-cell spray foam at ~6–7 R/inch can reach R-23 in a shallower depth (about 3.5"–4").
Typical materials and R/inch (approximate)
- Fiberglass batt: ~2.9–3.8 R/in
- Mineral wool: ~3.0–3.3 R/in
- Cellulose (dense-packed): ~3.2–3.8 R/in
- Open-cell spray foam: ~3.5 R/in
- Closed-cell spray foam: ~6–7 R/in
For more on how R-23 compares to slightly higher goals, see the deeper comparison in R23 vs R30 details.
Strengths of Choosing R-23
- Fits a common framing depth (2x6 studs) without making walls impractically thick.
- Balances material cost and labor for new builds.
- With continuous exterior insulation, R-23 walls can approach whole-wall performance that equals much higher cavity-only R.
Weaknesses and Limitations
- Studs and other thermal bridges reduce whole-wall effective R. A nominal R-23 wall might perform closer to R-16 when measured across the assembly if thermal bridging is not addressed.
- For retrofit work, adding exterior foam or building a double-stud wall to truly beat thermal bridging is more labor and cost.
Best For: Typical Use Cases
- New-build 2x6 frame walls in mixed or cold climates where code calls for R-values in this range.
- Basements and rim-joist areas where space limits thicker insulation; see basement finishing tips for details on continuity.
- Homeowners who want a compact wall assembly but are willing to add thin continuous insulation for improved performance.
The ENERGY STAR recommended home insulation R-values is a good quick reference for climate-based targets and how R-23-level walls fit into regional recommendations.
R-60 Insulation: What It Is, How You Achieve It, and Where It Makes Sense
Overview: Assemblies That Reach R-60
R-60 is a common attic target in cold climates and for homes aiming at high energy performance in their roof/attic. Typical ways to reach R-60:
- Deep blown-in cellulose: at ~3–3.8 R/inch, achieving R-60 usually requires 15–20 inches of material.
- Blown-in fiberglass: similar depths, sometimes a bit deeper due to lower settled density.
- Stacked batts: layering batts to reach R-60 is possible if the ceiling joist cavity is deep enough or if you build up on top of joists.
- Spray foam (closed-cell): to reach R-60 with closed-cell requires 8–10" of foam at typical 6–7 R/inch — expensive but gives air sealing.
- Combination: spray foam seal at the underside of roof sheathing with additional blown insulation above to reach R-60 more cost-effectively.
For practical depth guidance, see the attic insulation guide which walks through blower equipment, required depths, and calculating coverage from bag counts.
Strengths of Choosing R-60
- In heating-dominated climates, bringing the attic to R-60 cuts attic-to-house heat loss substantially and often pays back faster than equivalent wall upgrades.
- Blown-in materials are straightforward for DIY renters with a blower rental; they can be added without opening walls.
Weaknesses and Practical Limits
- Diminishing returns beyond R-60: each additional R saves less energy per dollar spent.
- Space constraints: older homes with shallow attic access may not physically allow R-60 without raising roof or using high-R-per-inch materials.
- Spray foam to R-60 is costly and has VOC and installation considerations for DIYers.
This video explains the fundamentals:
.The Insulation Institute discusses updated attic recommendations and how R-targets have changed over time; their report is useful when planning deep attic insulation: Uploads.
Other Options Between and Around R-23 and R-60 (hybrids, Exterior Insulation, and Assembly Strategies)
Double-stud and Deep-cavity Wall Options
Double-stud walls or staggered-stud assemblies allow deep cavities (R-30–R-49 and higher) without a continuous exterior foam layer. These can outperform an R-23 cavity wall by greatly reducing thermal bridging; see the double-stud tradeoffs in double-stud wall tradeoffs. Drawbacks: larger wall thickness, more framing, and higher material/labor cost.
Exterior Continuous Insulation
Adding 1"–2" of polyiso or XPS to the outside of a 2x6 wall shifts the whole-wall thermal behavior, making a nominal R-23 assembly behave closer to a higher effective R and reducing cold studs. For how to install continuous insulation on walls, consult the exterior insulation guide and the step-by-step exterior insulation on walls.
Staged Upgrades and Air-sealing-first Strategies
If budget is limited, prioritize air sealing and attic floor coverage before adding thick wall insulation. Air sealing often yields large performance gains for lower cost. For retrofits, topping up attic depth with blown cellulose is usually cheaper per R than tearing open walls. For guidance on mid-range R choices, the R 21 vs R 30 comparison and R 20 vs R 49 breakdown help highlight trade-offs.
Trade-offs to watch
- Moisture control: deeper wall cavities and exterior foam change dew point location. Use vapor control and hygrothermal analysis for cold climates.
- Labor vs material: double-stud walls save on exotic materials but add labor and time.
- Embodied carbon: rigid foams add embodied energy; natural options like cellulose have lower embodied carbon but require dense packing and careful installation.
Cost, Materials, and DIY Installation Considerations for R-23 vs R-60
Material Pros/cons
- Fiberglass batts: low cost, DIY-friendly for new construction, R/in ~2.9–3.8. Vulnerable to gaps and compression.
- Cellulose (dense-packed or blown): good settled R/in ~3.2–3.8, low embodied carbon, excellent retrofit option for attics and walls (dense-packed). Requires blower or contractor.
- Mineral wool: good fire resistance, moisture tolerance, R/in ~3.0–3.3, heavier and pricier than fiberglass.
- Spray foam: closed-cell gives air barrier + high R/in (~6–7); open-cell less R/in and not a vapor barrier. Spray foam has health and VOC concerns during installation and is often best left to pros.
- Rigid foam (polyiso, XPS): high R/in for polyiso, good for continuous exterior insulation to reduce bridging, but added cost and detailing required at windows and corners.
For a detailed comparison of blown and spray materials, see spray foam vs cellulose. For eco alternatives like cork, see how to use cork.
Installation Difficulty and Safety Tips for Diyers
- Air sealing first: seal attic plane and rim joists before insulating. Use low-expansion foam, gaskets, and caulk; tools and materials listed in air-sealing tools list.
- Blown-in insulation: rent a blower for attic projects; wear NIOSH-rated respirator, gloves, and eye protection. Work in sections and maintain ventilation.
- Spray foam: bulk kits are available, but professional application reduces risk of poor cure or overspray. DIYers should read manufacturer instructions and use full PPE.
- Batt installation: avoid compressing batts; cut to fit and keep insulation flush against cavity without gaps.
Long-term Performance, Settling, and Maintenance
Research indicates many insulation types retain most of their R-value for decades, but settling can reduce effective R in blown materials if not installed at the right density. The CPUC Residential Insulation EUL study provides data on effective useful life and retention: Api. Follow recommended densities for cellulose and check attic depth annually—additions are common after settling or when you upgrade HVAC.
Estimating cost
- Don’t rely on fixed price quotes here; calculate material quantities (area × target depth/R-per-inch) then multiply by local material cost and any rental or contractor fees. For small structures, use the shed insulation calculator to estimate materials.
Climate, Code, and Performance: When R-23 is Enough and When You Need R-60
How Climate Zone Affects Optimal R-value Choice
Colder climate zones need higher attic and wall R-values. Codes (IECC-based) set minimums by climate zone; best practice targets often exceed code for improved comfort and energy savings. For authoritative guidance on recommended R-values by region, consult the Department of Energy's guide to home insulation and regional code references.
Code vs Best-practice vs Passive-house Targets
- Code minimums are the baseline for safety and energy efficiency; they vary by jurisdiction and update over time.
- Best-practice and net-zero targets generally push insulation values higher than code — for example, passive-house standards target much higher envelope performance than R-23 walls or R-60 attics in many climates.
- Passive-house or highly insulated assemblies also emphasize airtightness, continuous insulation, and thermal bridge mitigation, not just cavity R.
Moisture and Ventilation Implications by Assembly
- Ventilated attic with R-60 at the attic floor: maintain soffit and ridge vents as appropriate; insulation should not block ventilation paths.
- Unvented roof assemblies insulated at the roof deck with spray foam change moisture dynamics; use manufacturer hygrothermal guidance to avoid condensation in roof assemblies.
- Walls with exterior continuous insulation shift condensation risk outward; flashing and detailing at windows/doors become critical.
When in doubt, reference government or academic guidance for hygrothermal design and local code office resources before changing assembly type.
Which Should You Choose? Scenario-based Recommendations for DIY Builders
Scenario A: New Build in Cold Climate — Priority Checklist
- Aim for R-60 in attic and at least R-23 in exterior walls, but consider R-30–R-40 walls with continuous exterior foam if budget allows.
- Prioritize airtightness testing (blower door) and fix major leaks before finishing insulation.
- Use closed-cell spray foam only where budget and ventilation control make sense; otherwise use cavity batt + exterior polyiso for a balanced assembly.
Scenario B: Retrofit in Mild Climate with Limited Budget
- Start with attic air sealing and add blown-in cellulose to reach R-38–R-49; full R-60 may be low priority if marginal savings are small.
- Upgrade rim joists and band joists; these are common leak points.
- Consider adding 1" exterior foam if re-siding is already planned — raises effective wall R cheaply.
Scenario C: Tiny House or Low-ceiling Attic
- Space constraints make high R/inch materials attractive: closed-cell spray foam can deliver high R in shallow cavities but check costs and ventilation needs.
- For tiny houses, see best tiny-house insulation for options tailored to low-clearance builds.
Quick Decision Flowchart (text-based)
- Is the house in a heating-dominated cold climate? If yes → prioritize attic to R-60.
- Is the primary heat loss through walls (large single-pane glazing, poor wall insulation)? If yes → consider raising wall R to R-23 or higher and adding continuous exterior insulation.
- Is budget or ceiling height limited? If yes → choose higher R/inch materials (closed-cell spray foam) or staged attic upgrades.
- Always: perform air sealing and evaluate thermal bridging before massive insulation spends.
If you want to compare a very low wall R versus a high attic R trade-off, see R 15 vs R 60 comparison.
The Bottom Line
For most DIY builders, R-23 is a sensible wall target in new 2x6 construction, while R-60 is the common attic target for cold climates where attic heat loss dominates. Prioritize air sealing and thermal-bridge reduction; choose blown-in cellulose for cost-effective attic R-60 or combine cavity insulation with thin continuous exterior foam to get better whole-wall performance in R-23 assemblies.
Frequently Asked Questions
Is R-23 the same as a 2x6 wall?
R-23 is often the nominal target for a 2x6 wall, but it's not automatic. A standard 2x6 cavity filled with typical fiberglass batts usually yields around R-18 to R-21. To reach R-23 you either need higher-density batts, a slightly deeper cavity, or add continuous exterior insulation such as 1" of polyiso. Also factor in thermal bridging — the whole-wall effective R will be lower than the cavity R unless you reduce framing heat flow.
Can I get R-60 with spray foam?
Yes. Closed-cell spray foam provides roughly 6–7 R per inch, so reaching R-60 would require approximately 8–10 inches of foam. That delivers air sealing and high R in shallow spaces but is expensive and has installation and safety considerations. A common cost-effective hybrid is to spray 1–2 inches for air control, then top up with blown-in cellulose to reach R-60.
Which gives more heating savings: insulating walls to R-23 or attic to R-60?
It depends on where a house loses most heat. In many older homes, attic heat loss is larger than wall loss, so moving from low attic insulation to R-60 often yields faster payback than raising wall R from low to R-23. That said, if walls have lots of thermal bridging or large windows, wall upgrades combined with continuous exterior insulation can be more impactful. A simple diagnostic is an energy audit or infrared scan to see where heat is escaping.
How does thermal bridging change the effective R-value?
Thermal bridging from studs, joists, and fasteners lowers the assembly's effective R compared with the nominal cavity R. For example, a cavity R-23 wall with wood studs may perform like R-16–R-18 across the whole wall. Continuous exterior insulation reduces the impact of studs by shifting the thermal path outward, so a modest exterior foam layer can increase whole-wall effective R significantly.
Do I need to upgrade ventilation when increasing attic insulation?
Not necessarily, but you must follow proper ventilation and sealing strategy. If insulating the attic floor in a ventilated attic, keep soffit-to-ridge venting clear before adding insulation. If converting to an unvented, conditioned attic by insulating the roof deck with spray foam or rigid foam, adjust ventilation strategy and roof details accordingly. See our attic insulation guide for step-by-step coverage of vented vs unvented options.