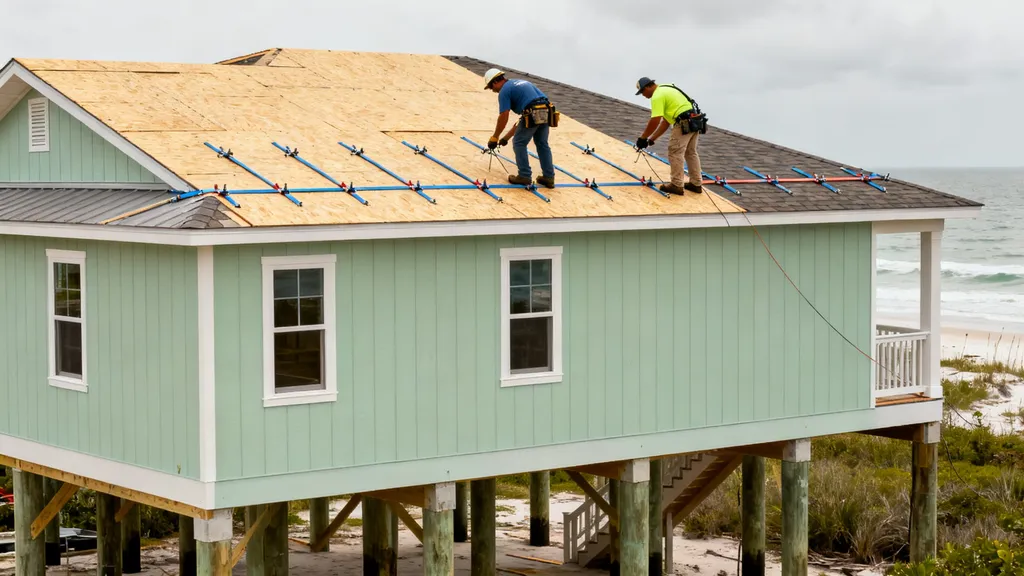
Practical guide to designing and building hurricane resistant coastal homes — foundations, connections, roofing, moisture control, and budget-friendly resilience.
Hurricane Resistant Building: Coastal Construction
Coastal homeowners and owner-builders need practical, buildable strategies to make homes truly hurricane resistant — not just weatherproof. This guide explains which hazards matter most on the coast (wind, storm surge, flooding, and windborne debris), how those hazards drive design and material choices, and the cost-effective sequence of upgrades a budget-conscious DIYer can implement to improve safety and speed recovery after a storm.
TL;DR:
- Focus first on elevation and a continuous load path: raise the living area above expected surge and secure roof-to-wall-to-foundation connections.
- Protect openings and utilities: install impact-rated glazing or certified shutters, and place electrical/mechanical systems above surge/freeboard levels.
- Prepare for recovery: add a basic solar + battery backup sized for critical loads, protected water storage, and corrosion-resistant hardware.
Understanding Coastal Hurricane Hazards and Design Criteria
Coastal sites present a mix of threats: extreme winds, storm surge, coastal flooding, wave action, and windborne debris. Each affects different parts of the house. Wind creates uplift and lateral loads on roofs and walls; surge and waves damage foundations and lower finishes; debris causes impact failures at openings. Design decisions must respond to this combined hazard environment.
Hurricane categories map to approximate wind speed ranges and give a sense of pressure and uplift potential, but designers use published wind speed maps and local code provisions rather than category alone. Research and observational programs continue to refine storm behavior; for recent findings about hurricane behavior and data collection, see NOAA's operational summary of 2024 research efforts (AOML summary of 2024 hurricane research). For design guidance, industry standards such as ASCE 7 (wind provisions), FEMA flood maps and V-zone guidance, plus the ICC/IBC family of codes are primary references for load criteria and floodplain treatment. These documents determine required design wind pressures, flood elevations, and required materials in coastal jurisdictions.
Practical implications:
- Elevation is the most direct defense against surge and flood damage.
- Wind-resistant connections and continuous load path reduce the risk of roof loss.
- Openings (windows/doors) are critical failure points; once glazing fails, internal pressurization multiplies structural loads.
- Corrosion, UV, and humidity influence material selection; coastal exposures accelerate fastener and connector degradation.
Planning, Site Selection, Permits, and Insurance Considerations for Coastal Builds
Start site selection with maps and records. Use FEMA flood maps to verify flood zone and Base Flood Elevation (BFE); check any local erosion or bluff retreat maps for long-term risk. If possible, choose lots with natural elevation or room to raise the building pad. Consider access routes that remain passable after a storm if evacuation or post-event access is required.
Permitting follows local adoption of model codes. Typical steps for a DIY owner-builder:
- Confirm the property's flood zone and request elevation certificate requirements from the local permit office.
- Identify V-zone or coastal A zone designations; these often require elevated foundations, breakaway walls, or engineered piling systems.
- Submit foundation and structural plans showing freeboard and load path details; many jurisdictions mandate engineered designs for pilings or pier foundations.
Industry analysis using historical loss data shows that insurers value certified mitigation measures. Examples include hurricane straps installed per manufacturer specs, impact-rated glazing, and elevation above BFE; these may qualify for premium credits. Research by NIST on improved design practices and simulation tools underscores the value of engineered solutions for severe storms (NIST research on hurricane-resistant design). Confirm prospective mitigation credits with your insurer or agent before investing.
Action checklist (permits and site readiness):
- Obtain an elevation certificate or request FEMA maps for your lot.
- Confirm whether the property falls in a V-zone and the local freeboard requirement.
- Review setback and coastal construction requirements with the planning office.
- For step-by-step permit process guidance aimed at DIY builders, see the site's building permits guide.
Foundation and Elevated Construction Strategies for Hurricane Resistant Coastal Construction
Elevation reduces direct surge damage and buys time for evacuation and recovery. Common elevated foundation solutions include driven piles, drilled piers (caissons), and pier-and-beam systems with elevated slabs. Each has trade-offs.
Pile foundations
- Pros: Deep bearing capacity, good for scour-prone sites and high wave loads.
- Cons: Typically require heavy equipment and engineered design; not usually DIY-friendly.
Drilled piers (caissons)
- Pros: Suitable where driven piles are impractical; provide deep anchorage.
- Cons: Require geotechnical input and construction rigs.
Pier-and-beam (DIY-friendlier)
- Pros: Works for modest elevations, accessible for experienced DIYers using local contractors for concrete piers and beams.
- Cons: Limited where wave loads and scour are severe; underfloor needs design to minimize debris impact and uplift.
Elevated slab-on-grade with piers
- Pros: Lower cost on sites with good soils and moderate exposure.
- Cons: Not adequate in high-surge, high-wave environments.
Designing for scour and debris:
- Specify deeper embedment and cross-bracing where scour or waves are expected.
- Use closed-cell foam or concrete collars around piles where required by code.
- Place ground-level finishes and utilities as sacrificial or easily replaceable elements.
Flood vents, freeboard and access:
- Install engineered flood vents where required to allow hydrostatic equalization and reduce wall loads.
- Provide code-required freeboard above BFE—commonly 1–3 feet higher—check local rules. This extra height lowers the likelihood of water reaching finishes and utilities.
- Design sturdy, corrosion-resistant access stairs with non-slip treads and quick-detach handrails if needed for storm removal and storage.
Material and connector choices:
- Use hot-dip galvanized or stainless-steel connectors and fasteners to resist salt corrosion.
- For detailed how-to on elevating a structure and design options, consult the site's article on elevated construction.
When to hire a pro:
- Engage a geotechnical or structural engineer for weak soils, high scour risk, driving piles, or when wave loads are likely to govern design.
Wind-resistant Structural Systems and Connections (embed Video)
A continuous load path ties the roof through walls and floor diaphragms down to the foundation to resist uplift and lateral forces. This means properly sized roof-to-wall and wall-to-foundation connectors, nailed and fastened per manufacturer and code guidance, and diaphragms that transfer shear loads to designated shear walls or braced frames.
Continuous Load Path: Roof to Foundation Basics
- Roof sheathing and nailing patterns create diaphragm action; use the sheathing thickness and nail spacing given by code and manufacturer.
- Roof trusses or rafters must be anchored to top plates with approved connectors sized for uplift.
- Wall-to-foundation anchors or holdowns transfer overturning forces to the foundation.
Roof-to-wall, Wall-to-foundation Connector Types
Below is an illustrative comparison table of common connector types. Capacities are illustrative; check manufacturer datasheets for project-specific values.
| Connector type | Typical application | Installation notes | Relative uplift capacity (illustrative) |
|---|---|---|---|
| Hurricane straps (S-shaped) | Tie rafters/trusses to top plate | Fasten with specified nails; wrap to rafter and plate | Medium |
| Tie-down connectors | Truss/rafter to top plate | Use per manufacturer, some require specific screw types | Medium-High |
| Holdowns (cast) | Shear wall to foundation | Anchor to concrete with epoxy or mechanical bolts | High |
| Metal clips (joist hangers) | Floor joist to beam | Use corrosion-resistant fasteners; seat joist fully | Low-Medium |
Corrosion in coastal settings makes fastener choice critical. Use stainless or hot-dip galvanized nails, screws, and connectors rated for marine or coastal exposure. For discussion on steel options and durable sections, see the site's piece on recycled steel.
Viewers will see step-by-step placement of straps, fastener patterns, and spacing—useful to complement the specifications above. Always verify connector capacity with manufacturer datasheets and conform to local code.
Shear Walls, Diaphragms, and Bracing
- Locate shear walls to form a balanced lateral-resistance system; avoid leaving large unsupported wall areas.
- Use structural sheathing (OSB or plywood) with proper nailing schedules for diaphragm strength.
- In high-wind regions, consider continuous sheathing or structural panels at corners and along long walls.
Installation quality matters: correct fastener type, spacing, and the use of specified washers or holdown bolts are as important as connector selection.
Roofing, Cladding, and Window Protection for High Winds
Roof shape and attachment method strongly influence uplift. Hip roofs have better wind performance than simple gable roofs because sloping on all sides reduces concentrated uplift at ridge ends. Minimize large overhangs and ensure that any overhangs are tied down with blocking and connectors.
Choosing Wind-resistant Roof Shapes and Materials
- Steeper roof pitches can shed wind differently; consult local code or an engineer for recommendations specific to design wind speeds.
- Metal roofs, when properly fastened, perform well in high winds and shedding rain; standing seam metal with concealed fasteners reduces tear-off risk.
- Asphalt shingles with high-wind ratings (look for ASTM test references) and mechanically fastened underlayment can be cost-effective.
For step-by-step attachment, fastener placement, and sheathing strategies, review the site's roofing installation guide.
Siding and Exterior Cladding Resistant to Wind and Salt
Durable cladding options include fiber cement, properly treated and painted wood, and coated metal panels. Consider:
- Use of through-fastening patterns specified by the cladding maker.
- A drainage plane (WRB) behind cladding to shed water and reduce wetting of framing.
- Corrosion-resistant fasteners and flashings in stainless or hot-dip galvanized finishes.
Window and Door Protection Options (comparison Table)
Select based on budget, DIY skill, and code/insurer requirements.
| Option | Pros | Cons | Typical DIY difficulty |
|---|---|---|---|
| Plywood storm panels | Low cost, quick to install | Labor/storage heavy, slower to deploy | Medium |
| Roll-down metal shutters | Fast deployment, durable | Higher upfront cost, professional install often | High |
| Impact-rated glazing | Always-on protection, no deployment needed | Highest cost, replacement if damaged | Low (installation by pro) |
Plywood is cost-effective for seasonal protection but requires storage and pre-measured panels. Impact-rated glazing removes the need for shutters and reduces insurance concerns, but initial costs are higher. Weather.gov provides homeowner preparation steps that align with these options (NOAA/NWS advice on hurricane prep).
Water Intrusion, Moisture Control, and Storm Surge Mitigation
Sealing the envelope prevents water-driven damage and mold. A clear sequence of flashing and weather-resistive barrier (WRB) installation reduces the chance of water tracking into assemblies.
Envelope Detailing, Flashing, and Sealing Penetrations
- Install a continuous WRB such as housewrap with taped seams before siding; integrate window and door flashing per manufacturer steps: sill flashing, jamb flashing, and head flashing in that order.
- Flash roof-to-wall intersections with step flashing and counterflashing. Sequence matters: apply underlayment and flashing so water sheds outward.
- Seal penetrations (vent pipes, HVAC penetrations) with ducted flashing and high-quality sealants rated for UV and salt exposure.
Drainage, Site Grading, and Landscaping to Reduce Water Entry
- Grade the building pad to shed surface water away from foundations.
- Provide clear stormwater paths so overflow routes avoid directing water toward lower openings.
- Use non-porous or sacrificial materials at ground level (e.g., pressure-treated kickers) that can tolerate inundation.
Material Selection for Saltwater Exposure and Corrosion Control
- Use closed-cell exterior materials where possible to limit moisture uptake.
- Choose fasteners, connectors, and metal flashings specified for marine or coastal use—stainless or hot-dip galvanized.
- Place mechanicals and electrical devices above anticipated surge and freeboard levels. For basic water system guidance for backups and pumps, see the site's plumbing basics.
Storm surge mitigation also includes community-scale actions and site-level features such as vegetated dunes or engineered seawalls; these can be costly and may require permits.
Off-grid and Resilient Systems for Post-storm Recovery
Design resilient systems with a tiered approach: protect critical loads first, then add conveniences.
Backup Power: Solar + Battery Layouts for Fast Recovery
- Prioritize circuits for life-safety and recovery: refrigerator/freezer, basic lighting, communications, pump for potable water.
- An illustrative DIY-friendly backup: a small solar array (1–3 kW) with a battery bank sized to run critical loads for 12–24 hours. This is an example; sizing must match actual load and use patterns and is not a prescriptive value.
- Mount panels with wind-rated, low-profile racking and use reinforced anchors. Consider microinverters or string inverters with rapid-connect transfer switches for simplified islanding.
Water Supply Options: Wells, Cisterns, and Potable Backup
- Elevated cisterns or cisterns in protected enclosures help avoid contamination and damage during surge.
- Include basic filtration and treatment (UV or cartridge filters) for post-storm disinfection.
- If using a well, plan for generator or battery power to run the well pump, and secure the wellhead against flooding and debris.
Storing Supplies and Designing for Maintainability After Storms
- Store spare fasteners, connectors, and a basic roof repair kit (tarp, straps, nails) in a dry, elevated location.
- Design access to systems for quick inspection and repair; avoid burying shutoffs in inaccessible places.
- Balance cost and recoverability: a modest investment in a battery and a small generator will shorten recovery time materially compared with no backup.
Practical Checklist: Key Points for Hurricane Resistant Coastal Construction
- Verify flood zone: Confirm FEMA flood zone and BFE for your lot.
- Document elevation: Obtain an elevation certificate if required.
- Plan freeboard: Add local freeboard requirements to foundation plans.
- Site grading: Grade site to shed water away from foundation.
- Choose elevation method: Select pile, pier, or pier-and-beam based on soils and exposure.
- Specify corrosion control: Use stainless or hot-dip galvanized connectors and fasteners.
- Provide continuous load path: Detail straps, holdowns, and diaphragm connections from roof to foundation.
- Secure the roof: Use wind-rated roofing systems with specified fastener patterns.
- Protect openings: Install impact glazing or certified shutters for windows and doors.
- Install flood vents: Use engineered vents where code requires hydrostatic equalization.
- Elevate utilities: Place electrical panels, HVAC, and water heaters above surge/freeboard.
- Design accessible underfloor: Keep underfloor open and sacrificial to reduce damage.
- Provide backup power: Size a basic solar + battery system for critical loads.
- Secure water backup: Add cistern or elevated potable storage with filtration.
- Prepare recovery kit: Store tarps, connectors, spare fasteners, and documentation in an elevated spot.
- Get permits early: Start with local planning and permit review before foundation work.
- Confirm insurance credits: Discuss mitigation measures with your insurer ahead of construction.
- Plan for maintenance: Schedule inspections of coatings, fasteners, and seals annually.
- Engage pros for hazards: Hire engineers for piles, scour, or complex wave loading.
- Record everything: Keep photos and documents for permits and insurance claims.
The Bottom Line: Prioritizing Measures for Budget-conscious DIY Builders
For most coastal DIY projects, the biggest resilience gains come from elevating the living area, installing a continuous load path with properly specified hurricane straps and holdowns, and protecting openings. Start by securing permits and documenting flood elevation, then prioritize elevating utilities, tying down the roof, and adding window protection. When foundation conditions, scour risk, or high wave loads are at play, hire a structural or geotechnical professional to design the foundation. For budgeting frameworks that weigh performance against cost, consult the site's net zero cost planning.
Video: AMANDA W/bonus Room. Certified Green Hurricane Resistant Home Built By
For a visual walkthrough of these concepts, check out this helpful video:
Frequently Asked Questions
How high should I elevate a coastal home to be hurricane resistant?
There is no single answer because required elevation depends on the property's Base Flood Elevation (BFE), local freeboard rules, and the expected storm surge/flood history. Many jurisdictions mandate 1–3 feet of freeboard above the BFE; some coastal V-zones require even higher elevation and pile foundations. The short next step is to obtain your lot's FEMA flood map and talk to the local permit office about minimum elevation. See the foundation and elevated construction section for design options and the action checklist for permit items.
Do I need impact windows or are shutters enough?
Both are valid strategies. Impact-rated glazing provides always-on protection and removes the labor and storage burden of removable shutters, but it carries a higher upfront cost. Permanent metal shutters or well-built roll-down shutters offer fast deployment and durability, while plywood is the lowest-cost seasonal option. Confirm insurer requirements and local code for opening protection, and weigh initial cost against deployment time and maintenance needs. See the window and door protection comparison table for pros and cons.
Can I DIY install hurricane straps and connectors?
Experienced DIYers can install many strap types and clips when they follow manufacturer installation details and local code requirements. Proper fastener type, spacing, and seat conditions are critical. For elevated foundations, piles, or where uplift capacities govern, a licensed engineer may need to design the connectors' capacities and locations. Watch a step-by-step installation tutorial like the recommended video in the wind-resistant section and always verify connector capacity with manufacturer datasheets.
How do I protect electrical and mechanical systems from storm surge?
Elevate electrical panels, HVAC equipment, water heaters, and fuel systems above the expected surge plus freeboard. If elevation is not feasible, protect equipment in water-tight enclosures or place quick-disconnects to move critical components before a storm. For water supply, use elevated cisterns or store potable water in protected containers and plan for power to run pumps after a storm. Consult the water intrusion and off-grid sections for layout tips and the plumbing basics article for pump and cistern fundamentals.
Will building hurricane resistant improve my insurance premiums?
Insurers commonly offer mitigation credits for certified measures such as elevated living areas, impact-rated openings, and professionally installed roof-to-wall connectors. The exact discount varies by insurer and region. Before investing, document the planned mitigations and discuss them with your agent to confirm which measures will yield premium reductions. Also retain permits and certification documents after construction to support claims for credits.