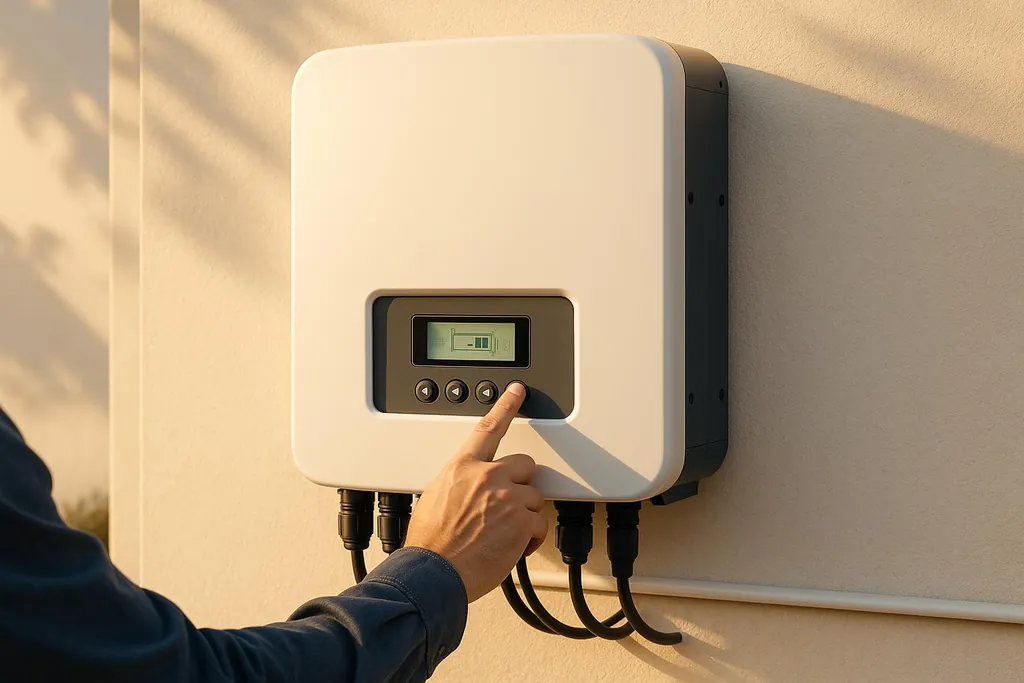
Learn about common solar inverter issues, their causes, and practical fixes to maintain optimal energy production in your solar system.
5 Common Solar Inverter Issues and Fixes
Solar inverters are the backbone of your solar energy system, but they often face problems that can disrupt energy production. Here’s what you need to know:
- No Power Output: Often caused by tripped breakers, blown fuses, or loose cables. Start by checking connections and resetting the system.
- Won’t Turn On: Could be due to low DC voltage, wiring issues, or internal component failures. Inspect breakers and wiring, but call a professional for internal issues.
- Low Power Output: Shading, dirty panels, or misconfigured MPPT settings are common culprits. Clean panels, check settings, and monitor grid voltage.
- Overheating or Shutdowns: Poor ventilation, dust buildup, or excessive load can overheat your inverter. Improve airflow, clean fans, and ensure proper installation.
- Repeated Tripping or Fault Codes: Often linked to loose connections, overloads, or grid instability. Tighten connections, reset the system, and update firmware.
Key takeaway: Regular maintenance and early troubleshooting can prevent costly repairs. For complex issues, always consult a professional. Stay safe by turning off power before inspecting your system.
Decoding Solar Inverter Errors: What Do They Mean? | Solar inverter fault codes | solar inverter
No Power Output
When your inverter's display is dark and there is no power being generated, the issue is often straightforward and can usually be resolved without too much hassle.
Common Causes
One of the most frequent reasons for total power loss is power supply disruptions. This can happen when circuit breakers trip due to electrical surges or overloads, cutting off power to your system. Similarly, a blown fuse in the DC or AC disconnect switches can completely halt power flow.
Another common issue is cable connection problems. Loose or disconnected cables - whether they’re the DC cables between your solar panels and the inverter or the AC cables linking the inverter to your home’s electrical panel - can stop power transmission.
Grid instability or disconnection is another potential culprit. Modern inverters are equipped with safety features (anti-islanding protection) that automatically disconnect them from an unstable grid to protect both your equipment and utility workers, as required by IEEE Standard 1547 for interconnecting distributed energy resources.
For those using hybrid inverter systems, problems like battery failures or malfunctions in the MPPT (Maximum Power Point Tracking) controller can also result in no power output. These components, which manage the DC-to-AC conversion process central to every PV system, may require additional checks or specialized troubleshooting. A poorly built battery cabinet is a common culprit too — see our guide to a proper DIY battery enclosure for the thermal and ventilation specs that keep packs from cycling early.
Lastly, low solar panel output - often caused by extremely cloudy weather - can lead to insufficient input power. However, this is usually temporary and resolves once conditions improve.
Fortunately, these problems can often be addressed with some basic checks and resets.
Fixes
Start by examining the most accessible parts of your system. Check the DC and AC disconnect circuit breakers and fuses for any that have tripped or blown. These are among the most common and easiest fixes to restore power.
> "Start by inspecting your circuit breakers or fuses for any that have tripped or blown - a common culprit behind power issues." > > - Easun Power Factory Store
Next, measure the DC voltage at the inverter. On a sunny day, the voltage reading should align with your system’s specifications. If the reading is unusually low or absent, the issue might lie with your solar panels or the cables connecting them.
Carefully secure any loose cable connections, but make sure to turn off the system's DC and AC disconnects before touching any wiring.
If the inverter’s display is working but no power is being generated, try a system restart. Turn off both the DC and AC disconnects, wait 5–10 minutes, and then reboot the system by turning on the DC disconnect first, followed by the AC disconnect. This simple reset can often resolve temporary glitches.
If none of these steps work, it may be time to call in a professional.
When to call a professional: If you’ve checked all connections, verified panel output, and performed a reset without success, it’s best to consult a certified technician. Issues like internal component failures, complex grid interactions, or anything requiring the inverter case to be opened should only be handled by a professional. Opening the inverter casing yourself could be dangerous and may void your warranty.
Inverter Won't Turn On
If your solar inverter isn't showing any signs of life - no lights, no startup sounds, no display activity - it’s likely experiencing a complete startup failure. Figuring out what’s causing this issue requires a step-by-step approach. Here’s a breakdown of the most common reasons and how to address them.
Common Causes
- Electrical supply issues: Problems with the overall power supply can prevent your inverter from starting, just like they can cause total power loss. These issues often stem from electrical or environmental factors.
- Low DC voltage: Your inverter needs a certain level of DC voltage from the solar panels to start up. If the voltage drops below the minimum threshold - like during early mornings, late evenings, or on very cloudy days - the inverter won’t initialize.
- Faulty wiring: Loose or damaged connections at critical points can disrupt the power flow necessary for startup.
- Internal component failures: Problems with internal parts, such as the power supply, control board, or safety relays, can lead to a complete shutdown. Diagnosing these issues often requires professional expertise.
- Extreme temperatures: Inverters are sensitive to their surroundings. If the ambient temperature is too high or too low, the inverter might shut down as a protective measure and won’t restart until conditions improve.
How to Fix It
Here’s how you can troubleshoot and possibly resolve the problem:
- Check breakers and fuses: Make sure none of the breakers or fuses connected to the inverter circuit have tripped or blown. Next, measure the DC voltage at the inverter’s input terminals. On a sunny day, the voltage should match the specifications in the inverter’s manual.
- Inspect wiring and connectors: Look for loose, corroded, or damaged connections, especially where the solar panels connect to the inverter. Always disconnect the power before handling any electrical components to ensure safety.
- Perform a reset: If your inverter has a reset option, turn it off, wait for the internal capacitors to discharge, and then restart it. Follow the reset instructions provided in the user manual carefully.
- Evaluate environmental conditions: Check if the inverter is exposed to direct sunlight or poor ventilation, as these factors can cause overheating. If necessary, relocate the inverter or add shading to improve its operating conditions.
- Know when to call a professional: If everything checks out - voltage readings are normal, wiring is secure, and environmental factors are addressed - the issue might be with the inverter’s internal components. Avoid attempting repairs yourself. Instead, contact a qualified technician for a detailed inspection and repair.
Low Power Output or Grid Fault Error
If your solar inverter is displaying grid fault messages or showing low power output, the problem could be tied to issues with the solar panels or the utility grid. These problems are often indicated by error codes on the inverter display or through performance monitoring apps.
Common Issues
Panel shading and obstructions can drastically reduce power output when sunlight is blocked by nearby objects or debris. Even partial shading on just one panel can impact the performance of the entire system, especially if the panels are connected in series. Overgrown trees, dirt buildup, or snow are frequent culprits.
MPPT (Maximum Power Point Tracking) settings may become misconfigured after system updates or maintenance. Incorrect settings can prevent the system from operating efficiently, leading to reduced power generation.
Grid voltage fluctuations can cause fault codes or even trigger the inverter's protective shutdown if the voltage moves outside the acceptable range for residential systems. In the U.S., most residential inverters are designed to handle specific voltage ranges defined by IEEE 1547, but significant deviations can cause issues.
Utility grid instability is another factor that can lead to inverter shutdowns. Modern smart inverters continuously monitor grid conditions and will disconnect if they detect irregularities like voltage spikes, frequency changes, or other anomalies.
Addressing these problems quickly can help restore your inverter’s performance to normal levels.
How to Fix
Resolving these issues often starts with a few simple checks and adjustments.
- Inspect your panels visually to ensure there are no obstructions like leaves, dirt, or snow. If the panels are installed on a steep roof or are difficult to access, hiring a professional cleaning service is a safer option.
- Monitor system performance using your inverter’s display or app. Check for patterns in power output and compare current performance with historical data under similar weather conditions.
- Review MPPT settings through the inverter’s configuration menu. Before making any changes, document the current settings. If needed, many inverters offer a "factory reset" option to restore default settings and resolve configuration errors.
- Check grid voltage using a multimeter during different times of the day. Record the readings, especially if the voltage frequently falls outside the expected residential range.
- Contact your utility provider if you suspect grid-related problems. Share specific error codes from your inverter, note when the issues occur, and provide any voltage measurements you’ve recorded.
- Reset your inverter system following the shutdown and restart instructions in your owner’s manual. This allows the system to complete its startup sequence and reconnect to the grid properly.
Taking these steps not only helps resolve the immediate issue but also supports better long-term maintenance of your inverter system.
Inverter Overheating or Frequent Shutdowns
When your solar inverter frequently shuts down or displays temperature warnings, it's not just an inconvenience - it’s a built-in safety mechanism designed to protect the system from serious damage. Understanding the reasons behind overheating and addressing them promptly can keep your system running smoothly and help you avoid expensive repairs.
Causes of Overheating
Several factors can lead to your inverter overheating:
- Direct sunlight exposure: Inverters exposed to direct sunlight can run significantly hotter than the surrounding air - by as much as 18°F to 36°F . This added heat strains the cooling system, increasing the risk of overheating.
- Poor ventilation: Without adequate airflow, heat accumulates around the inverter. Insufficient clearance or a cramped installation space can trap hot air, especially during hot summer months.
- Dust and debris buildup: Dust clogging ventilation openings or cooling fans reduces the system's ability to dissipate heat. In dusty environments, this buildup can occur quickly, forming an insulating layer that worsens the problem.
- Excessive system load: Running the inverter beyond its rated capacity forces internal components to work harder, generating more heat than the cooling system can handle.
- Internal component wear and tear: Over time, high operating temperatures - especially those exceeding 248°F - can degrade internal components, increasing the likelihood of short circuits or even fire hazards . As components fail, the system may generate even more heat, creating a damaging feedback loop.
> "Inverters that are exposed to direct sunlight or enclosed in poorly ventilated areas are more prone to these issues. Relocation or better airflow can sometimes solve recurring warning light problems."
These issues can be addressed with some straightforward steps.
Steps to Resolve
Here’s how you can tackle overheating and prevent future issues:
- Inspect the installation location: Ensure your inverter is installed in a shaded, well-ventilated area with at least 12 inches of clearance on all sides for proper airflow . If it’s exposed to direct sunlight, consider adding shading or a protective cover.
- Clean ventilation openings and fans regularly: Dust and debris can accumulate quickly, especially in dry or dusty environments. Use a soft brush or compressed air every three months to keep cooling fans and grills clean and functional.
- Monitor system load: Check your inverter’s display or monitoring app to ensure it’s not consistently running near its maximum capacity. If you’ve added solar panels or increased energy usage recently, your inverter might be overworked.
- Restart the inverter: Perform a restart by turning off the AC breaker, followed by the DC isolator. Wait 2–5 minutes, then power it back on - starting with the DC switch and then the AC breaker. This can help the system cool down and reset .
- Clear obstructions: Remove any nearby debris, vegetation, or items that might block airflow around the inverter. Even small obstructions can significantly impact cooling efficiency.
- Consider professional relocation: If overheating persists, consult an installer to evaluate whether the current location is suitable. Moving the inverter to a cooler, better-ventilated spot might be necessary.
> "An improperly installed inverter - such as one placed in direct sun or poorly ventilated - will run hotter and wear out faster. Excessive heat is one of the most common root causes of long-term solar inverter problems."
Repeated Inverter Tripping or Fault Codes
When your solar inverter keeps shutting down or flashing the same error codes over and over, it’s a clear sign of a deeper issue within your system. Unlike the occasional hiccup that resolves itself, these recurring problems point to underlying electrical issues that need immediate attention. Ignoring them could lead to equipment damage or even safety hazards. Below, we’ll break down the common causes and solutions to help you tackle these persistent problems.
Why It Happens
Repeated tripping or error codes often trace back to specific electrical problems that disrupt your inverter’s ability to operate smoothly:
- Loose DC or AC Connections: Over time, vibrations or thermal expansion can loosen connections. This increases resistance, generates heat, and eventually triggers shutdowns.
- System Overloads: If your solar system is producing more power than the inverter can handle - perhaps after adding extra panels without upgrading the inverter - it can lead to frequent shutdowns, especially during peak production times.
- Grid Voltage Instability: When your utility grid’s voltage fluctuates outside the inverter’s acceptable range (typically 106V to 132V for residential systems), the inverter disconnects to protect itself and the grid per IEEE 1547 interconnection requirements. This is a common issue in areas with older electrical infrastructure or during high-demand periods.
- Software Issues: Outdated firmware or software glitches can misread normal operating conditions, causing the inverter to display false error codes.
- Aging Components: Parts like capacitors, relays, and circuit boards wear out over time. When stressed, these components may underperform, leading to recurring error codes that are harder to diagnose.
DIY Fixes vs. Professional Help
Once you’ve identified a potential cause, there are a few steps you can take to address the issue before calling in a professional. These fixes can often resolve minor problems and help keep your solar inverter running smoothly.
- Inspect Connections: Turn off the power and check all DC and AC connections. Look for loose wires, corroded terminals, or signs of heat damage. Tighten and clean connections as needed.
- Monitor Capacity: Check your inverter’s display or app to see if it’s running near or above 90% capacity. If it is, reduce electrical loads during peak hours or consider upgrading your system to handle the increased demand.
- Reset the System: Power down the inverter by turning off the AC disconnect first, followed by the DC isolator. Wait at least five minutes to allow the capacitors to fully discharge, then turn the DC isolator back on, followed by the AC disconnect. Monitor the system for 24–48 hours to see if the issue persists.
- Update Firmware: Visit the manufacturer’s website or contact their support team to ensure your inverter’s firmware is up to date. Follow their instructions for downloading and installing updates.
Despite these efforts, some issues require professional expertise. For example:
- Ground Faults or Arc Fault Codes: These signal potential safety risks and likely component failures. A professional technician should handle these situations immediately.
- Grid-Related Faults: If the error codes point to voltage issues from the utility grid, you’ll need to coordinate with your utility company. Professionals have the tools and relationships to address these problems effectively.
- Persistent or Multiple Fault Codes: If error codes keep reappearing shortly after a reset or if you see multiple different codes at once, this could indicate internal component failures. Attempting to fix these issues without proper training can void your warranty and pose serious safety risks.
In cases where the problem lies beyond basic troubleshooting, don’t hesitate to call a professional. They have the expertise to diagnose and repair complex issues, ensuring your system operates safely and efficiently.
Troubleshooting Comparison Table
Here’s a handy guide to help you diagnose and address common solar inverter problems. The table below breaks down symptoms, likely causes, and whether you can handle the fix yourself or should call in a professional.
| Problem | Key Symptoms | Most Likely Causes | DIY vs. Professional |
|---|---|---|---|
| No Power Output | No energy production, blank display, no lights | Tripped disconnects, blown fuses, or loose wiring | DIY – Start by checking disconnects and fuses |
| Won't Turn On | Black display, no sounds, complete system silence | Faulty internal fuse, power supply issues, damaged control board | Professional – Requires expertise with internal components |
| Low Power Output | Output lower than expected, possible error codes | Dirty panels, partial shading, aging parts, grid voltage issues | Mixed – Clean panels yourself; consult an expert for electrical issues |
| Overheating/Shutdowns | Frequent shutdowns, hot casing, reduced performance | Poor ventilation, high temperatures, or fan failure | DIY – Improve airflow; Professional – For internal repairs |
| Repeated Tripping | Error codes, frequent resets, inconsistent operation | Loose connections, overload, grid instability, aging parts | Mixed – Tighten connections; seek professional help for complex problems |
When troubleshooting, assess your comfort level with electrical work. Tasks like checking fuses, cleaning panels, or improving airflow can often be done safely at home. However, for more complicated issues - especially those involving internal components - it's wise to call a professional.
Conclusion
Taking care of your solar inverter doesn’t have to be overwhelming. The five common issues we’ve discussed - from no power output to repeated tripping - are often manageable with regular maintenance and straightforward troubleshooting. Even small steps, like routinely checking disconnects, can go a long way in preventing problems before they escalate.
It’s important to know your limits. While some fixes are safe to handle yourself, others require professional expertise. Always turn off the DC isolator and AC disconnect before inspecting your inverter. Solar inverters operate with high voltages, and improper handling can pose serious electrical risks (OSHA's electric-power safety standard 1910.269 outlines the hazards involved). If you’re unsure or uncomfortable working with electrical components, don’t hesitate to call a professional or reach out to the company that installed your solar panels .
For any maintenance or repairs, make sure to disconnect the inverter from the grid to avoid shock hazards, and follow proper lockout-tagout procedures as specified in OSHA 1910.147. Ignoring error codes isn’t just a matter of lower energy output - it can also create safety risks if left unresolved .
By keeping an eye on your system and addressing issues promptly, you can maintain your solar setup’s efficiency for years to come. Whether it’s a simple fuse replacement or troubleshooting a grid fault error, a methodical approach can save both time and money. Regular upkeep not only safeguards your investment but also supports the broader goal of building energy-efficient homes.
Understanding these common inverter issues is key to ensuring optimal performance and creating a more sustainable living environment. For prospective owners weighing a new system, the DOE Homeowner's Guide to Going Solar and the DOE Solar Energy Technologies Office publish authoritative federal guidance on solar adoption and R&D. [DIY Eco Homes](/) offers detailed guides on solar installations and energy-efficient practices, helping you build a home that’s both reliable and eco-friendly year after year.
FAQs
What are the warning signs that my solar inverter needs professional repair instead of a DIY solution?
If your solar inverter displays error codes or warning lights that don’t go away after a reset, it could point to a more serious issue needing professional help. Other warning signs to watch for include a significant drop in energy output, visible damage like cracks or burn marks, or strange system behavior such as unexpected power surges or inconsistent performance.
While basic troubleshooting might fix minor hiccups, these symptoms usually signal more complicated problems. Getting a certified technician involved early can help avoid further damage and keep your system running smoothly.
How can I stop my solar inverter from overheating during hot summer days?
Keeping your solar inverter cool during the summer is essential for its performance and longevity. Start by ensuring it’s installed in a shaded spot with good ventilation to keep it out of direct sunlight. Regular maintenance is key - clean the cooling vents and heat sinks frequently to maintain proper airflow. If extra cooling is needed, consider adding fans or installing protective shading. These straightforward measures can help your inverter run efficiently, even in scorching temperatures.
Why does my solar inverter keep showing error codes even after basic troubleshooting?
If your solar inverter keeps showing error codes even after you've tried basic troubleshooting, it might indicate more serious problems, like damaged components or electrical issues. Start by carefully inspecting all connections to make sure they're secure, and check for any visible damage. If the errors persist, it’s time to call in a professional. A qualified technician can diagnose and fix the problem, preventing further complications and helping your solar system run smoothly again. Prompt action is key to maintaining its efficiency.