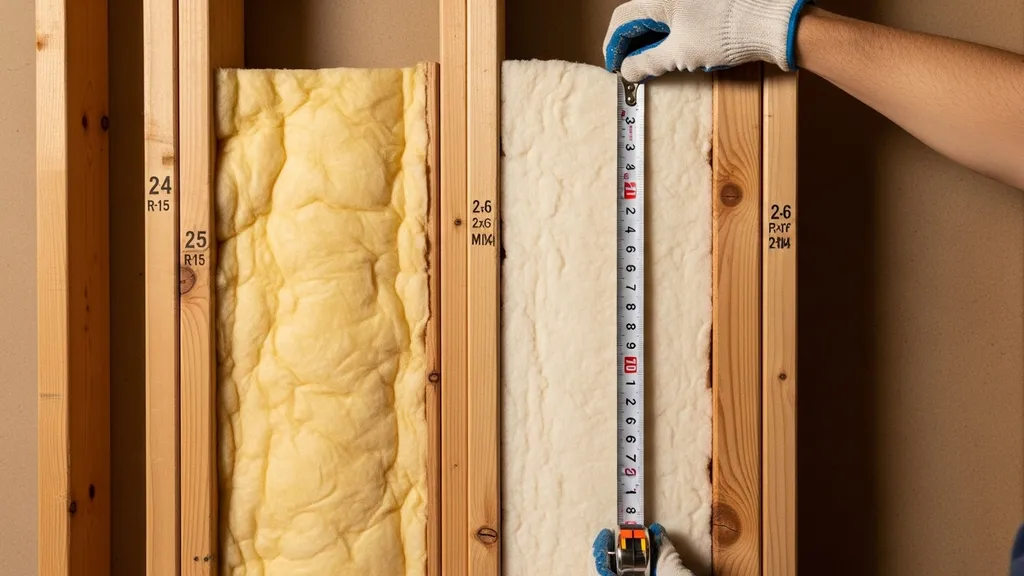
Clear, practical comparison of R-15 and R-19 insulation for DIY homebuilders — performance, costs, installation tips, and which to choose by use case.
R-15 vs R-19 Insulation: Which Do You Need?
Choosing between R-15 and R-19 insulation matters for budget, wall depth, and how well a wall actually slows heat flow. This article compares R-15 vs R-19 insulation directly and gives practical guidance for DIY homebuilders: what the numbers mean, where each batt fits, how installation quality changes performance, retrofit workarounds, and clear scenario-based recommendations. Read on to pick the option that balances cost, climate, and build constraints.
TL;DR:
- R-15 (≈3.5" fiberglass/rockwool) fits 2x4 cavities and is cost-effective in mild climates; expect whole-wall performance 10–25% below nominal due to studs.
- R-19 (≈5.5" fiberglass/rockwool) is suited to 2x6 walls and colder climates; avoid compressing batts and add continuous insulation to reduce thermal bridging.
- For retrofits or better whole-wall performance, use dense-pack cellulose, exterior rigid foam, or a cavity + continuous approach rather than just thicker batts.
R-15 vs R-19 Insulation: Overview — What's Being Compared and Why It Matters
What R-value Measures (simple Definition)
R-value is a material’s thermal resistance: higher R means slower heat transfer through that layer. The label on a batt (R-15, R-19) is a nominal, installed value for a specific thickness. For common batts, fiberglass and mineral wool yield roughly R-2.8 to R-3.1 per inch. That means a 3.5" R-15 fiberglass batt is about R-2.9/in × 3.5" ≈ R-10.2 — manufacturers adjust density and thickness to meet nominal R.
Why R-15 vs R-19 is a Common DIY Question
Most U.S. light-frame walls use either 2x4 or 2x6 studs. A 2x4 wall usually accepts R-13–R-15 batts; a 2x6 wall can accept R-19–R-21. DIY builders ask "R-15 vs R-19 insulation" because the choice affects material costs, framing depth, and overall energy performance. Real-world whole-wall R is lower than nominal R because studs (typically 25%–35% of the wall area) bypass insulation; this can reduce effective wall performance by roughly 10%–25% depending on framing fraction and continuous insulation. For airtightness guidance that pairs with insulation choices, see the passive house airtightness guide.
R-15 vs R-19 Insulation: Comparison Table (quick Specs & Performance)
How to read the table: thickness = nominal batt depth; cavity used = common framing; R/in = typical per-inch; effective R assumes 15–25% reduction from thermal bridging and minor installation gaps.
| Spec | R-15 batt | R-19 batt |
|---|---|---|
| Typical batt thickness (in) | 3.5 | 5.5 |
| Typical cavity used | 2x4 wall or shallow joist | 2x6 wall or deep joist |
| Typical material | Fiberglass, mineral wool | Fiberglass, mineral wool |
| Typical R per inch | R-2.8–3.1 | R-2.8–3.1 |
| Installed nominal R | R-15 | R-19 |
| Effective whole-wall R (approx) | R-11–13 (after bridging) | R-14–17 (after bridging) |
| Typical uses | 2x4 exterior walls, interior partitions, attic knee walls | 2x6 exterior walls, ceilings, rim joists |
| Typical cost relative index | Low | Medium |
Quick TL;DR under the table:
- Cold climates: R-19 performs meaningfully better as a cavity batt because it raises whole-wall R and reduces heat loss through insulated cavities.
- Mild climates: R-15 is often sufficient if paired with air sealing and, ideally, a thin layer of continuous insulation.
- Code notes: Several codes and guides recommend minimum values per assembly—check local code. See ENERGY STAR’s recommended R-values and the Department of Energy's types of insulation for context: recommended home insulation R-values and the Department of Energy’s types of insulation. Use the site's fiberglass batt specs and the insulation savings calculator to estimate payback for upgrades.
R-15 vs R-19 Insulation: R-15 Batt Insulation — Overview, Strengths, Weaknesses, Best For
Overview: Typical Materials & Installation Contexts
R-15 is the nominal target for most 2x4 framed cavities. Typical options are unfaced or kraft-faced fiberglass batts and mineral wool. Thickness for fiberglass R-15 is ~3.5". R-15 is also used for some attic perimeter or underfloor applications where depth is limited.
Strengths (cost, Fit in 2x4, Easier Installation)
- Lower material cost per linear foot than R-19. Fiberglass batts are widely available at box stores and suppliers.
- Fits standard 2x4 framing without altering structure.
- Easier to cut and fit in tight cavities; less risk of compressing the batt if correctly sized.
Weaknesses (lower Thermal Resistance in Cold Climates)
- Nominal R-15 provides lower whole-wall resistance once studs and openings are accounted for; expect ~10–25% reduction in effective R compared to nominal values. The Insulation Institute documents R-value loss when batts are compressed or misfit, which is a common retrofit pitfall (see "Estimated R-values for compressed fiberglass batt insulation").
- Limited headroom to add continuous insulation without modifying cladding depth.
- Compressing R-15 into tighter cavities (for example, packing into a cavity with wires or pipes) reduces its rated performance substantially.
Best For: Uses and Scenarios
- New builds in mild climates with 2x4 framing where budget is tight.
- Interior partitions and unconditioned attic knee-wall fills.
- Retrofits where adding depth or exterior foam is impractical — although consider dense-pack cellulose for better effective R in narrow cavities; see the cellulose insulation guide for dense-pack options.
For material differences that affect per-inch R and durability, see the rockwool vs fiberglass comparison.
R-15 vs R-19 Insulation: R-19 Batt Insulation — Overview, Strengths, Weaknesses, Best For
Overview: Where R-19 is Used and Typical Materials
R-19 is the nominal target for 2x6 framed cavities and some joist bays. Typical nominal thickness is around 5.5" for fiberglass and mineral wool batts. Many builders choose R-19 for exterior walls in cooler climates or for attic and rim-joist bays where extra depth is available.
Strengths (higher Nominal R, Better in Cooler Climates)
- Higher cavity R raises whole-wall resistance, especially helpful where studs make up a large wall fraction.
- Better performance for energy-cost payback in colder climate zones—less heating energy lost through the assembly.
- Works well with continuous exterior insulation to reach high-effective R and reduce thermal bridging.
Weaknesses (requires Deeper Cavity or Thicker Batts)
- Higher material cost than R-15.
- Not suitable for 2x4 walls without adding continuous insulation or altering framing; compressing R-19 into a 2x4 cavity reduces R and can cause gaps.
- Installation pitfalls: if the batt isn’t full-depth or is compressed at plates and around windows, expected gains disappear. The Southface and California code documents illustrate how required minimums and quality installation standards vary by jurisdiction; see the Georgia residential energy code field guide (Southface) and the 2019 California energy code insulation requirements.
Best For: Uses and Scenarios
- New 2x6 exterior walls in cold or mixed climates where heating dominates energy use.
- Roof assemblies or attic floors where extra depth is available and correct installation is verified.
- Assemblies where combining cavity R with continuous exterior insulation or rigid mineral wool board yields high whole-wall R. See the rigid mineral wool board tool for an alternative continuous layer option, and the r-19 vs r-20 guide for fine-grained choices near R-19.
R-15 vs R-19 Insulation: Alternative Ways to Meet R Targets (rigid Foam, Blown-in, Mineral Wool)
Rigid Continuous Insulation to Boost Whole-wall Performance
Adding continuous rigid insulation outside the sheathing eliminates much of the thermal bridging caused by studs. Polyiso, EPS, and XPS are common choices. To match or exceed a cavity R increase, use the EPS foam board specs to size thickness: for example, polyiso at ~R-6 per inch requires a smaller thickness than EPS (~R-3.6–R-4 per inch) to achieve the same added wall R. Continuous foam also helps air sealing if taped at seams.
Blown-in Cellulose or Dense-pack for Retrofit
For 2x4 walls that can't be rebuilt, dense-pack cellulose blown from the interior or exterior raises effective R by filling voids and reducing convective loops. Dense-pack cellulose in a 3.5" cavity can provide higher effective R than a compressed batt and resists settling. See the cellulose insulation guide for details.
Mineral Wool and Other Batts as Substitutes
Mineral wool (rockwool) has a similar per-inch R to fiberglass but offers better acoustic performance and is less affected by moisture. Rigid mineral wool boards are available for continuous layers; consult the rigid mineral wool board tool for thickness planning.
When to Mix Methods (cavity + Continuous)
Mixing cavity batts with a thin continuous layer often gives the best cost-to-performance ratio. For example, R-15 in the cavity plus 1"–1.5" of polyiso (or equivalent rigid board) raises whole-wall R and reduces stud heat loss without full 2x6 framing. That approach is common on retrofits and budget-conscious new builds. For spray foam alternatives and carbon trade-offs, compare options with the spray foam vs cellulose piece and explore safer spray foam alternatives before choosing closed-cell spray foam.
R-15 vs R-19 Insulation: Installation, Moisture and Airtightness Considerations
Common Installation Mistakes That Cut R-value
- Compression: Packing an R-19 into a 2x4 reduces thickness and R. The Insulation Institute notes compressed batts show lower R-values in testing (see compressed R-values PDF).
- Voids and gaps: Missing around wiring, pipes, top plates, and behind electrical boxes. Small voids add up.
- Improper cutting: Leaving strands or jagged edges that create gaps near windows, headers, or sill plates.
Examples: a 1/4" gap behind a plate along an entire stud bay can function like a thermal bypass. Likewise, notching or stacking batts without full fill causes convective channels that reduce effective R.
Moisture, Vapor Control and Condensation Risk Per Climate
Vapor control placement depends on climate. In cold climates, interior vapor retarders or smart vapor retarders can reduce interstitial condensation risk. In mixed or hot-humid climates, avoid interior vapor barriers that trap moisture. The California energy code materials summarize acceptable practices and testing requirements; see the California insulation and QII requirements for guidance on one-line requirements and quality installation inspections.
Airtightness and How It Interacts with Insulation Performance
Air leakage undermines insulation by moving warm air through and around cavities. Airtightness upgrades—sealing top plates, using taped sheathing or an interior air barrier, and proper detailing at service penetrations—often pay back faster than installing higher-R batts alone. Passive-house airtightness strategies are a useful companion resource: see the passive house airtightness guide. Also consider how cladding and rain-screen strategies affect drying: read about rain screen wall assembly for recommended exterior layers when using continuous foam.
R-15 vs R-19 Insulation: Which Should You Choose? Scenario-based Recommendations
Short Decision Flow: 4 Quick Scenarios
- New 2x4 frame in mild climate → R-15 + 0.5"–1" continuous foam or dense-pack cellulose if budget allows.
- New 2x6 frame in cold climate → R-19 in cavity; add 1"–2" continuous foam for best whole-wall R.
- Retrofit 2x4 exterior walls → dense-pack cellulose or exterior rigid foam rather than compressing higher nominal batts.
- Attic floor vs roof assembly → use deeper batts at attic floor (R-30–R-60 typical), but for vaulted roofs choose high-R or continuous rigid insulation on slope.
Detailed Scenarios (climate, Framing, Budget, Retrofit vs New Build)
- New build, tight budget, mild climate (zones 2–3): Start with R-15 in 2x4 walls, invest labor in air sealing and a small continuous foam layer (polyiso 1" ≈ R-6) to cut bridging losses. That combination often approaches the effective performance of thicker cavities at lower cost.
- Cold climate, heating-dominated (zones 5–8): Prioritize R-19 in 2x6 cavities or R-21 when available. If the budget allows, add 1"–2" exterior continuous insulation to reduce stud heat loss and improve dew point control in the wall.
- Retrofit into existing 2x4 walls: Remove drywall only if planning a full gut. Otherwise, use dense-pack cellulose to fill cavities, or add exterior rigid foam and furring to create a continuous layer without disturbing interior finishes.
- Basement walls or rim joists: Many codes require minimum cavity R-values for wood foundation walls; Minnesota's rules and local jurisdictional codes specify minimums—see the Minnesota rule excerpt that mentions R-19 minimum for certain foundation walls: (https://www.revisor.mn.gov/rules/1322.0402/). For basements, consider foam board at the interior face of foundation walls plus rigid or batt insulation as appropriate; see the basement insulation tips.
Cost vs Performance Trade-off Checklist
- Prioritize air sealing first — lower cost, high impact.
- For new framing, choose 2x6 if long-term thermal performance matters and budget allows.
- For retrofits, choose exterior rigid foam or dense-pack cellulose instead of squeezing thicker batts into shallow cavities.
- Balance fire, moisture, and pest considerations when selecting rigid foam type (EPS vs polyiso vs XPS).
This video provides a helpful walkthrough of the key concepts:
The Bottom Line
R-19 batts outperform R-15 in deeper cavities and cold climates, but installation quality and whole-wall strategies (air sealing and continuous insulation) often matter more than the nominal batt R alone. For 2x4 walls or constrained retrofits, prefer dense-pack cellulose or add exterior rigid foam rather than compressing a thicker batt.
Frequently Asked Questions
Will R-19 always perform significantly better than R-15?
Not always. Nominal R-19 provides higher thermal resistance in the cavity, but whole-wall performance depends on framing fraction, thermal bridging, and installation. Studs and gaps can reduce effective R by roughly 10–25%. In some assemblies, R-15 plus a thin continuous board can match or beat an R-19-only wall.
Can I compress R-19 into a 2x4 cavity?
Technically you can compress it, but performance drops. The Insulation Institute shows compressed fiberglass batt R-values decline when thickness is reduced. Instead of compressing, consider dense-pack cellulose or adding external rigid foam to raise whole-wall R without degrading batt performance.
Is continuous insulation better than thicker batts?
Continuous insulation addresses thermal bridging by covering studs and other framing members, so it often yields greater whole-wall performance per inch than adding cavity-only R. The best results usually come from a combined approach: full-depth [cavity insulation](/glossary/cavity-insulation) plus a modest layer of continuous foam or rigid mineral wool board.
How does framing fraction affect the choice?
Higher framing fraction (more studs, headers, and plates per wall area) lowers the benefit of thicker cavity insulation because metal or wood framing conducts heat. If framing fraction is high, adding continuous insulation or using advanced framing techniques (wider studs, fewer unnecessary studs) gives better returns than moving from R-15 to R-19 alone.
Where can I save money without hurting performance?
Spend on air sealing (top plates, sill plates, service penetrations) and quality installation rather than the highest nominal batt R. In many cases, sealing gaps, installing a small continuous foam layer, and ensuring batts are not compressed will improve comfort and efficiency more cost-effectively than simply upgrading from R-15 to R-19. For broader project planning, consult the [build your own home basics](/blog/how-to-build-your-own-home) guide.