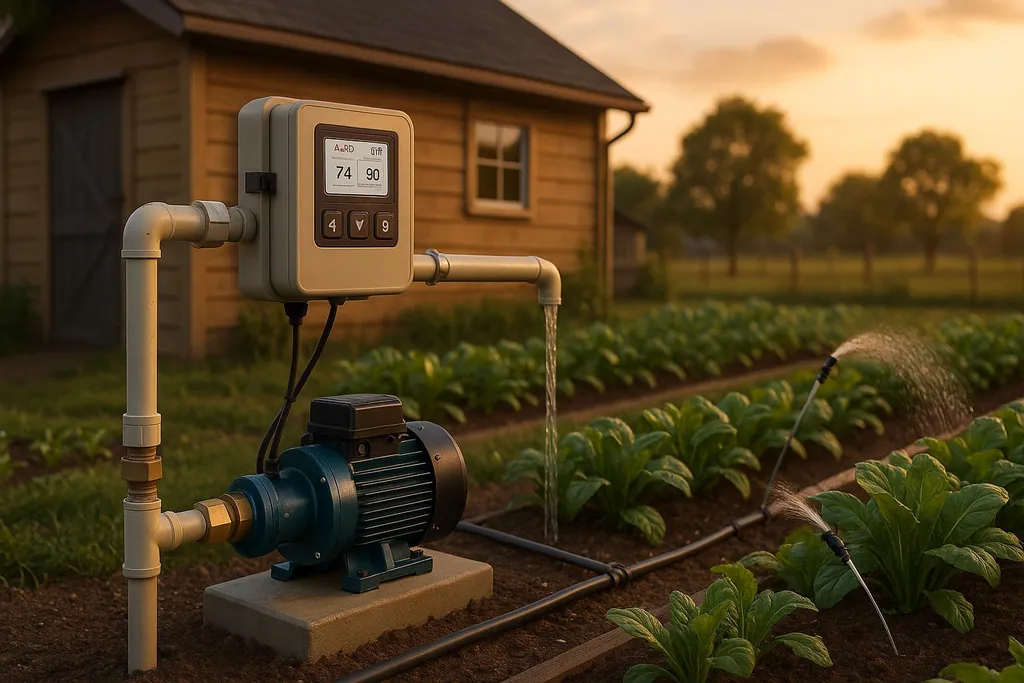
Automating your water pump can enhance efficiency, reduce energy costs, and eliminate manual monitoring with affordable DIY solutions.
How to Automate Existing Water Pumps on a Budget
Automating your water pump can save energy, reduce costs, and make your system more reliable. You don’t need expensive equipment - simple upgrades like controllers, sensors, or WiFi switches can get the job done for as little as $15–$200, depending on your needs. Here’s a quick breakdown:
- Why automate? Save up to 50% on energy costs, prevent pump damage, and eliminate manual monitoring.
- Common uses: Well pumps, sump pumps, irrigation systems, pools, and rainwater harvesting.
- Affordable methods: Float switches, pressure controllers, variable speed drives (VFDs), and WiFi-enabled controllers.
- DIY tools needed: Screwdrivers, multimeter, electrical tape, and safety gear.
- Cost range: Basic setups cost $15–$30; advanced systems with WiFi or VFDs range from $80–$200.
With proper installation and maintenance, these upgrades can pay for themselves in energy savings within a year or two. Keep reading for step-by-step guidance and tips to choose the right system for your home.
Water Pump Automation Basics
What is Water Pump Automation?
Water pump automation is all about making pumps run efficiently and reliably by using technology to control their operation. Sensors and controllers work together to monitor water levels, pressure, or flow rates in real time, ensuring the pump operates only when needed .
Here’s how it works: sensors keep an eye on your water system and send signals to controllers. Based on those signals, the controllers either start or stop the pump. This eliminates the need for manual adjustments and reduces human error, all while keeping the system running smoothly.
In older systems, basic pressure switches and tanks were the norm. But modern setups have swapped these out for electronic pressure switches that combine pressure sensors with flow switches. This upgrade allows for much more precise control, making pump operation smarter and more efficient . With this foundation in place, let’s look at how homeowners in the U.S. are using these systems in their daily lives.
Common Uses in U.S. Homes
Water pump automation has found its way into a variety of household applications across the U.S.:
- Well Pumps: In rural areas where municipal water isn’t an option, automated well pumps are a game-changer. They ensure steady water pressure throughout the home without the need for constant manual adjustments.
- Sump Pumps: If your basement floods, an automated sump pump can kick in immediately when water levels rise - no matter if you’re home or not.
- Irrigation Systems: For outdoor use, automation makes watering lawns and gardens easier. These systems can be programmed to run at specific times, adjust for weather, and deliver just the right amount of water, reducing waste.
- Pool Management: Pool owners are increasingly turning to automation for convenience. For example, in March 2021, a pool owner in Rancho Cost-a-Lotta used two 4-channel WiFi switches (about $22 each) and the Ewelink Smart Home app to automate their pool system. This setup controlled valve actuators and pump speeds, offering modes like Pool, Spa, Waterfall, and Cleaner - all for under $100 (not including actuators) .
- Rainwater Harvesting: Automated systems help collect, store, and distribute rainwater efficiently, making it easier to manage this eco-friendly resource.
These examples highlight just how versatile pump automation can be. Now, let’s explore the different methods available to automate your water pump.
Main Automation Methods
There are several ways to automate water pumps, each suited to different needs and budgets:
- Flow Control:
This method uses a flow switch to start and stop the pump based on water flow. When the system detects water movement, the pump kicks in, and when the flow stops, so does the pump .
- Pressure Control:
Pressure-based systems monitor water pressure. If the pressure drops - like when you turn on a faucet - the pump starts. Once the pressure stabilizes, the pump stops. This is a popular choice for well and home water supply pumps .
- Integrated Pressure and Flow Control:
By combining pressure and flow monitoring, this method ensures the pump starts when pressure drops and stops when water flow ceases. It’s a reliable way to prevent dry runs and keep the system running smoothly .
- Variable Speed Control:
Using variable frequency drive (VFD) technology, this method adjusts the pump's motor speed to meet demand. Instead of simply turning on and off, the pump can run at different speeds, stabilizing pressure and saving energy. Although these systems have a higher upfront cost, they’re more efficient and can reduce long-term energy bills .
- Float Switches:
Float switches are a budget-friendly option, especially for water tanks and sump pumps. They’re simple and effective, with automatic water level controllers available on Amazon for $12–$20, and basic cut-off timers costing around $10 .
- WiFi Controllers and Microcontrollers:
For tech-savvy DIYers, devices like Arduino offer affordable options for remote control, scheduling, dry run protection, and water level monitoring . Building your own WiFi Smart Water Pump Controller can save money and allow for customization.
When selecting an automation method, think about your pump type, water needs, and budget. For those who enjoy hands-on projects, creating a custom controller can be a cost-effective and flexible solution .
Tools and Components for Budget Automation
Required Tools
Setting up water pump automation doesn’t require an extensive toolkit - most of the essentials are likely already in your garage or toolbox.
Start with a Phillips/flathead screwdriver set for wiring and mounting tasks. A wrench set is necessary for loosening and tightening pipe fittings and pump connections. To ensure safe and weatherproof wiring, keep electrical tape and insulated connectors on hand.
A multimeter is a must-have for testing electrical connections and verifying that everything is functioning correctly before powering up the system. If you need to mount controllers or sensors onto walls or posts, a drill with the right bits will make the job easier. For leak-free plumbing connections, use Teflon tape.
Safety should never be overlooked. Equip yourself with safety glasses, work gloves, and rubber-soled shoes to protect against electrical hazards. And remember - always switch off the power supply before starting any installation to avoid accidents.
Once you’ve gathered your tools, you’re ready to move on to selecting cost-effective components for your automation project.
Low-Cost Automation Parts
With your tools ready, the next step is sourcing affordable parts for your DIY pump automation. Fortunately, there are plenty of budget-friendly options available.
- Float switches are among the simplest and most economical components, priced between $8 and $15 for basic models. These devices detect water levels and automatically trigger your pump to turn on or off .
- For custom automation, consider microcontrollers like Arduino or ESP8266 boards. Basic Arduino models cost about $10–20, while WiFi-enabled ESP8266 controllers are even cheaper, typically ranging from $5 to $15 .
- Relays handle the heavy lifting by switching power to your pump. A 12V relay capable of managing 7 Amp AC at 240V can be found for just a few dollars. Be sure to choose a relay that matches your pump’s power and current requirements .
- If you want WiFi connectivity, 4-channel WiFi switches are available for around $22, and Sonoff R3 switches cost approximately $13 . These allow for remote control and scheduling through smartphone apps.
- For the ultra-budget-conscious, you can assemble a basic automatic water level controller for under $1 using simple components like transistors, resistors, diodes, and a relay .
- Smart plugs are another straightforward option, especially for smaller pumps. These start at $10–15 and can be controlled remotely or set on timers.
Component Cost Breakdown
Here’s a quick breakdown of what you might spend on key components for your automation setup:
| Component Type | Price Range | Ideal Use |
|---|---|---|
| Float Switches | $8 – $25 | Simple water level detection |
| Basic Relays | $2 – $8 | Switching pump power on/off |
| Arduino/ESP8266 | $5 – $20 | Custom programmable control |
| WiFi Smart Switches | $10 – $25 | Remote control and scheduling |
| Smart Plugs | $10 – $20 | Simple on/off control |
For a basic setup using float switches and relays, you can expect to spend around $15–30. A mid-range system with WiFi control and smartphone integration typically costs $40–80, while more advanced setups with multiple sensors, variable speed controls, and sophisticated programming may range from $100 to $200.
With these flexible price points, automation becomes an option for nearly any budget. You can start small with the essentials and gradually expand your system as your needs or budget allow.
Step-by-Step Automation Installation
Preparation and Safety Steps
Before starting, make sure to turn off the power supply to your water pump at the circuit breaker. This step is essential to avoid electric shock and injuries during the process.
Gather all the tools you'll need and carefully review the manufacturer's manual for specific instructions on wiring and installation. This will help you avoid mistakes and ensure everything is set up properly.
Pick a location for installation that's dry, well-ventilated, and easy to access for future maintenance. Avoid areas prone to flooding or high moisture levels, even if your controller is labeled as waterproof. Indoor utility rooms or sheltered outdoor areas are usually the safest options.
Wear safety goggles and work gloves to protect yourself from debris, sharp edges, and electrical hazards. Keep a flashlight on hand for better visibility.
Before verifying that the power is off, test your multimeter on a known power source to ensure it's working correctly.
Once you've completed these steps, you're ready to move on to mounting and wiring the controller.
Installing Automation Parts
Using the cost-effective components mentioned earlier, you can now begin wiring the controller.
Start by mounting the controller to a wall or post using the brackets and screws provided in the kit. Make sure it's securely attached.
Next, connect the power supply wires. Typically:
- Black wires go to the "Line" or "L" terminals.
- White wires connect to the "Neutral" or "N" terminals.
- Green or bare copper wires attach to the ground terminal.
Use wire nuts or the terminal connectors included with your controller to secure the connections.
Now, connect the pump wires to the appropriate output terminals on the controller, which are usually labeled "Motor" or "Pump." Make sure to tighten the terminal screws to prevent loose connections, which could lead to overheating or failure.
For safety, attach a thick copper grounding wire from the controller to an approved grounding point in your home. This step is crucial for preventing electrical buildup and protecting both you and your equipment .
If you're adding sensors like float switches, consult the manufacturer's wiring diagram for guidance. Float switches typically have two wires that connect to the controller's sensor input terminals. Adjust the float to your desired water level by positioning its attached cable.
To keep your setup neat and safe, secure all wiring with cable ties or wire clips. If any wiring will be exposed or run underground, use electrical conduit to protect it and ensure compliance with local electrical codes. For outdoor installations, seal any openings in the controller housing with weatherproof sealant to keep moisture out.
Testing and Problem Solving
Once everything is installed, it's time to test the system and make sure it works correctly.
Turn the power back on and check the controller's LED startup sequence as outlined in the manual.
Simulate the conditions that should activate your pump to test the automation. For example, manually lift and lower a float switch to see if the pump starts and stops as it should, or open a faucet if your system uses a pressure switch.
Use a multimeter to confirm that the correct voltage (usually 120V or 240V) is present at all terminals during operation.
Let the system run through several cycles to ensure it functions consistently. Keep an eye out for unusual sounds, vibrations, or erratic behavior, which could signal wiring problems, loose connections, or faulty components. If the pump doesn't start, fails to stop, or behaves unpredictably, inspect the power connections, sensor settings, and wiring for issues.
Make any necessary adjustments to the controller's programmable settings. If your model is WiFi-enabled, you can often do this through a smartphone app. Once you're satisfied with the system's performance, secure the controller cover and record key details like the installation date, settings, and observations in a log. This can be a handy reference for future troubleshooting or maintenance.
Thorough testing ensures your system runs smoothly and aligns with your energy-saving goals.
How to AUTOMATE WATER MOTOR and NEVER worry about it again
Automation Method Comparison
When deciding on an automation method, consider your specific needs, budget, and technical expertise. Below, we’ll break down the key options to help you make an informed choice.
Method Comparison Chart
Here’s a quick overview of the main automation methods, comparing their costs, installation requirements, and performance features:
| Method | Cost Range | Installation Difficulty | Remote Control | Reliability | Energy Savings | Best For |
|---|---|---|---|---|---|---|
| Float Switch Controller | $25–$75 | Easy (DIY friendly) | No | High | Low–Medium | Basic tank automation, budget-conscious homeowners |
| Pressure Switch Controller | $40–$120 | Medium (may require electrician) | No | High | Medium | Pressurized systems, steady water pressure needs |
| Electronic Sensor Controller | $150–$400 | Medium–Hard (professional recommended) | Yes (some models) | Very High | High | Large-scale systems, tech-savvy users |
| Frequency Converter (VFD) | $200–$800 | Hard (professional installation) | Yes | Very High | Very High (up to 85% reduction) | High-demand systems, maximum efficiency goals |
Detailed Method Breakdown
Float Switch Controllers These are the simplest and most affordable option for pump automation. They’re straightforward to install and work well for basic applications, making them a go-to choice for homeowners on a budget. However, they lack advanced features and are prone to issues like debris buildup and wear over time, which can impact reliability .
Pressure Switch Controllers If maintaining consistent water pressure is a priority, pressure switch controllers are a strong option. They automatically activate the pump when pressure drops and turn it off once the set level is restored. This not only prevents dry running but also improves system efficiency. While they may require some calibration, they’re a practical choice for achieving steady water pressure without breaking the bank .
Electronic Sensor Controllers These systems offer precise water level monitoring and often come with advanced features like remote diagnostics and monitoring. While they’re more expensive and may require professional installation, their high reliability and functionality make them ideal for larger or more complex systems. They’re particularly appealing to users who value advanced technology and control .
Frequency Converters (VFDs) For maximum energy efficiency, frequency converters take the lead. By adjusting pump speed based on demand, they can slash energy consumption by up to 85%. For example, a 55 kW pump running continuously could save up to $20,000 annually . While these systems are more complex and require professional installation, the energy savings and performance benefits can make them a worthwhile investment for high-demand or critical applications.
Choosing the Right Method
For most homeowners, pressure switch controllers strike a good balance between cost and energy efficiency. They’re relatively easy to install and provide noticeable savings through better system control. However, if your system runs frequently or energy costs are a major concern, investing in a frequency converter could deliver significant long-term savings.
On the other hand, float switches are a solid choice for occasional use or simpler setups, while electronic sensor controllers cater to those managing large-scale or technology-driven systems. Ultimately, the right choice depends on your system’s demands and your long-term goals. Whether you’re automating a basic tank or optimizing a high-demand system, there’s an option to fit your needs.
Maintenance and Energy-Saving Tips
Taking care of your pump system doesn’t just keep it running smoothly - it can also reduce breakdowns, lower energy costs, and extend the life of your equipment.
Regular Maintenance Tasks
Creating a maintenance schedule is key to keeping your pump in top shape. Here’s what you should focus on:
Daily tasks: Quickly inspect the pump for leaks, unusual noises, or vibrations. Check that pressure, flow rate, and temperature readings are within normal limits. Look out for airlocks in the system that might disrupt performance .
Weekly tasks: Dive a little deeper by lubricating bearings as recommended by the manufacturer. Inspect seals and gaskets for wear, clean strainers and filters to avoid clogs, and check electrical connections for signs of corrosion .
Monthly tasks: Conduct a more thorough inspection. Make sure the pump is properly aligned, examine the impeller for damage or debris, and test the emergency shutoff system to confirm it’s functioning. Take this time to monitor energy consumption and compare it to past months to spot any inefficiencies .
| Frequency | Key Maintenance Tasks |
|---|---|
| Daily | Visual checks for leaks, noise, or vibrations; monitor pressure, flow, and temperature; check for airlocks |
| Weekly | Lubricate bearings; inspect seals and gaskets; clean filters; check electrical connections |
| Monthly | Inspect alignment and impeller; test emergency shutoff; monitor energy usage |
| Quarterly | Perform vibration analysis; test motor performance; inspect housing and piping; flush the system |
| Annually | Complete system inspection; replace worn parts; recalibrate sensors; apply corrosion protection |
Quarterly tasks: Perform vibration analysis to detect early signs of bearing or alignment issues. Test the motor’s performance, inspect the housing and piping for damage or corrosion, and flush the system to remove sediment that could reduce efficiency .
Annual tasks: Once a year, do a full system inspection. Replace worn seals or gaskets, recalibrate sensors and gauges, and apply corrosion protection to metal parts, especially if your area has hard water or high humidity .
A consistent maintenance routine not only ensures smooth operation but also sets the stage for safer and more energy-efficient use.
Safety Precautions
When working on pump systems, safety should always come first. Follow lockout/tagout procedures to prevent accidental start-ups during maintenance . Wear the right protective gear - safety glasses, gloves, and non-slip footwear - and ensure proper ventilation in enclosed spaces like basements or pump houses. Even if the system is off, stay clear of moving parts .
Prepare for emergencies with a clear response plan. Make sure everyone knows how to shut down the system quickly, and keep a well-stocked first aid kit nearby. Regular safety training and clear communication protocols can help prevent accidents .
For outdoor electrical components, use weatherproof enclosures and inspect them regularly for cracks, loose seals, or moisture intrusion that could pose hazards. These precautions not only protect you but also contribute to the system’s efficiency and reliability.
Energy Efficiency Tips
Pumping systems are responsible for nearly 20% of global electricity use , which means there’s a lot of room for savings with smart energy practices. Here’s how to make your system more efficient:
- Reduce water usage: Fix leaky faucets (a single drip per second can waste over 3,000 gallons a year), install aerators, upgrade to WaterSense toilets, and run appliances like dishwashers only when full .
- Regular maintenance: Clean your water tank annually to remove sediment that forces the pump to work harder. Check wiring for corrosion to ensure strong electrical connections. Insulate hot water lines to reduce heat loss and ease the pump’s workload.
- Time-of-use scheduling: If your utility offers lower rates during off-peak hours, program your pump to run during those times. Automation controllers make this easy and cost-effective.
- Monitor energy use: Track your system’s energy consumption monthly. A sudden spike could point to issues like clogged filters, worn impellers, or faulty components, which should be addressed quickly to prevent higher bills and equipment damage.
- Upgrade to energy-efficient parts: For example, switching to variable-speed pool pumps can cut energy use by up to 60% compared to single-speed models . While the upfront cost may be higher, the long-term savings often make it a worthwhile investment, especially for systems that operate frequently.
These strategies can help you save money while keeping your pump system running efficiently and reliably.
Conclusion: Main Points
The methods, tools, and maintenance tips highlighted above work together to make pump automation both practical and cost-efficient. Automating your water pump not only reduces long-term energy costs but also optimizes overall performance .
As discussed in the comparison of automation methods and maintenance strategies, combining efficiency with reliable safety features is key. An automated system can conserve water, detect leaks, and minimize the need for manual intervention. Plus, energy savings naturally follow, as pumps operate only when necessary, cutting down on power usage and wear on the equipment.
Smart maintenance practices further enhance these benefits. Pumps account for nearly 20% of global electricity use, so even small efficiency improvements can lead to noticeable cost reductions . Regular cleaning, proper lubrication, and timely replacement of components like wear rings can help avoid the typical 10–25% efficiency loss that often occurs before pumps are replaced .
Safety is another major advantage of automation. These systems minimize human error, provide protection against dry runs, and enable remote monitoring to catch problems early - before they escalate into costly repairs. Features like surge protection and overload detection offer added security for your water system.
By using the recommended tools, affordable parts, and proper installation techniques, you can create a system that saves energy and reduces manual effort. Choosing quality components tailored to your pump type, water source, and tank size ensures consistent performance over time.
With thoughtful installation, regular upkeep, and energy-smart practices, budget-friendly automation can transform your water pump into a reliable, efficient system. These strategies not only save money but also bring the convenience of modern water management into your home.
FAQs
What are the long-term savings and advantages of automating my water pump compared to using a manual system?
Automating your water pump can be a smart move for your wallet and your peace of mind. By ensuring the pump runs only when needed, automation helps cut down on energy use, which translates to lower utility bills. Plus, it reduces unnecessary wear and tear, helping your pump last longer.
Another perk? Automation makes maintenance less of a headache. With improved system efficiency, the chances of breakdowns drop significantly, meaning fewer repairs and less time spent on manual adjustments. In the long run, it’s a practical and hassle-free upgrade for your home or property.
What’s the best way to automate my water pump system without overspending?
When it comes to automating your water pump, the best choice will depend on your system's setup and how much you're willing to spend. Here are some options worth considering:
- Float switch controllers: A budget-friendly option, these are perfect for straightforward systems that only need basic on/off control based on water levels.
- Pressure switch controllers: If you're working with a pressurized system, these controllers are a great fit. They automatically keep water pressure steady without manual intervention.
- Variable frequency drives (VFDs): For systems with fluctuating water demands, VFDs help improve [energy efficiency](/blog/ultimate-guide-to-smart-lighting-energy-efficiency) by adjusting the pump's speed as needed.
- IoT-enabled systems: These offer the convenience of remote monitoring and control, making them a high-tech solution. However, they often come with a higher initial investment.
Take a close look at your pump's specific needs and your budget to find the solution that makes the most sense for you.
What challenges might I face when automating my water pump, and how can I solve them?
When setting up an automated water pump, a few challenges might pop up along the way. One common issue involves electrical setup mistakes, like incorrect wiring or insufficient insulation. To avoid these, it's crucial to follow step-by-step instructions closely and double-check every connection before powering up.
Another challenge is pressure-related problems, such as frequent cycling or uneven water pressure. These often stem from improper calibration or installation. Fine-tuning the pump’s pressure settings can usually resolve these issues and ensure smoother operation.
You might also face power supply troubles, like loose connections or blown fuses. Performing regular maintenance and inspections can help catch these problems early, saving you from bigger headaches down the line. And don’t forget - electrical safety should always come first. Turn off the power during installation and use the right tools to keep everything running safely and smoothly.