Learn how tilt-turn windows work, their energy and passive-house advantages, and realistic cost considerations for DIY eco homes.
European Tilt-Turn Windows: Benefits and Costs
European tilt-turn windows are a distinctive window type that combine two sash functions—an inward-tilt ventilation position and a full inward turn for cleaning and emergency egress. For budget-conscious DIY eco homebuilders, tilt-turn windows promise controlled ventilation, strong airtight seals, and passive-house compatibility, but they also come with specific material, hardware, and installation choices that affect cost and long-term value. This guide explains how tilt-turn windows work, what to expect for thermal performance, how they fit into passive-house and ventilation strategies, realistic cost considerations, and practical installation tips for airtight, durable results.
TL;DR:
- Tilt-turn windows provide two practical operations: a secure tilt for controlled ventilation and a full inward turn for cleaning and egress, making them well suited to airtight, passive-house-oriented builds.
- Higher-performance glazing (triple pane, low-E, gas fill) and quality frames improve U-factor and comfort but increase upfront cost; weigh lifecycle energy savings against purchase and installation expenses.
- Prioritize correct flashing, continuous air-barrier connections, and multi-point hardware when budgeting; DIY installs are possible in new builds, but airtightness-critical projects often need professional oversight.
What Are European Tilt-turn Windows and How Do They Work?
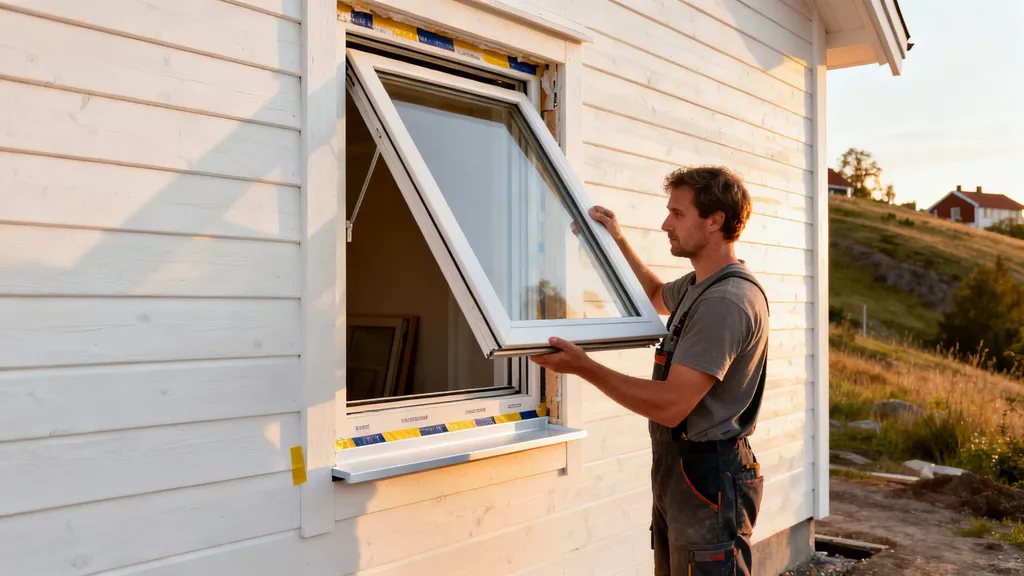
Tilt-turn windows combine two distinct actions in one sash: tilt and turn. In the tilt position the top of the sash tilts inward a few degrees to create a controlled ventilation opening that keeps the bottom sealed and secure. In the turn position the sash swings fully inward on side hinges, like a casement, allowing full airflow, easy cleaning of both glass faces from indoors, and unobstructed emergency egress.
Typical European practice (Germany, Scandinavia, the UK) favors inward-opening sashes for safe external access and easier maintenance. Hardware makers such as Roto, Maco, and Siegenia supply multi-point mechanisms and concealed hardware commonly found on modern tilt-turn systems; homeowners searching for hardware models will often find these trade brands referenced in product specifications.
Mechanically, tilt-turn hardware uses a central handle that engages different locking cams and hinge positions depending on the rotation. Textual diagram idea: when the handle points up, sash is closed and compressed against seals; when it points sideways, sash turns inward; when it points down, sash tilts at the top. The compression gaskets and sash overlap on tilt-turn units typically provide better sealing than single-point casements because the frame compresses around the sash at multiple points when closed.
How Tilt-turn Differs From Casement, Awning, and Sliding Windows:
- Operation: Casements swing out or in on side hinges (single action); awnings hinge at the top and open outward; sliding units move laterally. Tilt-turn combines two inward actions for ventilation and cleaning.
- Sealing: Tilt-turn multi-point compression hardware tends to achieve lower air leakage than many sliding systems and some single-point casements.
- Maintenance and safety: Inward turn simplifies cleaning and emergency egress; tilt mode gives secure ventilation that awnings and outward casements do not provide as safely.
Market note: Research reports indicate global demand for inward tilt-turn units is growing; for industry market context see the Inward tilt turn window market research report 2034. For performance labeling and comparing ratings look up the National fenestration rating council (nfrc) database for U-factors and product certifications.
Energy and Thermal Performance: U-factor, Airtightness, and Glazing Choices for Tilt-turn Windows
Windows are rated primarily by U-factor (thermal transmittance), SHGC (solar heat gain coefficient), and air infiltration. For tilt-turn windows the multi-point compression hardware and overlapping sash geometry commonly result in lower air leakage compared with many sliding and single-point windows; that helps with comfort and heating loads in cold climates.
Typical illustrative performance ranges for modern tilt-turn units (labelled as examples; values vary by manufacturer and test standard):
- Double-glazed low-E, argon-filled: roughly 1.4 to 1.1 W/m²K (European notation).
- Triple-glazed, low-E, krypton or argon fill: roughly 0.8 to 1.0 W/m²K.
- US/Canadian U-factor conversions: 1 W/m²K ≈ 0.1761 BTU/(h·ft²·°F) — use this only as an approximate conversion when comparing international labels.
Air-tightness: Multi-point locking and compression gaskets reduce infiltration. Passive House Institute guidelines set strict air leakage and thermal criteria; many manufacturers now offer Passive House certified window assemblies. For a deeper primer on labeled performance and how to read U-factors, see the window U-factor guide.
Glazing choices and trade-offs:
- Double glazing is cost-effective in temperate climates but loses efficiency in harsh winters.
- Triple glazing raises comfort, reduces condensation risk, and improves U-factor at the cost of weight and price.
- Low-E coatings control radiant heat flow; different coatings alter winter heat retention versus summer solar gain—review a low-E coatings overview to match coatings to orientation and climate.
Frame thermal performance matters as much as glass. Common frame options:
- uPVC: Low maintenance, good thermal performance for the price, but some builders avoid it for embodied carbon reasons.
- Wood: Excellent thermal properties and low U-value contribution, but requires regular maintenance.
- Aluminum-clad (with thermal break): Slim profiles and durability, but only thermally competitive with proper breaks and insulated cavities.
- Fiberglass: Strong, low expansion, and competitive thermal performance; see our frame material comparison for side-by-side details.
When to choose triple glazing: it's often cost-effective in cold, north-facing, or high-latitude sites where heating load savings and occupant comfort offset higher upfront cost. For milder climates, carefully sized low-E double glazing paired with shading can be a better budget choice.
External design insights about European window engineering can add context; see this university write-up on European window design for background on function and thermal thinking: Design Insight: What's up with European windows?.
Benefits for DIY Eco Homes: Ventilation, Safety, and Passive-house Compatibility
Tilt-turn windows offer several practical benefits for self-builders focused on efficiency and livability.
Controlled Ventilation and Passive-night Cooling:
- Tilt mode provides secure ventilation with the sash locked into a small top opening; that allows night cooling without compromising security or rain infiltration in light weather.
- For passive-night cooling strategies, pairing tilt ventilation with shaded nocturnal cross-breezes can reduce peak cooling loads.
Safety and cleaning:
- Turn mode allows the sash to open fully inward, which simplifies cleaning both glass faces from inside without ladders. That also makes the opening useful for emergency egress—an important consideration for bedrooms and kitchens.
- Multi-point locks and internal hardware reduce the risk of forcible entry compared with older single-point window systems.
Passive-house compatibility and airtight design:
- The compression seals and multi-point locking on many tilt-turn systems help meet airtightness goals. Combine the right window certification with installation practices that ensure the air barrier remains continuous at the frame to get the most benefit. For step-by-step passive-house selection and installation guidance see our article on passive house windows.
Shading and orientation:
- Tilt-turn units work well with external shading and overhangs to control summer solar gains; review window shading strategies when sizing glazing and choosing coatings.
Industry commentary and practical examples: A product-focused write-up on tilt-and-turn windows explains real-world performance and remodeling considerations for these systems; see Green Building Advisor's piece: An introduction to tilt-and-turn windows - GreenBuildingAdvisor.
Costs: Purchase, Installation, and Lifecycle Economics of Tilt-turn Windows
Window costs break down into several components: unit price (frame + glazing + hardware), delivery, site handling, installation and flashing, interior/exterior finishing, and long-term maintenance. For retrofit jobs include allowance for frame repairs, refurbs, and possible structural ordering.
Upfront Price Components:
- Frame material and finish (uPVC, wood, aluminum-clad, fiberglass).
- Glazing spec: double vs triple, low-E coatings, gas fills.
- Hardware: multi-point locking, tilt-turn mechanism, handle finishes, corrosion class for coastal sites.
- Ancillaries: flashing, sill pans, airtight tapes, insulation foams, and trim.
Illustrative example price bands (labelled as examples; regional variation can be large):
- Economy uPVC double-glazed tilt-turn: lower unit cost but variable hardware quality—useful for temperate climates where budget is tight.
- Mid-range wood-aluminum with double or triple glazing: higher upfront cost, better longevity and thermal performance.
- Premium factory-certified Passive House tilt-turn units: highest upfront cost but lower measured leakage and better long-term energy performance.
Installation Choices: DIY vs Professional
- New-construction: a competent DIYer can install windows when openings are plumb, drainage planes are complete, and flashing strategy is understood.
- Retrofit: often more complex—requires frame repair, possible re-sill work, and careful air-barrier reconnection. For help deciding, consult our DIY vs hiring pros guidance.
- Cost drivers: unit size, glazing weight (triple glazing increases handling difficulty), special frame finishes, access constraints, and required scaffolding.
Lifecycle costs and payback (illustrative calculation):
- Higher-performance windows raise upfront cost. Energy savings depend on climate, heating fuel cost, and air-tightness of the rest of the envelope.
- Example (illustrative): upgrading a set of main façade windows from double to high-performance triple glazing might increase window spend by X, while estimated heating savings could reduce bills by Y per year—calculate local payback using your climate data and fuel costs. For deeper analysis see our piece on triple-pane performance.
Additional cost considerations:
- Hardware warranty and corrosion class—coastal builds may need stainless or higher corrosion resistance, which raises price.
- Transport and handling: large tilt-turn sashes are heavy and may require special delivery or crane lift.
- Long-term maintenance: wood exterior finishes require repainting/staining; uPVC and fiberglass need little maintenance.
For practical buying decisions, ask suppliers for a breakdown of unit price by frame, glass package, and hardware, and request NFRC or Passive House certification sheets where applicable. For general market context and product comparison read industry guides such as the Idealcombi overview of tilt-and-turn functions: Guide to tilt and turn windows - Idealcombi UK.
Choosing the Right Tilt-turn Window: Materials, Hardware Grades, and Sizing Decisions
Frame Material Tradeoffs
- uPVC: Low maintenance and affordable, with good thermal performance when multi-chambered. Embodied carbon is higher than wood.
- Wood: Excellent thermal properties and lower embodied energy; needs routine exterior protection in exposed climates.
- Aluminum-clad wood: Slim sightlines and durable exterior but ensure a thermal break to avoid heat transfer.
- Fiberglass: Low expansion, strong, and durable; a solid choice where stability and low maintenance are priorities.
Compare durability, maintenance, and thermal behaviour against your climate and budget. Our frame material comparison gives longer comparisons and test data.
Hardware grades and security glazing:
- Ask about number of locking points around the sash (more points = better compression and security).
- Request corrosion class or surface treatment for coastal exposure.
- Consider laminated or toughened security glazing for vulnerable ground-floor openings.
- Check hinge load ratings and maximum sash dimensions the hardware supports.
Sizing and sash configuration:
- Larger glazed areas increase daylight and views but raise costs, weight, and thermal bridging risk at large frame perimeters.
- Consider mixing fixed units and operable tilt-turns: fixed glazing is cheaper per m² and gives lower leakage potential, while operable tilt-turns provide ventilation where needed.
- Plan sash proportions for maintenance: very wide sashes become heavy in turn mode and may require stronger hinges and professional installation.
Checklist of questions to ask suppliers:
- What is the tested U-factor and air leakage rating? Can you provide the test certificate?
- Is the unit Passive House certified or has a PHI component certificate?
- How many locking points and what corrosion class does the hardware use?
- What warranty covers glazing seal failure and hardware?
- What are recommended installation details for airtight connections?
Regional example sources and case studies on tilt-turn adoption in Canada show homeowner-reported efficiency improvements after upgrades; see a market-focused piece with Canadian examples here: Complete guide to European tilt-turn windows Canada 2025.
Installation Best Practices for Airtightness and Passive-house Standards
Proper installation is the single most important factor for realizing window energy benefits. This section summarizes sequence and product categories; read manufacturer installation manuals and local code before starting.
Preparing the Opening:
- Set a true, plumb, and square opening with correct head, jamb, and sill blocking. Ensure structural support for heavy sashes.
- Create or verify a continuous drainage plane behind cladding. Sloped sill or a pre-formed sill pan reduces risk of trapped water.
- Leave a consistent reveal around the frame per manufacturer; too tight or too loose gaps complicate sealing and shimming.
Air-sealing Details:
- Use butyl sill tapes or sill pans at the sill. Use a breathable breather membrane (weather-resistive barrier) lapped under the head flashing and over sill tape as the sequence requires.
- Connect the window flange or frame-to-structure interface to the primary vapour-control / air-barrier layer with airtight tapes rated for exterior use.
- Insulate gaps with low-expansion foam designed for window installation or use backer rod and compatible sealant where foams are not suitable.
- Fasteners should be set without distorting the frame; use shims under bearing points and follow manufacturer torque or clip guidance for compression.
Sequencing and best practice:
- Install sill pan and sill weather-resistive barrier.
- Place the window plumb and fasten at rated points.
- Seal the exterior flange or head with continuous flashing.
- Connect the interior air barrier to the frame with airtight tape and sealant.
- Install interior trim and finish; verify that interior vapour control is continuous where required.
Common Installation Mistakes Diyers Should Avoid:
- Over-tightening screws that distort the frame and impair hardware operation.
- Neglecting a sloped sill or sill pan, which leads to trapped moisture.
- Failing to connect the interior air barrier at the frame, which causes leakage despite a tight sash.
- Relying on expanding foam alone without compatible tapes and compressible backing.
Product types to consider (no single brand endorsement):
- Butyl sill tapes for short-term elasticity and adhesion.
- Breathable membranes for exterior WRB detailing.
- Airtight tapes rated for long-term adhesion to both frame materials and substrate.
- Low-expansion, gunnable insulation foams specifically made for window installation.
Watch a practical flashing and air-seal demo to visualize the sequence and the tilt-turn hardware operation before attempting installation:
When to hire a pro: If you plan a Passive House or airtightness target under 1.0 ACH50, consider hiring a certified installer or contractor experienced in continuity of air barriers. DIY install is more feasible in new builds with straightforward openings and adequate help for handling heavy sashes.
Comparison Table: Tilt-turn Windows Versus Casement, Sliding, and Awning — Specs at a Glance
How to read the comparison table: use columns to compare operation, ventilation control, airtightness potential, cleaning, security, typical U-factor ranges (illustrative), typical cost band (relative), and passive-house suitability.
| Feature | Tilt-turn | Casement | Awning | Sliding | Fixed |
|---|---|---|---|---|---|
| Operation | Tilt or inward turn | Hinged open (in/out) | Hinged at top, opens outward | Horizontal slide | No operation |
| Ventilation control | High (tilt = secure ventilation) | Moderate (full open) | Moderate (shielded) | Variable (partial open) | None |
| Airtightness potential | High (multi-point seals) | High (compression) | Moderate | Low–moderate | High |
| Ease of cleaning | High (inward turn) | Moderate | Harder (external cleaning) | Moderate | High |
| Security | High (multi-point locks) | High | Moderate | Lower | High |
| Typical U-factor range example | 0.8–1.4 W/m²K | 0.9–1.6 W/m²K | 0.9–1.8 W/m²K | 1.2–2.0 W/m²K | 0.6–1.4 W/m²K |
| Typical cost band (relative) | Mid–high | Mid | Low–mid | Low–mid | Low–mid |
| Passive-house suitability | Good (with certified units) | Good | Limited | Limited | Good (if high-spec) |
Interpretation: Tilt-turn windows offer an attractive balance of ventilation control, airtightness potential, and cleaning convenience, making them a strong candidate where airtightness and occupant control are priorities. In cold climates prioritize high-performance frames and triple glazing; in mild climates a well-specified casement or fixed unit may cost less while delivering acceptable performance.
Key Points for DIY Eco Homebuilders: Quick Checklist
- Verify U-factor: Ask for test certificates and compare like-for-like values.
- Choose frame material for climate: Pick wood or insulated claddings for cold sites; fiberglass for stability.
- Plan ventilation strategy: Use tilt mode with HRV/ERV systems for controlled fresh-air exchange.
- Budget for flashing and air-sealing: Include tapes, sill pans, and airtight connections, not just the window units.
- Confirm hardware grade: Request number of locking points and corrosion class for your exposure.
- Consider mix of fixed and operable: Use fixed glazing where ventilation isn't needed to cut cost and leakage.
- Schedule blower-door test: Verify airtightness after installation; patch and retest if needed.
- Know when to hire help: Bring in a pro for heavy lifts, complex retrofits, or airtightness-targeted projects.
The Bottom Line
Tilt-turn windows deliver practical ventilation control, easy cleaning, and strong airtightness potential, which fits well with passive-house and airtight design goals—but these advantages come with higher material and installation complexity. For DIY eco homes, prioritize certified performance data, careful flashing and air-barrier continuity, and realistic budgeting for hardware and labor to capture the long-term energy and comfort benefits of tilt-turn windows.
Video: Tilt-turn European Windows
For a visual walkthrough of these concepts, check out this helpful video:
Frequently Asked Questions
Are tilt-turn windows suitable for passive-house construction?
Yes. Tilt-turn windows can meet Passive House requirements when they are built to high-performance specifications and installed with airtight detailing. Look for units with validated U-factors and low air leakage and follow manufacturer and Passive House Institute installation sequences to maintain the continuous air barrier.
How much more do tilt-turn windows cost than standard casements?
Costs vary by material, glazing, and hardware. Tilt-turns typically command a mid-to-high cost band compared with basic casements because of multi-point hardware and heavier frames. Expect higher handling and installation complexity for large tilt-turn sashes. Obtain itemized quotes and compare unit, glazing, and hardware line items for accurate comparisons.
Can a competent diyer install tilt-turn windows, or should I hire a pro?
A competent DIYer can install tilt-turn windows in new construction when openings are square and drainage planes are in place; heavy sashes may require extra hands. Hire a professional for retrofits, difficult access, or when meeting strict airtightness targets. If in doubt, consult an installer experienced with airtight details and blower-door testing.
Do tilt-turn windows offer good security?
Yes. Multi-point locking systems and robust hardware provide strong resistance to forced entry compared with single-point locks. Security improves further with laminated or toughened glass and correct anchoring of the frame. Ask suppliers for security class ratings and the number of locking points when comparing units.
What maintenance do tilt-turn windows need to last 20+ years?
Perform annual checks: lubricate hardware pivots, inspect and clean seals, and tighten fasteners per the manufacturer's recommendations. Refinish or repaint exposed wood within recommended cycles. Replace glazing seals only if you observe fogging or moisture between panes. Routine attention extends service life substantially.