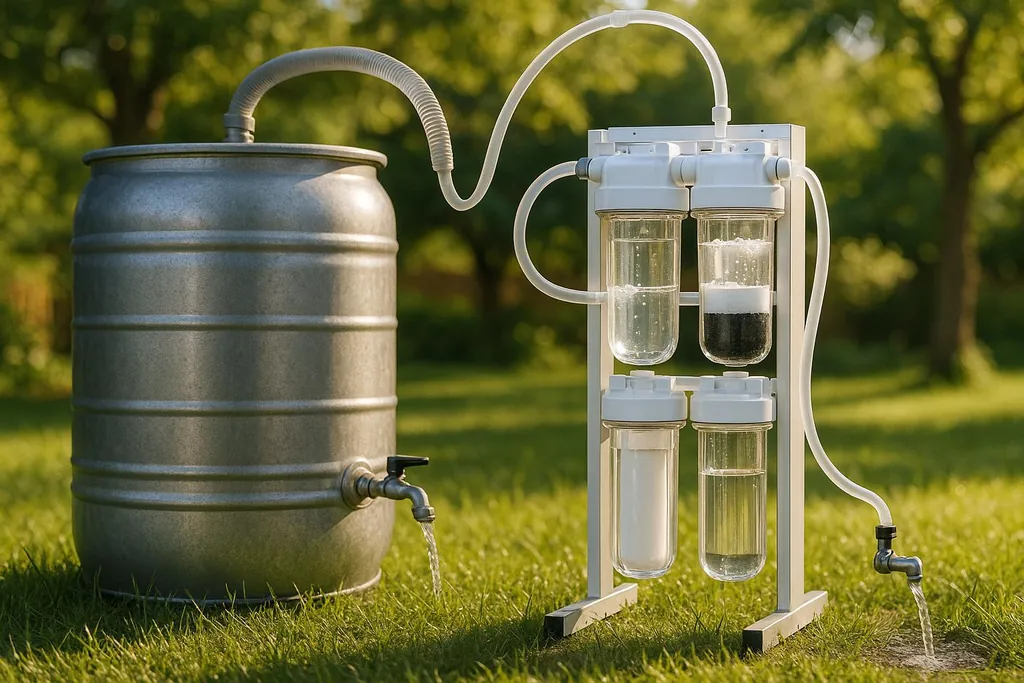
Learn how to build a DIY rainwater filtration system to save water and reduce your utility bills with this comprehensive guide.
DIY Rainwater Filtration Checklist
Want to save water and lower your bills? Building your own rainwater filtration system can cut household water use by 30–60% and reduce reliance on municipal supplies. This guide simplifies the process, covering tools, materials, setup, and maintenance to ensure clean, usable rainwater.
Key Steps:
- Tools & Materials: Gather essentials like power drills, PVC pipes, food-grade barrels, and filters (sand, charcoal, or UV systems).
- Site Prep: Choose a shaded, level area near your downspout. Build a stable platform for your tank.
- System Setup: Install gutters, diverters, and secure your tank. Use pre-tank filters to remove debris.
- Filtration & Treatment: Combine sand, gravel, and carbon filters with UV disinfection for safe water.
- Maintenance: Inspect monthly, clean quarterly, and test water annually for safety.
Benefits:
- Reduce utility costs
- Collect chlorine- and fluoride-free water
- Comply with local codes for safe and efficient use
Follow this step-by-step approach to build a reliable rainwater filtration system for your home.
DIY Home Water Filtration System: Rainwater Harvesting with a Biological Sand Filter and Maintenance
Tools and Materials
Creating a DIY rainwater filtration system starts with careful planning and having the right tools and materials on hand. Before diving in, make sure you've gathered everything you need for a smooth building process.
Required Tools
You'll need a variety of tools to assemble your filtration system. Key items include:
- Power drill with assorted bits
- Jigsaw for cutting large openings
- Pipe wrench and an adjustable wrench set
- Measuring tape and a level for accurate alignment
- Basic hand tools like screwdrivers, pliers, and a utility knife
- Hacksaw for cutting pipes and sandpaper for smoothing edges
A level is especially important for properly aligning gutters and storage tanks. And don't forget to prioritize safety - wear work gloves and safety glasses when cutting or drilling.
Filtration System Materials
Once your tools are ready, focus on gathering quality materials to ensure your system lasts.
- Storage Containers: Opt for food-grade containers. Used 55-gallon drums are budget-friendly, costing about $20–$30, while decorative rain barrels can range from $100 to $500 . Always confirm that barrels are labeled "food-grade" to ensure they haven't stored harmful substances. If using translucent IBC totes, cover them with opaque material to block sunlight and prevent algae growth .
- Conveyance Components: These include gutters, downspouts, and connecting pipes, which typically cost between $100 and $1,500, with an average expense of $800 . You'll need PVC pipes (usually 3 to 4 inches in diameter), T-fittings, 90-degree elbows, and threaded couplings for assembly.
- First Flush Diverter: To build one, gather a vertical PVC drain pipe, a plain T fitting, a 90-degree fitting, a threaded access coupling, a capped threaded coupling (with an O-ring or ball valve), a floating ball, a ball seat, and PVC cement . These diverters usually cost between $20 and $60, with an average price of $40 .
- Filtration Materials:
- For a sand and gravel filter, you'll need a large container, coarse gravel, fine gravel, sand, and a spigot .
- A charcoal filter requires activated charcoal, a container with a mesh bottom, and another container to collect filtered water .
- Additional Components:
- Gutter mesh: $0.80–$1.25 per linear foot
- Downspout screens: Around $30
- Tank screens: About $30 each
- If you want to add water pressure, a pump costs between $150 and $300, averaging $225 .
Filter Type Comparison
Different types of filters serve unique roles in your system, from removing large debris to improving water quality. Here's a breakdown of some common filter types:
| Filter Type | Particle Size Removed | Primary Use | Maintenance |
|---|---|---|---|
| Mesh Filters | Greater than 750 microns | Removes large debris (pre-tank) | Clean regularly |
| Sand & Gravel | Removes particulates | Secondary filtration | Regular inspection |
| Carbon Filters | Not specified | Enhances taste and reduces chemicals | Replace or check periodically |
| Self-Cleaning | 5–4,000 microns | High-flow applications | Annual inspection |
For larger rooftops, select a filter that can handle higher flow rates . While most filters require cleaning every few months, self-cleaning models only need an annual check-up to ensure they’re functioning properly .
Site Preparation and System Setup
Getting your site ready is a crucial step to ensure your system works efficiently and lasts for years. Proper positioning of your storage tank is key to functionality and ease of maintenance.
Preparing the Collection Site
Picking the right location and preparing it correctly can make all the difference in water flow and tank upkeep.
Location Selection should be your first priority. Here's some practical advice:
> "The first thing you need to do is decide where you want the container to go. It needs to be located near the building you want to collect rainwater from, and it also needed to be elevated if you want it to work on gravity flow."
Choose a spot close to your downspout to keep piping simple and reduce the chance of leaks or failures. Additionally, try to place the tank in a shaded area to limit sunlight exposure, which can encourage algae growth in translucent tanks.
Ground Preparation is another important step. Clear the area of any debris, rocks, or vegetation, and ensure the ground is level. For example, when setting up a 275-gallon IBC container, a 4′×4′ level area was prepared in a rock garden near a barn. This provided a stable and secure base for the tank .
Building a Platform helps elevate the tank, making it easier to access spigots and drain ports. Use pressure-treated wood or concrete blocks to create a sturdy base that slightly extends beyond the tank’s edges. This prevents erosion and ensures stability. You can also add a notch in the platform for easy access to the drain port.
Once the site is ready, you can move on to setting up the drainage components.
Installing Gutters and Diverters
With the collection site prepared, the next step is to ensure your gutters and diverters direct water efficiently into the tank.
Gutter Installation requires careful planning. Measure and cut your gutters so they slope slightly - about 1/4 inch per 10 feet - toward the downspouts. This ensures smooth water flow and prevents pooling.
Downspout Diverter Installation is all about precision. Cut a 6-inch section from the downspout at least 24 inches above the container, making sure to smooth out any rough edges. Modern diverters, like the BlueBarrel System, simplify this process. Their flexible, rubberized diverter head fits directly into standard downspouts with minimal cutting. As BlueBarrel explains:
> "The most brilliant thing about this diverter is that it optimizes inflow to fill rate, and handles system overflow automatically. Because of that hole, this is all possible with no on-and-off switch. It's a true set-it-and-forget-it solution."
Secure the diverter with self-tapping screws, then attach a rubber hose from the diverter outlet to your rain barrel using nylon cable ties. Keep the hose level to ensure proper overflow management. If your system requires complete diversion, make sure the overflow capacity can handle heavy rainfall to avoid backups.
Placing and Securing the Storage Tank
Proper tank placement is vital for maintaining system stability and preventing issues like leaks or contamination.
Foundation Requirements and Positioning are critical. The foundation must support the tank's full weight when filled. For reference, a 55-gallon drum weighs about 460 pounds when full, while a 275-gallon IBC container can exceed 2,300 pounds. Make sure the foundation extends beyond the tank’s edges to prevent erosion and keep the tank level for even water distribution. When using multiple tanks, position inlet and outlet pipes at opposite ends to promote circulation and reduce stagnation.
For above-ground installations, you can use concrete pads, patio blocks, or a sturdy wooden platform. Be sure the surrounding area is free of tree roots that could disrupt the foundation over time.
Pipe Installation and Sealing should focus on using high-quality, flexible piping to minimize leaks and make maintenance easier. Ensure all connections are tightly sealed to protect water quality. For underground setups, use proper bedding materials and backfill carefully, compacting the soil around the tank to prevent shifting during heavy rains.
Plan for Access and Maintenance by placing tanks where cleaning, inspections, and repairs are convenient. Keep the area above underground tanks clear of heavy equipment. It’s also a good idea to have the site professionally assessed to check soil conditions and drainage patterns, avoiding potential problems down the line.
A stable and secure tank ensures reliable water collection and simplifies future maintenance.
Filtration and Water Treatment Stages
Once your storage tank is properly set up and connected, the next step is ensuring the water flowing through your system is both clean and safe. A well-thought-out filtration system not only protects the longevity of your setup but also ensures the health of your household.
Pre-Tank and Multi-Stage Filters
Getting rid of debris before it even enters your tank is a smart move. It reduces maintenance needs and keeps your water cleaner from the beginning.
Pre-Tank Filter Installation acts as your first line of defense. These filters typically feature a stainless-steel mesh or grill housed in a plastic casing. The mesh's fineness is measured in microns - the smaller the micron rating, the finer the filtration . A downspout diverter can also help redirect debris away from your collection tank .
Pre-filtration devices should be set up before rainwater enters the storage tank, while post-filtration devices are installed after the pressure tank and before the water reaches your fixtures .
Filter Selection and Performance play a crucial role in reducing maintenance. For instance, filters like the Wisy Vortex and Linear100 are highly rated for their efficiency, requiring monthly cleaning initially, followed by quarterly maintenance. Horizontal mesh filters tend to need more frequent cleaning than vertical ones. Pre-tank filters also save you the hassle of opening your tank for cleaning .
Multi-Stage System Setup uses a combination of filters to tackle different contaminants . Typically, the process starts with coarse filters to catch large particles, followed by finer sediment filters. Activated carbon filters then remove chemicals and improve taste. Finally, UV disinfection ensures the water is free of harmful microorganisms. This layered approach ensures each filter works efficiently without being overwhelmed by contaminants .
After implementing your multi-stage filtration, consider adding UV disinfection for an extra layer of protection.
UV Disinfection Systems
UV disinfection offers a chemical-free way to eliminate harmful microorganisms that could cause illnesses.
How UV Technology Works: UV filters use ultraviolet light at a wavelength of 254 nanometers to disrupt the DNA of harmful organisms like bacteria, viruses, and protozoa, effectively rendering them harmless . According to the United States Department of Health, a UV system should deliver at least 30,000 mJ/cm² for effective treatment of drinking water .
Installation Requirements are straightforward but essential to ensure proper functioning. A prefilter (5 to 20 micron) should be installed before the UV system to remove turbidity and suspended solids . Choose a UV system that matches your household's peak water demand, measured in gallons per minute (gpm) . For optimal performance, the incoming water should meet these quality standards:
| Parameter | Acceptable Range |
|---|---|
| Turbidity | 5 FTU or 5 NTU |
| Suspended solids | < 10 mg/L |
| Iron | < 0.3 mg/L |
| Manganese | < 0.05 mg/L |
| pH | 6.5–9.5 |
Power and Maintenance Needs are key to keeping your UV system running smoothly. A consistent power supply is required . Replace the UV lamp annually, as these lamps are designed to last 8,760 hours while maintaining 98% efficiency . Clean the quartz sleeve regularly - weekly or monthly - to prevent buildup that could block the UV light .
It’s also essential to monitor treated water for coliform and heterotrophic bacteria monthly for the first six months . Before using the system for the first time - or after servicing - disinfect your plumbing with chlorine .
For added peace of mind, use NSF-certified components to ensure your system is reliable and safe.
NSF-Certified Components
Certified components give you confidence that your filtration system will perform as expected and produce safe drinking water.
What Is NSF Certification? NSF International certifies water filters to meet specific safety and performance standards . Look for the NSF mark and numbers like NSF/ANSI 53, NSF/ANSI 42, or NSF/ANSI 58 on products. These numbers indicate the type of contaminants the filter is certified to reduce, such as lead .
Choosing Certified Products starts with understanding your water quality needs. Obtain a water quality report from your local utility or, if you use a private well, have the water tested independently . Use NSF’s contaminant reduction claims guide to find certified products that address your specific concerns . For example, filters certified to NSF/ANSI 58, such as certain multi-stage reverse osmosis units, can remove up to 99% of harmful contaminants.
Maintaining Certification Standards ensures your system continues to work effectively. Follow the manufacturer’s recommended maintenance schedule and replace filters as needed . Keep documentation of your certified components and perform regular testing to ensure everything is functioning properly .
Consistent care and attention to your filtration system protect both your investment and your family’s health. Regular maintenance ensures your water remains safe and clean for everyday use.
Testing and Maintenance Schedule
Once your filtration system is up and running, keeping it in top shape requires regular inspections, testing, and diligent record-keeping. A well-maintained system can serve you reliably for decades. By sticking to a structured maintenance schedule, you can avoid expensive repairs and ensure your water stays clean and safe.
Regular System Inspections
A tiered inspection schedule - monthly, quarterly, and annually - helps you catch potential issues early and keep your system running smoothly.
Monthly inspections should focus on the system's most exposed and vulnerable areas. Check the roof catchment area for leaves, dirt, or other debris. Look at the gutters and ensure they’re clear and free of blockages. Inspect the area around tank openings for signs of pests or other unwanted materials. Confirm that all downpipes are securely attached and haven’t shifted due to weather or ground movement . While you’re at it, monitor water levels to track seasonal changes and ensure you have an adequate supply .
Quarterly maintenance steps things up with deeper cleaning and testing. Thoroughly clean gutters and downpipes to remove any buildup that monthly checks might have missed. Install or replace mesh guards to prevent clogs. Flush pipes to ensure water flows freely. Clean inlet and overflow screens to remove dirt and debris, and replace any damaged screens. Tighten loose fittings to avoid leaks . Filter cartridges should be replaced every six months or as needed, depending on usage . Check the filtration system materials section for specific filter details.
Annual deep cleaning is essential for long-term care. Fully drain the rainwater tank and scrub the interior walls using non-toxic cleaners safe for potable water systems. Remove sediment from the bottom of the tank and inspect for corrosion or structural damage that could impact water quality or the tank’s integrity. This process helps prevent bacterial growth and extends the life of your tank . After dry periods, perform a first flush to clear away dust and contaminants that may have built up on your roof .
Once inspections are complete, testing your water ensures its safety and quality.
Water Quality Testing
Testing your water regularly is just as important as maintaining the system itself. Since private water systems aren’t regulated by the EPA like public utilities, it’s up to you to monitor the quality of your water .
Basic annual testing should include checks for total coliform bacteria, nitrates, total dissolved solids, and pH levels. These tests provide a good baseline for assessing safety and quality . Use state-certified laboratories to verify results, and consult your local health department to see if additional tests are recommended based on environmental factors in your area.
Immediate testing is necessary if you suspect contamination. This could be triggered by nearby construction, flooding, or noticeable changes in your water’s odor, color, or taste . Families with vulnerable members - like young children or the elderly - may want to test more frequently .
| Nearby Conditions | Test For |
|---|---|
| Intensive agriculture | Nitrate, nitrite, pesticides, coliform bacteria |
| Mining operations | Metals, pH, corrosion |
| Gas drilling | Chloride, sodium, barium, strontium |
| Industrial facilities | Volatile organic compounds, total dissolved solids, pH, sulfate, chloride, metals |
| Fuel stations or buried tanks | Volatile organic compounds |
| Stained fixtures or laundry | Iron, copper, manganese |
If harmful contaminants are found, switch to bottled water and contact your local health or environmental department for advice on remediation .
Maintenance Tracking Log
Keeping detailed records is key to transforming maintenance into a straightforward, efficient process. A maintenance log helps you spot trends, plan future tasks, and troubleshoot problems more effectively. Record the date (MM/DD/YYYY), actions taken, and any test results. Be sure to include notes on filter replacements, cleaning activities, and any repairs or adjustments.
Using a digital tracking system, like a simple spreadsheet, can streamline this process. Include columns for the date, type of maintenance, actions performed, parts replaced, costs, and additional notes. These records are invaluable when diagnosing system issues or even when selling your property, as they provide a clear history of care and maintenance that can reassure both technicians and potential buyers.
Safety and Compliance Considerations
Once you've set up your rainwater filtration system and established a maintenance routine, the next step is to focus on safety and compliance. These measures not only protect your investment but also ensure the system operates within local regulations, keeping your family and property safe.
System Safety Measures
- Mosquito Prevention: Mosquitoes and other pests can turn your rainwater system into a breeding ground if not properly managed. Install screens on all tank openings to block bugs and debris, and make sure everything is securely sealed to keep mosquitoes out .
- Contamination Control: Rainwater collected after a dry spell may contain contaminants from rooftops and gutters. A first flush diverter can help by discarding the initial runoff, ensuring cleaner water enters your system .
Potable vs. Non-Potable Water Labels
Proper labeling is critical to avoid accidental use of untreated water for drinking and to comply with safety codes. Nonpotable water systems must be clearly marked, often using purple color-coding. This ensures anyone interacting with the system knows the water is not safe to drink.
- Pipe Marking: Use purple tape or embossing on pipes to display warnings like "CAUTION: NONPOTABLE WATER. DO NOT DRINK" . For existing pipes, wrap them with purple identification tape that’s at least 3 inches wide. The tape should feature clear white or black lettering and be fastened every 10 feet .
- Outlet Labeling: Clearly mark all nonpotable outlets, such as faucets and hose connections, with signs stating "Nonpotable Water - DO NOT DRINK." The lettering must be at least 0.5 inches high, in contrasting colors, and include a "Do Not Drink" pictograph for added clarity .
Here’s a quick reference for pipe labeling requirements:
| Pipe Diameter | Background Field Length | Letter Size |
|---|---|---|
| 3/4" to 1-1/4" | 8 inches | 0.5 inches |
| 1-1/2" to 2" | 8 inches | 0.75 inches |
| 2-1/2" to 6" | 12 inches | 1.25 inches |
| 8" to 10" | 24 inches | 2.5 inches |
| Over 10" | 32 inches | 3.5 inches |
- Cross-Connection Prevention: To prevent mixing potable and nonpotable water, maintain a physical separation between the two systems. Use air gaps or reduced pressure zone (RPZ) valves as required by local codes to ensure proper backflow prevention.
Permitting and Code Compliance
Before you begin installation, check with your local government for permitting requirements. This includes consulting zoning, fire, building, and health departments, as guidelines vary depending on system size, intended use, and local conditions .
- Permit Requirements: Some areas require permits for tanks over 5,000 gallons . Indoor or commercial systems often need professional design and approval.
- Professional Design: For potable systems or those serving multiple units, certain states require designs by a licensed professional engineer .
- State Regulations: Regulations differ by state. While some states offer incentives for rainwater harvesting, others impose restrictions. For example, Utah requires registration with the Utah Division of Water Rights .
For guidance, refer to resources like the ARCSA/ASPE 63 document from the American Rainwater Catchment Systems Association or the International Association of Plumbing and Mechanical Officials (IAPMO) rainwater code .
Backflow Prevention
To protect public water supplies, install backflow prevention devices wherever your rainwater system connects to potable water supplies. These devices, such as air gaps or RPZ valves, must comply with local codes and permit requirements.
Conclusion and Key Takeaways
Setting up a DIY rainwater filtration system is a rewarding project, but it demands thoughtful planning, the right tools, and consistent upkeep to ensure it operates effectively and safely. Cutting corners during installation can jeopardize water quality, while a properly designed and maintained system offers a dependable source of clean water for your home .
Understanding the pre-filtration and post-filtration stages is a cornerstone of building a reliable system. These steps not only ensure water quality but also simplify routine maintenance and help meet local legal requirements.
| Filtration Stage | Contaminants Addressed | Methods/Devices |
|---|---|---|
| Pre-filtration | Large debris (leaves, twigs, pebbles) | Gutter screen guards, downspout diverters, rain barrel covers |
| Post-filtration | Pathogens, volatile chemicals, heavy metals | UV disinfection, carbon filtration, reverse osmosis, whole house filter |
Regular maintenance is non-negotiable for keeping your system efficient. Tasks like cleaning gutters and downspouts and replacing filter components are essential . The Centers for Disease Control and Prevention (CDC) underscores this point:
> "The Centers for Disease Control and Prevention (CDC) recommends that any rainwater meant for drinking should be filtered and disinfected, as well as regularly tested. System maintenance is crucial to preventing contamination."
Legal and safety requirements vary widely by state. Some states mandate system registration, while others offer tax benefits for installing rainwater collection systems. It’s always a good idea to check your local regulations before starting.
Following established industry standards is another way to ensure your system runs smoothly. As highlighted by experts:
> "Following the American Rainwater Catchment Systems Association's (ARCSA) guidelines for rainwater system engineering and installation ensures that your system is safe, compliant, and efficient."
FAQs
What are the main challenges of setting up a DIY rainwater filtration system, and how can you address them?
Setting up your own rainwater filtration system can be rewarding, but it does come with a few hurdles, such as filter clogging, microbial growth, and contamination risks. Thankfully, these challenges can be tackled with some simple yet effective measures:
- Keep filters clear: Regularly clean your filters and consider adding a pre-filtration setup to trap debris before it reaches the main system.
- Prevent microbial growth: Opt for high-quality filtration materials like ceramic or sand filters, and stay on top of routine maintenance to keep things running smoothly.
- Make water safe to use: Add a UV sterilizer or use safe chemical treatments to eliminate bacteria and other harmful pathogens.
By staying consistent with maintenance and using the right tools, you'll have a dependable system that provides clean, safe rainwater for your home.
How can I make sure my DIY rainwater filtration system meets local safety and legal requirements?
To make sure your DIY rainwater filtration system meets local safety and legal standards in the US, start by checking your city or state’s building codes and health department guidelines. These documents often detail the specific rules for rainwater harvesting and filtration systems.
When building your system, use certified, food-grade materials, like ANSI/NSF 61-approved containers. Your design should also include proper filtration and regular maintenance steps to ensure the water remains safe. Don’t forget to look into state-specific regulations or recommendations, as these can differ significantly depending on where you live.
For extra support, you can consult resources such as CSA B805/ICC 805:2022 standards or EPA recommendations on rainwater harvesting. Staying up-to-date on regulations and using approved materials will help you create a system that’s both safe and compliant.
How can I keep my rainwater filtration system working efficiently and ensure the water stays clean?
To keep your rainwater filtration system running smoothly and ensure the water stays clean, it’s important to stay on top of maintenance. Start by inspecting and cleaning the filters regularly to avoid clogs. Every 3 to 6 months, clear debris from your gutters to keep the system flowing properly. After heavy rainfall, check the first-flush diverters to make sure they’re working as intended.
Don’t forget about the storage tank - disinfect it at least once a year. For added safety, you might want to use UV sterilization or other disinfection techniques to keep the water safe for use. Lastly, test the water periodically to check for any contaminants and make sure it meets safety standards.