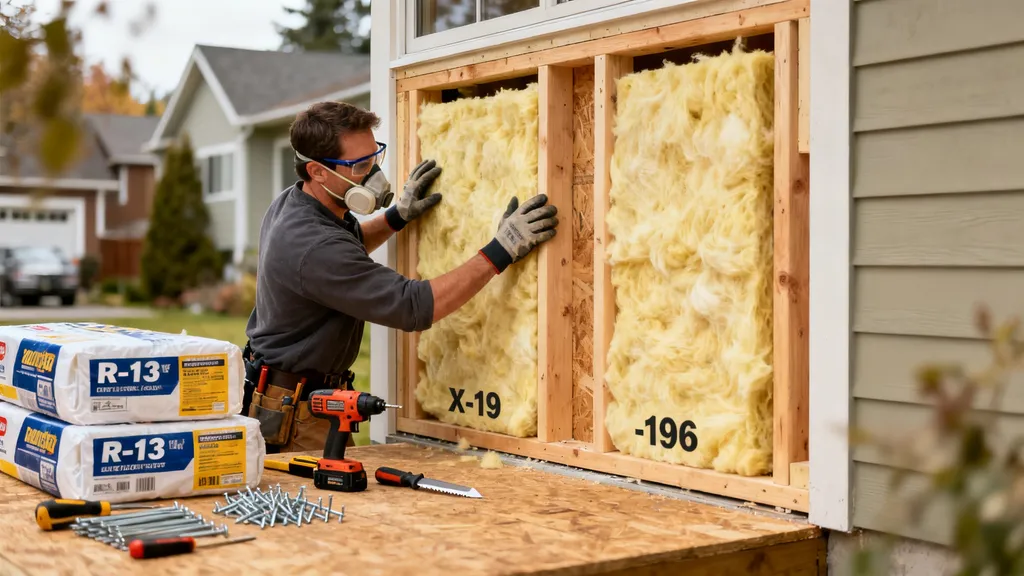
Compare R-13 and R-19 batts — costs, performance, best uses, and simple decision rules for DIY self-builders.
R-13 vs R-19 Insulation: Which Do You Need?
Choosing between R-13 and R-19 batt insulation is a common decision for DIY self-builders and retrofit projects. This article compares R-13 vs R-19 insulation so you can judge thermal performance, fit for 2x4 vs 2x6 walls, installation trade-offs, and simple rules to pick the right option for your climate and budget. Read on for a quick comparison table, practical installation tips, upgrade paths, and scenario-based recommendations for common DIY situations.
TL;DR:
- For standard 2x4 exterior walls, R-13 batts (3.5" thick) are the usual choice; for 2x6 walls, R-19 (5.5" thick) gives ~31% lower cavity U-value (U = 1/R) than R-13 when comparing cavity R only (U≈0.077 vs U≈0.053).
- If your wall depth is fixed and budget is tight, prioritize air sealing and continuous insulation before upgrading from R-13 to R-19 — these measures often deliver larger real-world gains.
- Choose R-13 for budget retrofits and mild climates; choose R-19 (or R-13 + continuous foam) for cold climates or when building with 2x6 framing.
R-13 vs R-19 Insulation: Quick TL;DR and Comparison Table
A short visual comparison helps: R-13 batts are sized for 2x4 (3.5") stud bays; R-19 fits 2x6 (5.5") bays. The Department of Energy's overview of insulation types explains the options and where each material tends to be used, which is useful when weighing batt choices against blown or rigid options: Department of Energy - types of insulation.
| Nominal R-value | Typical cavity | Typical R/inch (nominal) | Installed thickness (nominal, full vs compressed) | Rough cost per bay (range) | Best common use |
|---|---|---|---|---|---|
| R-13 | 2x4 walls (3.5") | ~3.7 R/inch (13 ÷ 3.5") | 3.5" full thickness; compressing reduces R | $4–$12 | 2x4 exterior walls, interior partitions, budget retrofits |
| R-19 | 2x6 walls (5.5") | ~3.45 R/inch (19 ÷ 5.5") | 5.5" full thickness; compressing into 3.5" drops performance | $7–$18 | 2x6 exterior walls, floors above unconditioned spaces, colder climates |
Simple U-value example (cavity-only comparison):
- R-total = 13 → U = 1 / 13 = 0.077 Btu/(hr·ft²·°F)
- R-total = 19 → U = 1 / 19 = 0.053 Btu/(hr·ft²·°F)
Upgrading the cavity from R-13 to R-19 reduces the cavity U by about 31%. Flag: whole-wall U will be worse because of thermal bridging through studs, so actual savings depend on framing fraction, air sealing, and continuous insulation.
What you’ll see in practice: thickness and proper installation matter more than small differences in labeled R. Watch a short video that shows how R-13 and R-19 look in real cavities and common installation errors so you can visualize fit and compression:
R-13 vs R-19 Insulation: What R-value Means for DIY Homebuilders
R-value Basics in Plain Language
R-value measures resistance to heat flow; the higher the number, the more the material resists heat transfer. That said, R-value is a property of the installed material in a controlled test. In real walls, the effective performance depends on more than the batt label: cavity depth, compression, gaps, air leakage, and thermal bridging through studs all reduce whole-wall performance.
Typical nominal R/inch numbers vary by material and product. For batts, the nominal R per inch is roughly:
- Fiberglass batts: about 2.6–3.8 R/inch depending on product and density.
- Mineral wool (stone wool) batts: roughly 3.0–3.3 R/inch for many common products.
For an accessible technical overview of cavity insulation types and installation factors, see our cavity insulation explained page and the Insulation Institute's guidance on selecting fiberglass products: A guide to selecting fiber glass insulation products for new construction (pdf).
R-value Per Inch, Thermal Bridging, and Why Installed Performance Differs From Label Numbers
Two issues reduce the labeled R-value in the finished wall:
- Thermal bridging: wood studs and metal fasteners have much lower R than insulation. In a typical framed wall with 16" o.c. studs, the whole-wall effective R can be 10–30% lower than the cavity R depending on stud fraction and sheathing.
- Air leakage: cavities with convective loops or gaps let warm air bypass insulation; a continuous air barrier plus good sealing often saves more energy than a small R upgrade.
Because of this, many builders recommend combining cavity insulation with continuous exterior insulation (rigid foam or insulated sheathing) or prioritizing airtightness and moisture control before stepping up batt R. For climate-specific guidance on target R-values, check Energy Star's recommended home insulation R-values: ENERGY STAR recommended insulation R-values.
Use the rule of thumb: in moderate climates, fixing air leaks and adding 1–2 inches of exterior foam can beat the cost of upsizing every stud cavity to a much higher batt R.
R-13 vs R-19 Insulation: R-13 Batt Insulation — Overview, Strengths, Weaknesses, Best For
Overview (typical Materials and Where It Fits)
R-13 batts are made primarily for 2x4 stud bays (3.5" nominal thickness). Common materials are fiberglass and mineral wool. Fiberglass R-13 rolled or faced batts are widely available at big-box stores and insulation suppliers; unfaced batts are common when a separate vapor/air barrier will be installed.
Strengths
- Lower upfront cost and widely available in standard lengths for wall studs and floor joists. Typical installed cost per bay is toward the low end of the ranges in the table above.
- Fits existing 2x4 framed walls without changing framing or depth — good for many retrofit projects.
- Easier to handle and cut for DIY work; fewer framing adjustments necessary.
- When properly installed and combined with air sealing, can deliver acceptable comfort in mild climates.
Weaknesses
- Lower thermal resistance than R-19; in cold climates it may lead to higher heating loads and more condensation risk on cold sheathing if other controls are missing.
- Less sound control and less fire/thermal mass benefit than deeper assemblies or dense-pack cellulose.
- Compressing higher-R batts into a 2x4 cavity reduces performance; do not stuff thicker batts into shallower cavities expecting full R.
For practical specs and handling tips, see our fiberglass batt basics guide and the material comparison in rockwool vs fiberglass.
Best for (use Cases)
- Budget retrofits of 2x4 exterior walls where changing framing depth isn't feasible.
- Interior partitions and acoustic separation where full exterior R isn't required.
- Mild climate new builds or rehab projects where whole-wall upgrades (continuous insulation) are not in scope.
If you plan a low-cost retrofit, pair R-13 with focused air-sealing and consider installing a low-profile exterior foam or insulated sheathing where you replace cladding.
R-13 vs R-19 Insulation: R-19 Batt Insulation — Overview, Strengths, Weaknesses, Best For
Overview (typical Materials and Where It Fits)
R-19 batts are typically designed for 2x6 stud bays (5.5" depth). Common batt materials include fiberglass and mineral wool; rigid mineral wool boards are also an option where higher R and moisture resilience are desired. Local code and field guides sometimes call for R-19 in floors or in certain climate zones; for example, some regional residential field guides list R-19 for floors above ventilated crawlspaces or colder zones — see the Georgia Residential Energy Code field guide for zone-based examples: Georgia Residential Energy Code - field guide (PDF).
Strengths
- Higher thermal resistance in the cavity improves steady-state heat loss, better sound control, and greater comfort in colder climates when correctly installed.
- If you have 2x6 framing, R-19 avoids compressing insulation and achieves its rated performance.
- Mineral wool R-19 options add fire resistance and can handle moisture better than standard fiberglass.
Weaknesses
- Requires deeper cavities; forcing R-19 into a 2x4 bay by compressing will reduce actual R and can create gaps or voids that reduce performance.
- Higher material cost and slightly more labor if you must modify framing or add furring.
- Not all performance gains translate into large energy savings unless thermal bridging and air leakage are controlled; sometimes a combination of R-13 cavity + exterior continuous insulation yields better whole-wall R per dollar.
For comparison with adjacent R-values and when a small step-up matters, see r-19 vs r-20 comparison. For rigid higher-R options, consider rigid mineral wool board.
Best for (use Cases)
- New construction with 2x6 framing in cold or mixed-humid climates.
- Floors over unconditioned spaces where depth allows R-19.
- When homeowners prioritize better sound control and an upfront investment in thermal performance.
If you are building new and can choose stud depth, R-19 is often a sensible default for moderate-to-cold zones. Also consider hybrid strategies: R-19 in cavities plus 1–2" of exterior foam to cut thermal bridging.
R-13 vs R-19 Insulation: Alternatives and Upgrade Paths If R-19 Isn't Enough
Not every project needs thicker batts. Several upgrade paths boost whole-wall performance without extreme framing changes.
Dense-pack Cellulose and Blown-in Options
Dense-pack cellulose in cavities or attic-ceiling assemblies can achieve higher effective R and reduce convective heat loss. It adapts well to irregular cavities and is a good retrofit option for older 2x4 walls. Learn the basics of cellulose here: what is cellulose. Compare blown and foam approaches in our spray foam vs cellulose guide.
Continuous Exterior Foam or Rigid Insulation Plus Thinner Batts
Adding continuous rigid insulation outside the sheathing (EPS/XPS/polyiso) reduces thermal bridging and increases whole-wall R without deeper studs. See EPS options: EPS foam board options. A common strategy: use R-13 batt in the cavity plus 1–2" of exterior foam to reach the whole-wall performance of deeper cavities.
Wall Assembly Changes: Double-stud Walls, Larsen Trusses
If you want much higher R and are willing to change wall thickness, double-stud walls and Larsen trusses create deep cavities for large amounts of loose-fill or batt insulation and greatly reduce thermal bridging. For a full comparison, read double stud vs larsen truss.
When to Consider Spray Foam or Hybrid Systems
Spray polyurethane foam (closed- or open-cell) raises cavity R and provides an air barrier, but it has higher embodied carbon and cost. Many DIY-friendly hybrids exist: use a thinner spray layer for air sealing plus dense-pack cellulose or batt to reach target R. For safer, lower-impact options compared to conventional spray foam, see safer spray foam alternatives and compare performance in spray foam vs cellulose.
When choosing an upgrade path, weigh embodied carbon, moisture risk, cost, and the ease of future repairs. Dense-fill options and mineral wool are more moisture-tolerant than some spray foams.
R-13 vs R-19 Insulation: How to Decide for Your Climate, Budget, and Build Method
Simple Decision Flow (2–3 Questions Diyers Can Answer)
- What is your cavity depth? If 2x4 → R-13 fits; if 2x6 → R-19 fits comfortably.
- What climate zone are you in? Colder zones (IECC zones 5–8) justify deeper cavities or continuous foam. See climate zone maps for reference: IECC climate zones and resources.
- What’s your budget vs lifetime energy cost? Use a payback estimate with our insulation savings calculator to compare options.
Answering these narrows the choice fast. If you can add continuous foam or increase cavity depth affordably, that often yields better whole-wall R than simply swapping batt R.
Scenario A: Retrofitting a 2x4 Wall on a Budget
Recommendation: keep R-13, prioritize air sealing and fill gaps, then add low-profile exterior foam where you replace siding. Dense-pack cellulose is a retrofit-friendly upgrade if you open the wall or drill and dense-pack from the interior.
Scenario B: New Self-build in a Cold Climate
Recommendation: choose 2x6 framing with R-19 batts and add 1"–2" of continuous exterior foam if your budget allows. Consider double-stud or Larsen truss assemblies for high-performance targets.
Scenario C: Tiny House or Narrow-wall Projects
Recommendation: wall thickness is often constrained; use the highest-performing materials that fit (e.g., mineral wool batts or rigid polyiso on the exterior) and prioritize airtightness. For floors and ceilings, aim for continuous insulation where possible; our compact example, insulating a shed floor, shows how to balance depth constraints and performance.
To estimate payback for a specific home, run numbers through the insulation savings calculator using your climate, heating fuel, and utility prices.
R-13 vs R-19 Insulation: Installation Tips and Common DIY Mistakes
Fit, Compression, and Avoiding Gaps
- Cut batts to fit around pipes and wiring; avoid gaps larger than 1/4" between batt and framing.
- Do not compress R-19 into a 2x4 cavity expecting R-19 performance; compressed batts lose rated R and can create voids.
- Stagger seams between layers and avoid leaving voids behind electrical boxes.
Why Air Sealing Matters More Than Small R Jumps
Sealing the top plates, rim joists, and penetrations often reduces heat loss more than upgrading from R-13 to R-19 in the cavity. For airtightness guidance and Passive House-style detailing, see our airtightness overview in the passive house resources.
Vapor Control and Moisture-management Basics
Vapor control strategy depends on climate. In cold climates, keep vapor control on the warm side of insulation; in warm-humid climates, avoid vapor barriers that trap moisture. Always pair insulation work with a moisture plan and, for problem foundations or crawlspaces, consult fix damp crawl space before insulating.
Inspection Checklist Before Closing Walls
- Verify continuous insulation coverage with no gaps.
- Confirm electrical box and plumbing penetrations are sealed.
- Check that batts are full-thickness, not compressed.
- Install required vapor/air barrier per code and climate.
Safety note: wear appropriate PPE when handling batts and follow manufacturer instructions. Mineral wool can be favored by some installers for its moisture tolerance and handling.
R-13 vs R-19 Insulation: Which Should You Choose?
Short Recommendations by Common DIY Scenarios
- Retrofitting 2x4 walls on a tight budget: choose R-13 and focus on air sealing and targeted exterior foam later.
- New build with 2x6 framing in a cold climate: choose R-19 or R-19 + exterior continuous insulation.
- Want high performance without deeper studs: consider cavity R-13 plus 1"–2" exterior foam, dense-pack cellulose, or a double-stud/Larsen truss assembly.
- Tiny house or narrow-wall build: choose the highest R/inch material that fits (mineral wool or rigid polyiso exterior) and prioritize airtightness.
A Final Checklist to Make the Call
- Cavity depth: 2x4 or 2x6?
- Climate severity: what IECC zone are you in? (see IECC resources)
- Budget vs lifetime energy cost: run the insulation savings calculator.
- Moisture risk: any damp foundations or poor drainage? Check fix damp crawl space.
- Sound control or fire resistance needs: consider mineral wool options.
The Bottom Line
For typical 2x4 walls, R-13 is the practical, economical choice; for 2x6 walls and colder climates, R-19 offers better thermal performance. The best route for most DIY projects is to pair the chosen batt with good air sealing and, where possible, a layer of continuous exterior insulation — this usually yields more real-world benefit than small batt-only upgrades.
Video: How to Install Ceiling Insulation in a Basement or Crawlspace
For a visual walkthrough of these concepts, check out this helpful video:
Frequently Asked Questions
Can you compress an R-19 batt into an R-13 cavity?
Technically you can compress a thicker batt into a shallower cavity, but you reduce its R-value and may create gaps or voids. Compressed batts lose insulation performance and can lead to thermal bypass or moisture problems, so use only the thickness rated for the cavity or choose a product designed for the shallower depth.
Will R-19 always save more energy than R-13?
R-19 provides lower steady-state heat transfer in the cavity, but whole-wall savings depend on thermal bridging and air leakage. In many cases, sealing air leaks or adding continuous exterior insulation produces larger real-world savings per dollar than moving from R-13 to R-19 alone; use the insulation savings calculator to model your house.
Is one better for soundproofing?
Thicker cavities (R-19 in 2x6 walls) generally improve airborne sound reduction versus thinner cavities with R-13, but material choice matters too — mineral wool often performs better for acoustic control than standard fiberglass. For partition walls, consider dense mineral wool or double-stud strategies if sound control is a high priority.
How does moisture or a damp wall affect R-values?
Moisture reduces thermal resistance of many insulation materials and can create mold risk. Use moisture-tolerant materials where needed, ensure drainage and vapor control are correct, and address any foundation or crawlspace dampness before insulating; see our guide on how to fix damp crawl space.
Do I need a vapor barrier with these batts?
Vapor barrier requirements depend on climate and assembly. In cold climates, vapor control toward the warm interior is common; in mixed or hot-humid climates, a vapor barrier can trap moisture and is usually not recommended. Follow local code and manufacturer instructions, and consult climate guidance such as ENERGY STAR's insulation recommendations when deciding on vapor control: ENERGY STAR recommended insulation R-values.