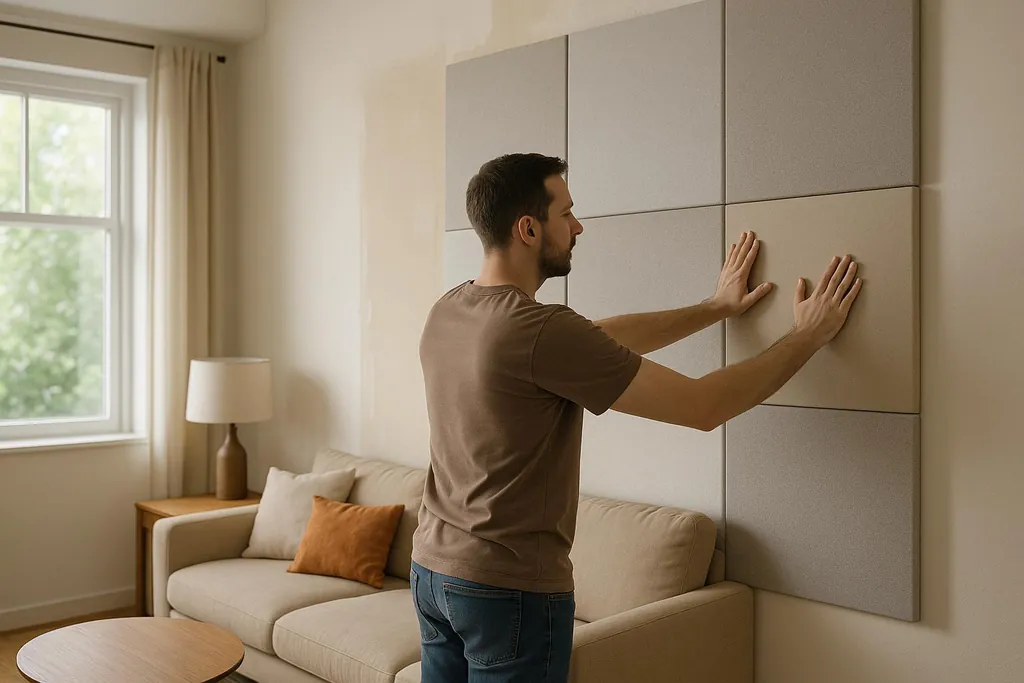
Learn how to effectively soundproof walls in multi-unit homes to reduce noise from neighbors and improve your living environment.
How to Soundproof Walls in Multi-Unit Homes
Living in a multi-unit home can be noisy, but soundproofing your walls effectively can create a quieter, more peaceful space. Here's what you need to know:
- Main Noise Types:
- Airborne Noise: Sounds like conversations, music, or TV travel through the air and seep through walls.
- Impact Noise: Vibrations from footsteps, furniture, or pipes travel through the building structure.
- Key Solutions:
- Seal gaps around outlets, windows, and doors with acoustical caulk.
- Add Mass-Loaded Vinyl (MLV) or extra drywall layers to increase wall density.
- Use acoustic insulation (e.g., mineral wool or recycled cotton) to absorb noise.
- Install decoupling systems like resilient channels or sound isolation clips to reduce vibrations.
- Budget Tips:
- DIY fixes like weatherstripping start at $20.
- Professional projects can range from $1,200–$3,600 for a 10×12-foot room.
- Long-Term Benefits:
- Improved privacy, better sleep, and increased property value.
ULTIMATE way to soundproof PARTY WALL from noisy neighbors!
How Noise Travels Through Walls
To effectively block unwanted noise, it's important to first understand how sound moves through walls. Noise can be categorized into two main types: airborne and impact, each requiring a different strategy to control.
Airborne vs. Impact Noise
When people think about noise complaints, airborne noise often comes to mind. This includes sounds like conversations, music, barking dogs, or the TV blaring in the next room. These noises travel through the air, causing walls to vibrate and transmit sound [[5]](https://www.soundproofingstore.co.uk/whats-the-difference-between-impact-and-airborne-noise).
> "Airborne noise is when a sound is transmitted by air, examples include music, speech, and television. This type of noise is fairly common, so it's typically what comes to mind when you think of noise." - Soundproof Cow [[4]](https://www.soundproofcow.com/impact-noise-vs-airborne-noise)
Eric Zuck from Second Skin Audio explains it clearly: "Airborne noise travels like water, flowing toward any weak point, like cracks and gaps, and only stopping at dense, airtight barriers" [[6]](https://www.secondskinaudio.com/soundproofing/airborne-vs-impact-noise).
On the other hand, impact noise is caused by direct contact between objects and surfaces, creating vibrations that travel through the structure [[6]](https://www.secondskinaudio.com/soundproofing/airborne-vs-impact-noise). Think of footsteps from an upstairs neighbor, furniture being dragged, doors slamming, or even the sound of water moving through pipes [[4]](https://www.soundproofcow.com/impact-noise-vs-airborne-noise)[[5]](https://www.soundproofingstore.co.uk/whats-the-difference-between-impact-and-airborne-noise).
> "Impact noise is when the vibration of a sound travels through a medium other than the air and occurs when two or more objects collide. Examples of impact noise include a construction jackhammer, a ball bouncing on the floor above you or water sloshing through your pipes. Impact noise can travel through structures, and so it is sometimes called structure-borne noise." - Soundproof Cow [[4]](https://www.soundproofcow.com/impact-noise-vs-airborne-noise)
The main difference between the two is that impact noise tends to be more intense [[7]](https://www.fibers-foams.com/airborne-and-impact-noise). While airborne sounds can often be reduced by adding mass or sealing gaps, impact noise is tougher to manage because it travels farther through dense materials [[5]](https://www.soundproofingstore.co.uk/whats-the-difference-between-impact-and-airborne-noise).
Common Wall Weak Points
Even the best-constructed walls have areas where sound can sneak through. For instance, a wall designed to achieve a 60 STC (Sound Transmission Class) rating can drop below the minimum FSTC 45 required by building codes if gaps are not properly sealed [[1]](https://www.acousticalsurfaces.com/soundproofing_tips/html/multi_familybuild.htm).
Small openings, like those around window seals, can amplify noise transmission by as much as 50% [[3]](https://pacificexteriorsnw.com/5-best-noise-reduction-techniques-for-multifamily-buildings). Sound doesn't just pass through - it causes surfaces to vibrate, turning them into sound transmitters [[1]](https://www.acousticalsurfaces.com/soundproofing_tips/html/multi_familybuild.htm).
Here are some common weak points to watch out for:
- Electrical outlets and switches: Outlet boxes placed back-to-back between rooms can create an easy path for sound [[8]](https://mjsconstructiongroup.com.au/can-you-hear-through-duplex-walls).
- Door and window frames: Gaps around these areas can let noise escape if they aren't sealed properly.
- Floor and ceiling connections: Misaligned floor plates or uneven surfaces can allow sound to leak [[1]](https://www.acousticalsurfaces.com/soundproofing_tips/html/multi_familybuild.htm).
- Shared ductwork and HVAC systems: These can act like highways, carrying noise from one unit to another [[8]](https://mjsconstructiongroup.com.au/can-you-hear-through-duplex-walls).
- Structural elements: Joists and studs can transmit vibrations directly through the building [[8]](https://mjsconstructiongroup.com.au/can-you-hear-through-duplex-walls).
Even thick walls can fail to block noise if there are unsealed gaps or voids between components [[1]](https://www.acousticalsurfaces.com/soundproofing_tips/html/multi_familybuild.htm). In many cases, the solution isn't about adding more material - it's about ensuring proper sealing. For example, ensuring windows close tightly and weatherstripping is intact can make a big difference [[1]](https://www.acousticalsurfaces.com/soundproofing_tips/html/multi_familybuild.htm).
Professional installers stress that every wall assembly should be carefully inspected. This includes checking factors like stud spacing, insulation density, the placement of resilient channels, and the alignment of gypsum boards [[1]](https://www.acousticalsurfaces.com/soundproofing_tips/html/multi_familybuild.htm).
Choosing Soundproofing Materials
When selecting materials for soundproofing, focus on four main principles: mass, absorption, damping, and decoupling. As Dr. Bonnie Schnitta, President and Owner of SoundSense, explains:
> "If we're talking about a wall, a floor or a ceiling, there are certain things that improve or are successful in inhibiting sound. The criteria are that it has to be dense, must have some level of flexibility or resiliency to it, and has to have a complete seal. You can have the best wall in the world, but if it's got a hole in it, it's not going to work." [[10]](https://newenglandcondo.com/article/soundproofing)
Mass-Loaded Vinyl and Acoustic Barriers
Mass plays a critical role in blocking airborne noise. Dense materials act as barriers, making it harder for sound waves to pass through. For instance, doubling the weight of a material can improve its Sound Transmission Class (STC) rating by about 5 points, which is especially important in multi-unit homes where walls are often thinner [[15]](https://www.secondskinaudio.com/soundproofing).
Mass-loaded vinyl (MLV) is one of the top choices for adding density to walls. This heavy, flexible material can be installed between drywall layers or directly on existing walls, significantly reducing sound transmission. Kevin White, Owner of Brooklyn Insulation and Soundproofing, explains:
> "The old buildings were soundproofed by density. Everything back in the day was built solid, and extremely dense. The denser the floor or wall, the harder it is for that sound to transmit through." [[10]](https://newenglandcondo.com/article/soundproofing)
Eco-Friendly Insulation Options
If you're looking for sustainable options, several materials not only absorb sound effectively but are also environmentally friendly.
- Mineral wool insulation: Denser than fiberglass, it effectively absorbs sound by filling wall cavities and dampening vibrations [[3]](https://pacificexteriorsnw.com/5-best-noise-reduction-techniques-for-multifamily-buildings).
- Recycled cotton panels: Made from pre- and post-consumer waste, these panels can perform as well as - or better than - traditional soundproofing materials [[12]](https://www.acousticalsurfaces.com/blog/acoustics-education/eco-friendly-soundproofing).
- Hempcrete walls: Ideal for new construction, hempcrete can cut sound transmission by up to 50% [[14]](https://soundproofdirect.com/eco-friendly-soundproofing-materials).
- Recycled denim insulation: An eco-conscious choice, this material offers soundproofing properties similar to fiberglass but is safer to handle and install.
When choosing eco-friendly materials, prioritize those with low-VOC finishes to maintain good indoor air quality [[13]](https://acousticgeometry.com/sustainable-acoustic-design). Certifications such as LEED, GREENGUARD, or FSC can help you identify products that meet sustainable standards [[13]](https://acousticgeometry.com/sustainable-acoustic-design).
Decoupling Systems
Sometimes, the secret to effective soundproofing lies in separating surfaces rather than adding more material. Decoupling systems work by breaking the physical connection between wall layers, stopping vibrations from traveling through the structure.
- Resilient channels: These metal strips attach to wall studs, and drywall is mounted to the channels instead of directly to the framing. This creates a gap that disrupts sound transmission. However, installation precision is critical - screws must be the correct length to avoid touching the stud behind the channel, which would undo the soundproofing [[11]](https://www.buildingenclosureonline.com/articles/85505-soundproofing-the-multi-unit-structure).
- Sound isolation clips: These clips, used with hat channels, provide an advanced decoupling solution, offering even greater separation between the structure and finished walls. They are especially effective for reducing impact noise in walls and ceilings [[15]](https://www.secondskinaudio.com/soundproofing).
Another effective option is Green Glue damping compound, which is applied between drywall layers. It transforms sound energy into heat, reducing noise. Adding a 5/8" drywall layer with Green Glue and acoustical sealant to a well-sealed wall can raise its STC rating to 50-52 [[16]](https://www.secondskinaudio.com/soundproofing/party-wall-soundproofing).
Decoupling is particularly useful in multi-unit homes where structural noise - caused by vibrations traveling through building materials - can be the most disruptive.
Regardless of the materials or systems you choose, airtight sealing is essential. Using acoustical caulk to seal around drywall edges can block an additional 20 dB of sound [[15]](https://www.secondskinaudio.com/soundproofing). Even the most advanced soundproofing solutions won't work if gaps allow sound to leak through. These methods work best when paired with other soundproofing strategies discussed earlier.
Step-by-Step Installation Guide
Retrofitting walls to reduce noise requires a well-thought-out plan, careful installation, and attention to detail during the finishing process. Following these steps will help you create an effective shield against both airborne and impact noise.
Tools and Preparation
Before diving in, gather the necessary tools: a stud finder, caulk gun, drill, rock knife, ruler, and the right nails and screws. Don't forget safety gear like a mask, gloves, and safety glasses.
Working in a space that's already occupied? Take extra precautions. Schedule your work during daylight hours to minimize disruption and let neighbors or adjacent units know your plans. Cover furniture and floors with plastic sheeting to protect them from dust and debris.
Start by using a stud finder to locate the wall studs and mark them with chalk. This step is essential because securing materials directly to the studs ensures better performance. Also, identify any electrical outlets, switches, or wall penetrations that might need special handling during installation.
Take note of the thickness of your soundproofing system, which can range from 30 mm to 120 mm, depending on the materials you're using [[17]](https://www.soundproofingstore.co.uk/9-ways-to-soundproof-an-existing-internal-wall). Once everything is set, you're ready to start installing your soundproofing layers.
Installing Soundproofing Layers
Begin by installing your chosen soundproofing material. If you're working with mass-loaded vinyl (MLV) like Quiet Barrier® HD, use the largest pieces possible to reduce seams [[20]](https://www.soundproofcow.com/online-guides/wall-soundproofing/chapter-3-soundproof-existing-walls). Secure the MLV to the studs with a cap stapler or nailer rather than relying solely on adhesive. This ensures the material stays in place over time.
For ceilings, MLV can be heavy and tricky to manage, so having an extra set of hands is a good idea [[21]](https://www.secondskinaudio.com/sound-blocking/how-to-install-mlv). If you're using acoustic mineral wool insulation, fill the entire cavity between the studs without compressing the material. Compressing it can reduce its ability to absorb sound [[17]](https://www.soundproofingstore.co.uk/9-ways-to-soundproof-an-existing-internal-wall).
For decoupling systems like resilient channels or the IsoTrax® Soundproofing System, follow the manufacturer's instructions carefully. Precision is critical - using screws that are too long can accidentally connect the channel to the studs, negating the system's soundproofing benefits.
When adding a second layer of drywall, opt for ½-inch Type X gypsum board, which offers both fire resistance and sound-blocking properties [[20]](https://www.soundproofcow.com/online-guides/wall-soundproofing/chapter-3-soundproof-existing-walls). Leave a small gap between the new drywall and adjacent surfaces like floors and ceilings. Fill this gap with acoustical sealant to prevent sound from sneaking through [[20]](https://www.soundproofcow.com/online-guides/wall-soundproofing/chapter-3-soundproof-existing-walls).
> "Acoustical sealant is your best friend in any soundproofing project. You must seal the seams, around the perimeter, and around any penetrations. Another common path for sound is for it to 'leak' through cracks, gaps, or seams in your barrier. The best performing soundproofing barriers must be both dense AND sealed." [[21]](https://www.secondskinaudio.com/sound-blocking/how-to-install-mlv)
Once all the layers are installed and secured, it's time to move on to the finishing touches.
Final Steps and Finishing
The finishing stage is crucial for both functionality and aesthetics. Seal all seams, corners, and penetrations with acoustical caulk to block any potential sound leaks [[19]](https://www.soundproofyourstudio.com/blog/how-to-soundproof-over-existing-walls-ceilings-and-floors)[[20]](https://www.soundproofcow.com/online-guides/wall-soundproofing/chapter-3-soundproof-existing-walls)[[21]](https://www.secondskinaudio.com/sound-blocking/how-to-install-mlv). Offset the drywall seams from the original wall to improve the overall soundproofing effect [[23]](https://sonopan.com/sonopan-installation-guide).
Use standard drywall techniques to tape and mud the seams. Apply the joint compound in thin, even layers, letting each coat dry completely before sanding and adding the next. This step ensures a smooth surface.
Pay special attention to gaps around electrical boxes, switches, or outlets. These areas are common culprits for sound leaks. Use putty pads behind electrical boxes and seal the edges with acoustic caulk [[19]](https://www.soundproofyourstudio.com/blog/how-to-soundproof-over-existing-walls-ceilings-and-floors).
Once the joint compound is dry and sanded smooth, apply a primer and paint that match your room's décor. Using a high-quality primer designed for new drywall helps achieve an even, professional finish.
For added sound absorption and a polished look, consider installing Echo Absorber™ Acoustic Panels or similar decorative materials [[20]](https://www.soundproofcow.com/online-guides/wall-soundproofing/chapter-3-soundproof-existing-walls).
The key to effective soundproofing lies in ensuring continuous coverage and sealing every gap or penetration [[21]](https://www.secondskinaudio.com/sound-blocking/how-to-install-mlv)[[22]](https://www.aslong.cc/how-to-install-mass-loaded-vinyl-for-soundproofing-aslong.html). Even the best materials won't perform well if sound can sneak through unsealed areas. A precise finish not only maximizes the soundproofing but also sets the stage for evaluating its cost-effectiveness.
Cost Planning and Budget Breakdown
Understanding the costs involved is key to planning an effective soundproofing project for multi-unit homes. A well-thought-out budget helps you avoid unexpected expenses. The total cost depends on factors like the materials you choose, the size of the area, and whether you handle the project yourself or hire professionals.
Material Costs and Price Comparisons
Material prices vary widely, so it's important to balance cost with performance. For instance, Luxury Liner MLV (Mass Loaded Vinyl) costs between $2.50 and $3.50 per square foot, with a 40-square-foot roll priced around $150 [[24]](https://www.secondskinaudio.com/sound-blocking/cost-of-soundproofing-walls)[[25]](https://www.angi.com/articles/how-much-does-soundproofing-cost.htm). On the other hand, drywall offers a more economical solution: standard 5/8-inch drywall costs about $0.40 to $0.60 per square foot, while soundproof drywall averages $2.85 per square foot or $40 per panel [[24]](https://www.secondskinaudio.com/sound-blocking/cost-of-soundproofing-walls)[[25]](https://www.angi.com/articles/how-much-does-soundproofing-cost.htm).
Insulation materials also come in a range of prices. Foam insulation typically costs $1 to $3 per square foot, while blown or loose-fill insulation can range from $40 to $200 per application [[25]](https://www.angi.com/articles/how-much-does-soundproofing-cost.htm). Additional products include acoustic sealant at approximately $16.99 per tube [[24]](https://www.secondskinaudio.com/sound-blocking/cost-of-soundproofing-walls) and Green Glue damping compound at about $0.75 per square foot [[24]](https://www.secondskinaudio.com/sound-blocking/cost-of-soundproofing-walls). For decoupling systems, RSIC clips cost around $1.25 each, and 25 Gauge Hat Channel is between $1.00 and $1.25 per square foot [[24]](https://www.secondskinaudio.com/sound-blocking/cost-of-soundproofing-walls).
One common mistake is relying on acoustic foam panels (usually $10 to $100 per panel) for soundproofing. While these panels are excellent for absorbing sound, they don't block sound transmission between units [[24]](https://www.secondskinaudio.com/sound-blocking/cost-of-soundproofing-walls)[[25]](https://www.angi.com/articles/how-much-does-soundproofing-cost.htm).
Your choice of installation method will also play a significant role in determining costs.
DIY vs. Professional Installation Costs
Labor costs can significantly impact your budget. If you opt for professional installation, expect to pay between $10 and $30 per square foot, including materials, with labor alone ranging from $8 to $13 per square foot [[25]](https://www.angi.com/articles/how-much-does-soundproofing-cost.htm)[[27]](https://homeguide.com/costs/cost-to-soundproof-a-room). For a standard 10×12-foot room, that translates to $1,200 to $3,600.
Choosing DIY installation can save you money on labor, but it requires time, tools, and a certain level of expertise. For larger projects, doing the work yourself can save roughly $250 to $500 [[25]](https://www.angi.com/articles/how-much-does-soundproofing-cost.htm). However, while professional installation may increase your total costs by 20% to 60%, it often includes warranties and ensures quality workmanship [[26]](https://estimatorflorida.com/soundproofing-cost-estimator).
For simpler tasks like hanging textured wall panels (priced at $1.50 to $5 per square foot) or installing acoustic tiles (around $10 each), a DIY approach can be practical [[25]](https://www.angi.com/articles/how-much-does-soundproofing-cost.htm). More complex jobs - such as installing MLV, soundproof drywall, or advanced insulation - are better suited for professionals, especially when dealing with challenges like hidden pipes or wiring [[25]](https://www.angi.com/articles/how-much-does-soundproofing-cost.htm). For basic tasks, a handyman (charging $50–$80 per hour) might suffice, but specialized installations are best left to experts [[27]](https://homeguide.com/costs/cost-to-soundproof-a-room). Don't forget to account for additional costs like permits, tools, and the disposal of old materials.
Beyond the upfront expenses, soundproofing offers long-term benefits that are worth considering.
Long-Term Value of Soundproofing
Soundproofing isn't just about reducing noise - it's an investment that can enhance your property's value. In multi-unit buildings, quieter spaces are more appealing to potential buyers or tenants, improving marketability and retention.
There's also the added benefit of energy efficiency. Many soundproofing materials, such as insulation, improve thermal performance by sealing air leaks. This can help lower heating and cooling costs, especially when combined with extra drywall layers and sealed gaps.
Perhaps most importantly, soundproofing improves quality of life. Less noise stress, better sleep, and greater privacy create a more comfortable living environment, especially in busy urban areas. Additionally, maintenance costs are typically low once durable materials like MLV and acoustic sealants are installed. Many of these products are built to last for decades, and professional installations often come with warranties.
On average, soundproofing a room costs between $1,022 and $2,700. For those on a tighter budget, consider phasing the project by addressing the most significant noise sources first. Over time, the benefits in livability and property value can make this investment well worth it [[25]](https://www.angi.com/articles/how-much-does-soundproofing-cost.htm).
Summary
Soundproofing walls in multi-unit homes involves a strategic approach that tackles both airborne and impact noise. To achieve effective results, it's essential to combine multiple methods rather than relying on a single solution.
Main Steps and Materials Review
The first step in wall soundproofing is identifying the sources of noise and understanding how sound travels between units. Airborne noise moves through gaps and cracks, while impact noise transfers vibrations directly through the building's structure[[2]](https://www.soundproofcow.com/soundproofing-solutions-for-multi-family-buildings). Start by sealing all openings - especially at the floor line behind baseboards - using acoustical caulk to block sound leakage[[1]](https://www.acousticalsurfaces.com/soundproofing_tips/html/multi_familybuild.htm).
Key materials for soundproofing include Mass-Loaded Vinyl (MLV) to block sound waves, acoustic insulation to absorb noise, and decoupling systems like RSIC clips or resilient channels to interrupt vibration pathways[[9]](https://acousticalsolutions.com/soundproofing-a-wall). Adding mass, such as extra drywall layers or MLV, increases density and reduces sound transfer[[2]](https://www.soundproofcow.com/soundproofing-solutions-for-multi-family-buildings). For better performance, use Green Glue damping compound between drywall layers to minimize resonance. It's important to reinforce and seal the entire wall area, as no single material can fully block sound on its own[[9]](https://acousticalsolutions.com/soundproofing-a-wall).
Proper installation is crucial. Materials must be layered strategically, and sealing every gap is vital to prevent sound from slipping through. Even small openings can undermine your efforts, so attention to detail during installation is key.
With your materials and plan in place, you're ready to begin putting these soundproofing principles into practice.
Getting Started with DIY Soundproofing
Armed with these insights, you can confidently start your DIY soundproofing project. Effective soundproofing doesn't have to be overly complicated or expensive. By tailoring your approach to your budget and specific needs, you can significantly reduce noise.
If sustainability is a priority, consider eco-friendly options like cellulose insulation or cotton-based materials. These not only provide excellent sound absorption but also align with environmentally conscious building practices[[1]](https://www.acousticalsurfaces.com/soundproofing_tips/html/multi_familybuild.htm). In many cases, these materials outperform standard fiberglass in acoustic performance[[18]](https://www.instructables.com/Build-a-Soundproof-Wall). Choosing such materials can enhance your home's value while promoting a quieter living space.
The benefits of soundproofing extend beyond noise reduction. As Ben Markham from ACENTECH explains:
> "Good acoustics and noise control suggests a higher level of construction quality to the renter or condo buyer... This could have a positive effect on the perceived marketable value of the property"[[28]](https://www.bdcnetwork.com/home/news/55153495/sound-advice-on-multifamily-construction).
Investing in soundproofing improves your quality of life and can increase your property's appeal to future buyers or renters.
To get started, prioritize addressing the most problematic noise sources and plan your project with acoustics in mind from the beginning. This approach can help you avoid costly adjustments later on[[2]](https://www.soundproofcow.com/soundproofing-solutions-for-multi-family-buildings). By combining the right materials - mass, absorption, decoupling, and thorough sealing - you'll create an effective sound barrier that delivers long-lasting results.
Take the first step by assessing your noise challenges and selecting materials that best suit your situation. A quieter, more peaceful home is within reach.
FAQs
What are the best materials to soundproof walls against airborne and impact noise in multi-unit homes?
To reduce noise effectively in multi-unit homes, you can rely on materials like mass-loaded vinyl (MLV), Green Glue damping compound, [acoustic panels](/blog/bamboo-acoustic-panels-for-passive-houses), fiberglass insulation, and resilient channels.
- Mass-loaded vinyl (MLV): This dense material helps block airborne noise by adding weight to walls.
- Green Glue damping compound: It works between wall layers to minimize vibrations.
- Acoustic panels: These panels absorb sound within a room, improving overall acoustics.
- Fiberglass insulation: Placed inside walls, it helps cut down on sound transmission.
- Resilient channels: These are great for impact noise, as they separate drywall from the wall frame, reducing vibration transfer.
These options are practical, accessible, and effective in making shared living spaces quieter and more enjoyable.
How can I make sure my DIY soundproofing project seals all areas where sound might escape?
To make your DIY soundproofing project a success, focus on addressing the common areas where sound tends to sneak through. Start by checking for gaps around electrical outlets, windows, doors, and baseboards. Use acoustic caulk to seal these gaps - this material is specially made to block sound effectively. For doors and windows, adding weatherstripping can further cut down on noise leakage.
Another important step is increasing the mass of your walls. You can do this by installing extra layers of drywall and incorporating soundproofing materials like mass-loaded vinyl or acoustic panels. Don't forget to seal all seams and edges with acoustic caulk. This ensures an airtight barrier, which plays a big role in reducing sound transmission. Combining these strategies - sealing gaps and adding mass - will go a long way in creating a quieter space.
What are some eco-friendly ways to soundproof walls that also benefit the environment?
If you're aiming to soundproof your space while keeping things eco-friendly, there are plenty of sustainable materials that can help reduce noise without harming the planet. Recycled denim insulation and soy-based acoustic foam stand out as excellent picks. They're non-toxic, environmentally conscious, and do a great job of absorbing sound. Similarly, recycled cotton panels provide natural and effective acoustic performance.
For those who prefer renewable materials, options like cork, bamboo, or wood wool are worth exploring. These not only dampen noise but also align with sustainable building practices. They're ideal for creating quieter, greener multi-unit homes and embracing a more environmentally responsible approach.