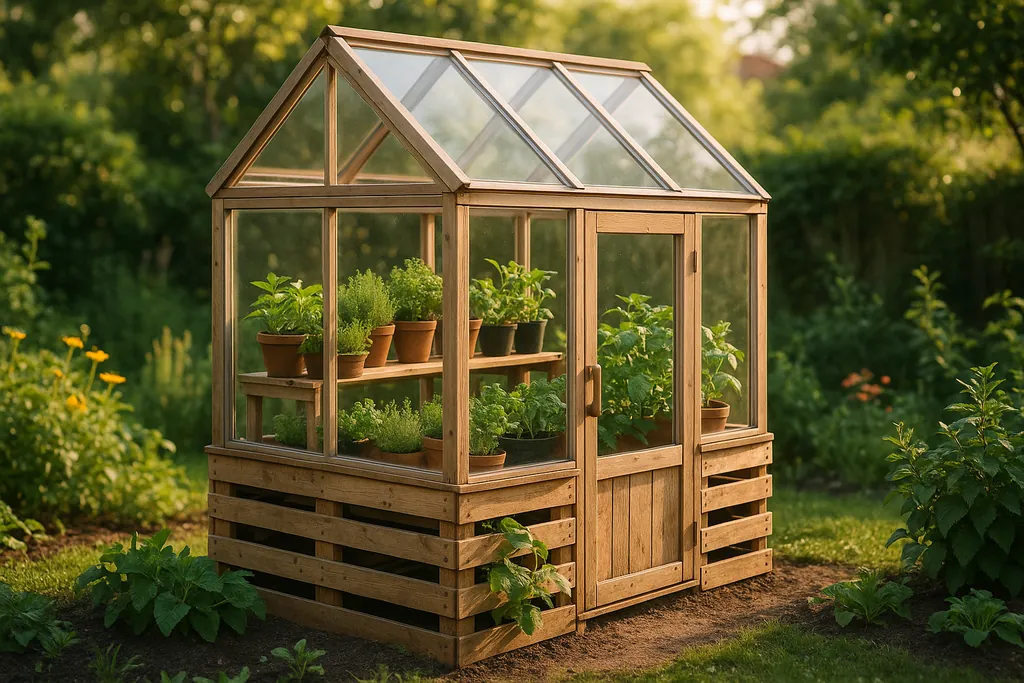
Explore budget-friendly and eco-conscious ideas for building your own greenhouse, maximizing efficiency and sustainability for year-round gardening.
DIY Greenhouse Ideas
Building your own greenhouse can save you money, reduce waste, and help you grow plants year-round. Pre-made kits can cost up to $10,000, but DIY projects using repurposed materials can cost as little as $500–$3,000. With proper planning, you can create a greenhouse that fits your climate, budget, and space while cutting costs by 40–70% or more.
Key takeaways:
- Save Money: Use reclaimed windows, wood, or other materials to cut costs significantly.
- Boost Efficiency: DIY greenhouses can reduce water use by 95% and increase food production.
- Plan Smart: Focus on sunlight, ventilation, and insulation based on your local climate.
- Affordable Upgrades: Add features like rain barrels, automatic vents, or shade cloths for under $100–$300.
A well-designed greenhouse offers long-term benefits like extended growing seasons, better control over plant health, and reduced grocery costs. Ready to get started? Let’s dive into the details.
The Ultimate Guide to DIY Greenhouses: Pros, Cons, and Everything In Between
Planning and Designing Your Greenhouse
Getting your greenhouse design right from the start can save you money and headaches while ensuring a thriving environment for your plants. The planning stage is where you lay the groundwork for energy efficiency, plant health, and overall success. Let’s dive into the essentials.
Choosing the Right Location
When picking a spot for your greenhouse, sunlight exposure should be your top priority. Aim for a location that gets full, direct sunlight throughout the day. In the Northern Hemisphere, a south-facing orientation typically provides the most consistent light.
Don’t forget about wind protection. Strong winds can make heating less effective and put strain on the structure. Natural windbreaks like nearby buildings, hedges, or hills can help. If your site is exposed, consider adding wind barriers to cut down on turbulence.
Proximity to water and electricity is another key factor. A site near these utilities can make installation easier and reduce construction costs. It’s also worth ensuring the ground has proper drainage. Avoid low-lying areas where water tends to pool, as this can lead to foundation issues and create overly humid conditions that promote plant diseases.
Once you’ve secured the right location, it’s time to tailor your design to your local climate.
Designing for Your Climate
Your greenhouse design should reflect the unique challenges and conditions of your local climate. While USDA Hardiness Zones provide a helpful starting point, you’ll need to consider specific factors like temperature swings, humidity, and seasonal weather.
In cold climates, insulation and thermal mass are essential. Double-layered panels can help trap heat, and materials like water barrels or concrete blocks can store warmth to keep temperatures stable. Also, make sure your roof is designed to handle snow loads common in your area.
For warmer and humid regions, ventilation is critical. Overheating and fungal problems can quickly become issues without proper airflow. Look for ways to incorporate plenty of vents, and consider temperature-sensitive systems that adjust automatically to maintain a balanced environment.
Once you’ve accounted for climate, you can focus on determining the right size and layout for your greenhouse.
Sizing and Layout Options
Starting small can be a smart move, especially for beginners. A compact greenhouse is easier to manage and can still produce enough crops to meet a household’s needs.
If you’re in an urban or suburban area, lean-to designs are a great space-saving option. These structures can be built against an existing wall, making it easier to connect to utilities like water and electricity. Just be sure to leave enough room around the greenhouse for maintenance tasks.
For those with larger properties, freestanding greenhouses offer more flexibility. They’re ideal for future expansion and allow for more creative layouts. When planning, make sure to include wide enough walkways so you can move freely between growing areas without disturbing plants.
Don’t forget to think vertically. Adding shelving, hanging baskets, or other vertical systems can significantly increase your growing space without expanding the greenhouse’s footprint. If you’re planning to grow taller crops, ensure the interior height can accommodate them.
Lastly, consider your workflow. Dedicate areas for potting benches, tool storage, and supplies. Having a well-organized space can make your gardening process smoother and more enjoyable.
Selecting Affordable and Eco-Friendly Materials
Building a greenhouse doesn't have to cost a fortune or harm the planet. By choosing the right materials, you can lower costs while minimizing waste and reducing your environmental impact. The trick is finding the right balance between cost, sustainability, and practicality to create a structure that supports your plants for years to come. Below, we’ll explore some budget-friendly and eco-conscious material options.
Repurposed Materials
Using repurposed materials is a smart way to save money and reduce environmental impact, aligning with [DIY Eco Homes](/)' focus on sustainability.
Reclaimed windows are an excellent choice for greenhouse construction. Old wooden windows with intact glass can work as effective glazing panels. You can often find these at home renovation projects, demolition sites, or even through local online marketplaces. Double-hung windows are great for vertical walls, while larger picture windows can be transformed into roof panels.
Salvaged glass-paneled doors are another option, allowing extra light into your greenhouse while doubling as stylish entrances.
Reclaimed wood is another affordable and eco-friendly option. Materials like old barn wood, fence posts, or disassembled pallets can be used to construct the frame. This approach is much cheaper than buying new lumber and adds a rustic charm to your greenhouse.
For flooring, salvaged materials such as brick pavers or flagstone are ideal. They create durable, permeable surfaces that help manage moisture effectively.
> One DIY greenhouse project, built primarily with reclaimed materials, came in at just $280. With more free wood, the cost could drop to as little as $110.
Not only do repurposed materials cut costs, but they also add a layer of sustainability to your project, showcasing a true commitment to eco-friendly building practices.
Step-by-Step Building Guide
Now that you've chosen your materials, it's time to start constructing your greenhouse. By following a logical sequence, you'll ensure the structure is sturdy and built to last. Let’s break it down step by step.
Creating the Foundation
A strong foundation is key to keeping your greenhouse stable, dry, and weather-resistant. The type of foundation you choose will depend on factors like your budget, soil conditions, and the size of your greenhouse.
- Gravel Foundations: Ideal for smaller greenhouses (up to 8x12 feet). Start by marking the perimeter and digging 4 to 6 inches deep. Level the area with a board and a spirit level. Lay down landscape fabric to block weeds, then add a 4-inch layer of crushed or pea gravel. Compact the gravel evenly using a hand tamper or plate compactor.
- Concrete Slab Foundations: Best for larger greenhouses. Excavate 6 to 8 inches deep and build a wooden frame with 2x8 pressure-treated lumber. Add a 2-inch sand base, followed by a 6-mil plastic sheet as a vapor barrier. Pour a 4-inch thick concrete slab, leveling it with a screed board. Let it cure for 48 to 72 hours before moving on.
- Pressure-Treated Wood Foundations: A middle-ground option that’s easier to work with than concrete but more stable than gravel. Use 4x4 or 6x6 pressure-treated timbers to make a rectangular frame matching your greenhouse size. Secure the corners with galvanized carriage bolts or structural screws. This is particularly useful if you’re working with reclaimed materials, offering flexibility for slight size differences.
Once your foundation is ready, you're set to begin framing.
Building the Frame
The frame is the skeleton of your greenhouse, and its material will affect cost, durability, and assembly method. Here’s a breakdown of common options:
- Wood Frames: Start by cutting all lumber to the required lengths. For an 8x12-foot greenhouse, vertical posts should be spaced every 4 feet, with additional framing for doors and windows. Begin by installing corner posts, ensuring they’re perfectly vertical using a level. Connect the posts with horizontal rails at the bottom, middle, and top of each wall. Use galvanized carriage bolts or outdoor-rated screws for durability. Pre-drill screw holes to avoid splitting, especially with older wood.
- PVC Frames: PVC is quicker to assemble but requires careful attention to joint stability. Use Schedule 40 PVC pipes with a minimum 1-inch diameter for small structures, scaling up for larger ones. Cut the pipes with a PVC cutter for clean edges. Test-fit the frame before applying PVC cement, as adjustments are impossible once the cement sets. To anchor the frame, insert rebar stakes into the foundation and slide the bottom PVC pipes over them. For extra stability, use metal connectors at key joints instead of relying solely on cement.
- Metal Frames: Galvanized steel tubing provides the strongest option but may require welding or bolt-together systems. If welding, work in a well-ventilated area and ensure all joints are secure. For bolt-together frames, use stainless steel or galvanized hardware to prevent rust.
Assembling Walls and Roofs
With the frame in place, it’s time to add walls and a roof. Proper installation ensures your greenhouse stays weather-resistant and energy-efficient.
- Reclaimed Windows: Measure each opening carefully and adjust the frame or window as needed for a snug fit. Install windows from the outside, sealing the edges with exterior-grade caulk. If using wooden windows, apply primer and paint beforehand to protect against the elements. Secure the windows with galvanized screws in pre-drilled holes. For mismatched windows, plan the layout to minimize gaps, filling smaller ones with polycarbonate or wooden panels where light isn’t essential.
- Polycarbonate Panels: Remove the protective film from both sides of the panels before cutting. Use a circular saw with a fine-tooth blade, supporting the panel on both sides to avoid cracking. Install panels with the ribbed channels running vertically to allow proper drainage of condensation. Seal the top edges with aluminum H-channel or specialized tape, leaving the bottom edges open for drainage but covered with insect screens. Secure the panels with screws and rubber washers, spaced every 12 to 18 inches.
- Roof Assembly: Start at the bottom and overlap roof panels by at least 2 inches to prevent leaks during heavy rain. In snowy areas, increase the roof pitch to at least 6/12 (6 inches of rise for every 12 inches of run) to help snow slide off. If your greenhouse is near walkways or entrances, consider adding snow guards to prevent falling snow from causing damage or injury.
Weatherproofing and Sealing
To create a comfortable growing environment, focus on sealing and weatherproofing.
- Apply high-quality exterior caulk at all joints, especially where different materials meet. Pay close attention to corners and the areas where walls meet the roof.
- Add weatherstripping around doors and operable windows to reduce heat loss.
- Seal the bottom edge where walls meet the foundation with a continuous bead of caulk. This blocks moisture and pests while allowing for slight movement due to temperature changes.
Energy-Efficient and Passive Solar Features
Once your greenhouse is built, you can design it to take advantage of natural processes for heating and water management. This approach not only lowers energy costs but also creates a stable environment for plants to thrive year-round.
Maximizing Passive Solar Heating
To make the most of the winter sun, position your greenhouse glazing to face true south, accounting for magnetic declination. This alignment ensures maximum sun exposure, which is key to capturing and storing heat during the day.
Thermal mass plays a major role in retaining heat. Water, for instance, stores four times more heat than earth or concrete. A single 55-gallon steel drum filled with water weighs nearly 500 pounds and can act as an effective heat reservoir. Larger setups, like the "Walden" greenhouse design, which uses 63 barrels, can amass a thermal mass exceeding 30,000 pounds (15 tons) . In one example from a Pennsylvania passive solar greenhouse (USDA Zone 6b), indoor temperatures dropped to only 36.5˚F, even when the outdoor temperature plummeted to 0˚F .
Once you've optimized heat retention, the next step is to focus on water efficiency to complete your sustainable greenhouse setup.
Water Conservation Methods
Drip irrigation systems are a smart way to deliver water directly to plant roots, minimizing waste. You can also collect rainwater from the greenhouse roof to create a sustainable irrigation source.
For precision, soil moisture sensors can measure real-time conditions, helping you water only when it's truly needed . Additionally, greywater can be recycled for non-edible plants, while collection mats can capture and reuse excess water. Grouping plants with similar water needs is another simple yet effective way to streamline your irrigation efforts.
Budgeting and Maintenance
Creating a long-lasting greenhouse requires careful planning and consistent upkeep. By estimating costs accurately and sticking to a maintenance routine, you can avoid unexpected expenses and keep your greenhouse in excellent shape.
Cost Estimation and Budgeting
The cost of building a DIY greenhouse in the United States typically falls between $500 and $3,000, depending on the size, materials, and features you choose. For example, you can build a basic structure using reclaimed wood or old windows for under $1,000. On the other hand, larger greenhouses with polycarbonate panels and energy-efficient upgrades might range from $2,000 to $3,000.
Here’s a quick breakdown of common material costs:
- 2×4 lumber: $3–$6 per 8-foot piece
- Polycarbonate panels: $30–$60 per 4×8-foot sheet
- Additional supplies: Fasteners, sealants, and hardware add to the total cost.
| Essential Components | Cost Range (USD) | Notes |
|---|---|---|
| Framing lumber | $150–$400 | Depends on the greenhouse size |
| Glazing materials | $200–$800 | Options include polycarbonate panels or reclaimed windows |
| Foundation materials | $100–$300 | Gravel, concrete blocks, or poured concrete |
| Hardware & fasteners | $75–$150 | Screws, hinges, and door handles |
| Tools (if needed) | $100–$300 | Basic tools like a saw, drill, and level |
To avoid surprises, set aside an extra 10–20% of your budget for unexpected expenses like delivery fees or replacement parts. For instance, one DIY builder completed a 10×12-foot greenhouse for under $800 using reclaimed wood and windows, while another spent about $1,200 for a 6×8-foot structure made with new metal framing and polycarbonate panels.
Once your greenhouse is built, regular maintenance will ensure it stays in top condition.
Maintenance Tips
Initial costs are just the beginning - routine maintenance is crucial to protecting your greenhouse and keeping it functional. Plan for monthly cleanings and inspections, with more detailed checks before winter and after extreme weather.
- Clean your glazing panels: Use mild soap and water to keep them clear and maximize light transmission. Avoid abrasive cleaners that could cause scratches.
- Inspect seals and weatherstripping: Small gaps can lead to heat loss or pest problems, so check for wear regularly.
- Check the structure: Look for sagging frames, loose fasteners, wood rot, or rust on metal parts. Address these issues early to prevent larger problems.
- Lubricate moving parts: Vents and door hinges should be lubricated twice a year to keep them operating smoothly.
If you notice persistent condensation, malfunctioning vents, or difficulty maintaining the greenhouse temperature, it’s time to make repairs or upgrades. Tackling these issues promptly can save you from more expensive fixes later on.
Affordable Upgrade Ideas
You don’t need a big budget to improve your greenhouse’s efficiency. Small upgrades can make a big difference:
- Automatic vent openers: At $30–$60 each, these devices help regulate temperatures by releasing excess heat automatically.
- Bubble insulation: For $20–$40 per 25-foot roll, this can reduce heat loss by up to 50% during winter. It’s especially effective on north-facing walls and roofs.
- Rain barrels: A 55-gallon barrel, costing $50–$120, conserves water and helps stabilize temperature fluctuations.
- Shade cloths: Priced at $20–$40 for a 6×12-foot section, these can lower summer temperatures by 10–15°F.
- Evaporative coolers: In dry climates, these cooling systems cost $100–$300 and provide an efficient way to combat heat.
When designing your greenhouse, consider leaving room for future upgrades. Features like extra electrical outlets or space for automated systems can make it easier to add heating, cooling, or other enhancements as your needs and budget evolve over time.
Conclusion and Key Takeaways
Building your own greenhouse offers a rewarding experience for those who value sustainability and fresh, homegrown produce. From thoughtful planning to energy-conscious design, a DIY greenhouse becomes a space that benefits both your family and the environment. And here's an important tip: a smaller, well-designed greenhouse often performs better than a larger one that's thrown together without proper planning.
Focusing on smart design elements - like maximizing sunlight, adapting to your local climate, and using proper insulation - ensures your greenhouse will thrive for years to come.
You don’t need a massive budget to create an eco-friendly greenhouse. Repurposing materials such as old windows, reclaimed wood, and salvaged doors not only cuts costs but also keeps useful items out of landfills. Choosing durable and sustainable materials adds to the efficiency and longevity of your project.
Once built, your greenhouse can help reduce grocery expenses by providing fresh, homegrown produce throughout the year. Plus, it can even enhance your home’s appeal by showcasing sustainable living practices. These principles have guided every step of this DIY greenhouse journey.
Start with the basics: passive solar design principles like proper orientation, thermal mass, and ventilation. Over time, you can add features like automatic vent openers, better insulation, or rainwater collection systems as your budget and experience grow. These upgrades can improve efficiency without overwhelming your wallet.
Finally, regular maintenance is key to keeping your greenhouse in top shape. By staying on top of repairs and upkeep, you can avoid unnecessary costs and ensure your greenhouse remains a valuable part of your home for years to come. Building a greenhouse isn’t just a project - it’s the start of enjoying fresh vegetables, extended growing seasons, and the satisfaction of sustainable living.
FAQs
What are the best budget-friendly materials for building a DIY greenhouse?
For a budget-friendly DIY greenhouse, consider using PVC pipes or rebar for the frame. Both materials are durable, lightweight, and easy on the wallet. For the covering, UV-resistant plastic sheeting or 6-mil plastic works well to provide insulation while keeping costs down. Another great option is to reuse materials like old windows or glass panes for the panels. This approach not only reduces expenses but also promotes sustainability. These materials are easy to find across the U.S. and are suitable for different climates and spaces.
How can I design a DIY greenhouse that works well for my local climate?
To build a DIY greenhouse that works well in your local climate, you'll need to adjust a few key elements like insulation, ventilation, shading, and heating to match your region's weather conditions. For hotter areas, think about using shading materials and passive cooling techniques. If you're in a colder region, focus on adding extra insulation and incorporating a dependable heating system.
Another important factor is site orientation. Place your greenhouse where it can get the most sunlight while staying shielded from strong winds. Designing your greenhouse with your USDA [climate zone](/glossary/climate-zone) in mind will make it more effective and durable, no matter where you're located.
How can I maintain my DIY greenhouse to keep it in great shape all year long?
To keep your DIY greenhouse in top shape all year, regular maintenance is key. Start by cleaning the glazing, vents, and gutters to avoid dirt buildup, pests, and mold. These simple tasks help maintain a healthy environment for your plants and prevent long-term damage.
It's also important to inspect for cracks or gaps in the structure. Sealing these with insulating materials, like bubble wrap, can help retain heat and block drafts during colder months, ensuring your plants stay cozy.
Don’t forget to check for loose clips, damaged panels, or worn door seals. Addressing these issues promptly keeps the greenhouse stable and secure. Seasonal chores like clearing gutters, managing humidity, and ensuring proper airflow will not only prolong the life of your greenhouse but also create the perfect conditions for your plants to thrive. A little consistent care goes a long way in keeping your greenhouse efficient and ready for every season.