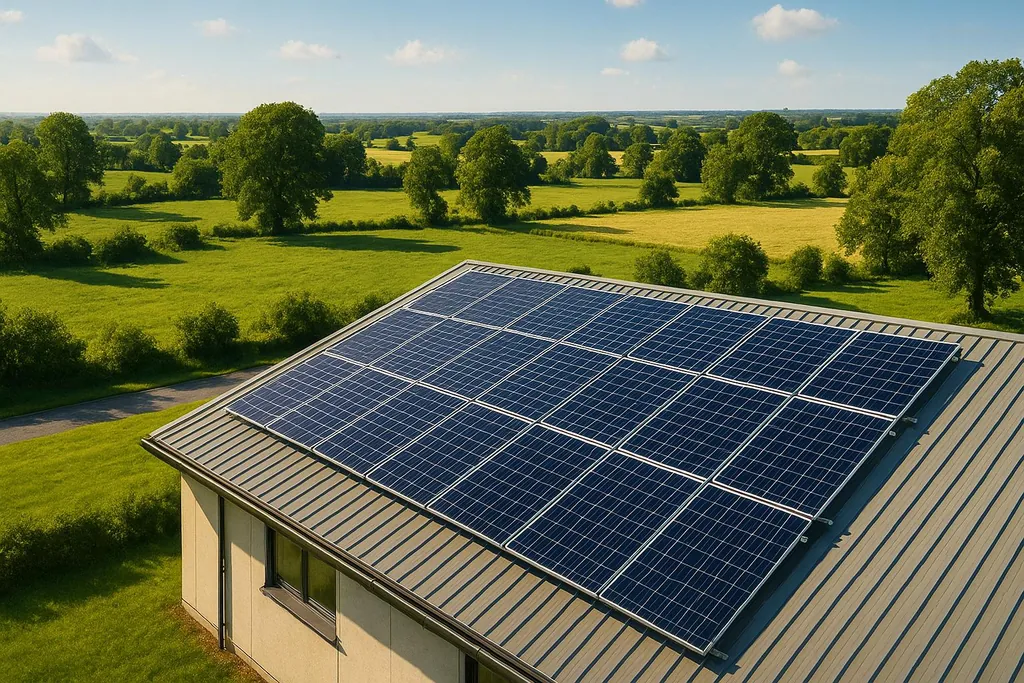
Ensure your solar installation is efficient by evaluating sunlight, roof condition, tilt, permits, and financial planning.
Checklist For Solar Site Selection
- Sunlight: Aim for 4–5 hours of direct sunlight daily. South-facing roofs are ideal, while east or west-facing options are less efficient.
- Shading: Even minor shadows can reduce panel output by over 50%. Analyze shading patterns throughout the day and across seasons.
- Roof Condition: Ensure your roof is in good shape and less than 10 years old. Structural issues or older roofs may require additional prep work.
- Tilt and Orientation: Match your roof's angle to your latitude for optimal results. A 10–15° deviation reduces efficiency by only 2–4%.
- Permits: Research local zoning and permitting requirements early. Approvals for electrical work, structural changes, and utility hookups can take weeks.
- Financial Planning: Factor in costs, incentives like the 30% federal tax credit, and estimated energy savings to calculate ROI and payback periods.
How to perform a site assessment and shading analysis for solar
Location and Site Conditions
Getting the details right is key to making your solar installation a success. You'll need to assess three main factors: how much sunlight your property receives, the direction and angle of your roof, and whether you have enough usable space for the system. These elements directly influence how much energy your panels will generate and, ultimately, how much you'll save.
Sunlight Availability Assessment
Start by determining how much sunlight your installation area gets throughout the day and across seasons. The focus should be on peak sun hours - these are the hours when solar irradiance reaches 1,000 watts per square meter. Depending on where you live in the continental U.S., this can range from 3.5 to 7 peak sun hours daily.
To get an accurate picture, walk your property at different times on a clear day, taking photos of your roof or ground area at 9:00 AM, 12:00 PM, 3:00 PM, and 6:00 PM. Look for shadows cast by trees, nearby buildings, chimneys, or utility poles. Even a small shadow covering just 10% of a solar panel can slash its output by over 50% due to how panels are wired.
Use your smartphone's compass app to locate true south (not magnetic south). Magnetic declination varies across the U.S. - it’s about 20° east in Seattle and 5° west in Florida - so this adjustment is important. Also, measure the height and distance of objects creating shadows to calculate their seasonal impact.
Seasonal changes matter, too. Trees may block more sunlight in summer, while the sun’s lower position in winter affects shading patterns. Adjust for these variations to ensure optimal energy production.
Once you’ve got a handle on sunlight, the next step is analyzing your roof's orientation and tilt.
Site Orientation and Tilt Analysis
In the U.S., south-facing roofs are ideal for solar panels. However, southeast or southwest-facing roofs are still highly effective, producing about 90-95% of the energy a perfectly south-facing system would. East and west-facing roofs drop to around 80-85%, while north-facing roofs generally aren’t practical for most installations.
For tilt, the general rule is to match your latitude for year-round efficiency. For example, if you’re in Denver at 40° latitude, aim for a 40° tilt. Most residential roofs, however, have slopes between 30° and 45°. Being slightly off the optimal angle - by 10-15° - usually only reduces efficiency by 2-4%, which is minor.
You can measure your roof’s slope using a digital level app or an angle finder from a hardware store. If you’re considering a ground-mounted system, you’ll have more flexibility to set the perfect angle. Plus, steeper tilts help panels shed snow and stay clean during rain.
Combining this analysis with your sunlight assessment ensures your system is set up for maximum energy production.
Installation Space Measurement
Next, measure the usable area of your roof or ground space in square feet, accounting for obstacles like vents, chimneys, and required safety setbacks. Building codes typically require a 3-foot clearance for firefighter access. Since a standard residential solar panel is about 65 inches by 39 inches (roughly 17.5 square feet), this will help you estimate how many panels can fit.
Check your roof for issues like sagging, damaged shingles, or signs of water damage. If your roof is more than 10-15 years old, consider having a structural engineer assess whether it can handle the extra 2-4 pounds per square foot that solar panels add. Replacing a roof after installing solar panels is both costly and inconvenient.
Document the roof material and its condition. Asphalt shingles, metal roofing, and tile are all compatible with solar systems, though each requires specific mounting hardware. Avoid installing panels on wood shake or slate roofs, as they’re more fragile and pose fire risks. For ground-mounted systems, check for underground utilities, septic tanks, or easements that could limit your options.
Here are some key measurements to note:
- Distance from the installation area to the main electrical panel (runs over 100 feet may require thicker wiring)
- Obstacles like landscaping, driveways, or nearby structures that could complicate installation
- Roof dimensions, factoring in setbacks and obstacles
Take detailed notes and photos, and sketch a simple layout showing dimensions, compass directions, and shading objects. This documentation will be invaluable when requesting quotes from installers or planning a DIY system. The more thorough you are now, the smoother the installation process will be.
Permits and Regulations
When installing solar panels, you'll need permits for electrical work, structural changes, and utility hookups. Tackling these requirements early can help you avoid delays and ensure your system meets safety standards. These steps also tie into the technical and financial evaluations discussed later.
Zoning and Permit Requirements
For most residential solar projects, you’ll need both a building permit and an electrical permit. Start by checking your local building department’s website for zoning rules and permit specifics. Typically, you’ll need detailed drawings showing panel placement, electrical connections, and structural details. In some areas, these plans may need to be reviewed and approved by a licensed engineer. If you live in a neighborhood governed by a homeowners association (HOA), be sure to review their guidelines, as they might have rules about aesthetics or other factors that could affect your installation. Additionally, setback requirements can vary, so confirm local clearance rules for rooftop and ground-mounted systems.
Impact Assessment
Think about the environmental impact and long-term disposal of your solar system. Rooftop installations generally have little environmental impact, but ground-mounted systems may require careful planning to address issues like soil disruption, drainage, or wildlife habitats. Be sure to document areas like mature trees, wildlife corridors, or drainage systems for environmental reviews and permit applications.
Also, consider what happens at the end of your system’s life. While many materials in solar panels - like aluminum, glass, and silicon - are recyclable, the infrastructure for recycling old panels is still evolving. Some states require manufacturers to handle panel recycling, so check for any local programs or requirements. This information will also play a role in your overall project planning.
Incentives and Rebates Research
Look into federal, state, and local incentives, such as the Investment Tax Credit (ITC), rebates, and utility programs. Confirm your eligibility early and keep thorough records of your costs and permits. Many states and local governments offer rebates or performance-based incentives, and utility companies often have their own programs or simplified connection processes.
Since incentive programs usually have limited funds and strict deadlines, it’s a good idea to review the requirements as soon as possible. Keeping organized records of your expenses, permits, and applications will also help with tax filings, warranty claims, and any future updates to your system.
Infrastructure and Technical Requirements
Before diving into a solar installation, it's crucial to assess if your current electrical system can handle the additional load. This evaluation will help you identify any upgrades needed to ensure a safe and efficient setup.
Electrical System Inspection
Your home's electrical panel is the nerve center of your power system. It manages electricity distribution to appliances and balances the flow between the utility grid and your solar panels . Start by checking the main breaker’s amperage, which is typically listed on the panel's label. For most solar installations, a 200-amp rating is often necessary .
If your panel is rated below 200 amps, it might struggle to manage the increased load from solar power. This could lead to serious risks like overheating or even electrical fires . Panels that are over 20 years old - or older systems like fuse boxes - are often incompatible with modern solar setups and may require replacement .
Take a look at your monthly utility bills to estimate your current energy usage in kilowatt-hours (kWh). If you’re planning to add high-demand appliances like electric vehicle (EV) chargers, heat pumps, or battery storage systems, these will increase your electrical load and might necessitate an upgrade .
Another important consideration is the "120% rule" from the National Electrical Code (NEC). This rule limits the combined amperage of your main breaker and solar breaker to 120% of your panel’s busbar rating . Ignoring this guideline can lead to overheating, tripped breakers, failed inspections, or even fire hazards .
For solar systems with battery storage, you may need to install a subpanel dedicated to "critical loads" - essential appliances and circuits that stay powered during outages . Additionally, check your utility meter. Older meters might not support net metering, which is essential for selling excess power back to the grid .
Once you’ve reviewed these factors, you can start aligning your system’s configuration with your home’s capacity.
Grid-Tied vs. Off-Grid Options
Choosing between a grid-tied and an off-grid solar system will significantly impact your infrastructure needs and the complexity of your setup.
- Grid-Tied Systems: These connect directly to your local utility grid, allowing you to send excess energy back through net metering programs. They’re generally more straightforward to install since they don’t require battery storage. However, they won’t provide power during outages unless paired with battery backup. The utility grid helps balance solar production, supplying power when your panels aren’t generating enough and accepting excess power when they’re producing more than you need.
- Off-Grid Systems: These operate independently from the utility grid and rely entirely on battery storage to supply power when solar production is low, such as at night or during cloudy weather. Off-grid setups require more equipment, including charge controllers, inverters, and a large battery bank. You’ll also need to carefully manage your energy usage and size the system to meet your peak demands, which often means installing more panels and batteries compared to a grid-tied system. While they involve higher upfront costs and greater complexity, off-grid systems offer complete energy independence and keep running during utility outages.
Ultimately, the capacity requirements for either system depend on your home’s total energy demand, including all appliances and devices. For off-grid systems, this calculation is even more critical since you won’t have the grid as a backup during high-demand periods or extended cloudy weather .
Financial and Performance Analysis
After evaluating your site and the technical details, the next step is to figure out if your solar project makes financial sense. Accurate energy production estimates are crucial for solid financial planning and will form the foundation of your analysis.
Energy Production Estimates
To estimate your system's energy output, multiply its kilowatt (kW) capacity by the average number of peak sun hours in your area. For example, a 5 kW system receiving 5.5 peak sun hours daily would generate about 27.5 kWh per day, which adds up to around 10,000 kWh annually. Regional differences in sun hours across the United States mean it's wise to use local data from your utility company or state energy office for more precise calculations.
However, real-world production often falls short of these theoretical numbers. Factors like inverter inefficiencies, temperature fluctuations, and shading can reduce output. Seasonal changes also play a role, with winter months typically yielding lower production due to shorter days and the sun's lower angle. Once you’ve adjusted for these variables, you can translate these production estimates into concrete costs and savings.
Cost and Savings Calculations
Start by breaking down your costs into three main categories: equipment, labor (even for DIY installations), and permitting fees. Then, calculate your potential monthly energy savings by multiplying your estimated energy output by your local electricity rate (per kWh). Be sure to account for ongoing expenses, such as maintenance, when tallying up your costs.
Once you have a clear picture of both costs and savings, you can move on to evaluating the project’s financial feasibility through metrics like ROI and payback period.
ROI and Payback Period
Incorporate available incentives, such as the federal Investment Tax Credit (ITC) and local rebates, to lower your upfront costs. Combine these with your chosen financing method - whether a loan, lease, or power purchase agreement (PPA) - to refine your ROI analysis.
To estimate the payback period, divide the net system cost (after factoring in incentives) by your projected annual savings. For a more detailed look, you could calculate the system’s net present value (NPV), which accounts for the time value of money and expected increases in electricity rates over time.
Your financing choice also matters. Solar loans can make your project cash-flow positive right away, while leases and PPAs often reduce upfront costs but may result in lower savings over the long term.
Lastly, consider the broader benefits of going solar. Studies have shown that solar installations can increase property values. In off-grid scenarios, solar may save you even more by avoiding the steep costs of extending utility lines, making it an especially appealing option in remote areas.
Final Checklist and Summary
Key Points to Remember
To get the most out of your solar installation, make sure your site gets 4–5 hours of direct sunlight daily on a south-facing surface. Seasonal shadow analysis is a must - just a little shading can lower your system's performance by 10–25%.
If you're considering a rooftop system, check the condition of your roof. Ideally, it should be less than 10 years old or recently inspected to ensure it can handle the added weight. For ground-mounted setups, plan for enough space - typically 100–200 square feet per kilowatt of solar capacity, though this depends on the efficiency of your panels.
Get in touch with your local building authorities early in the process. Approvals for permits - covering electrical, structural, and interconnection requirements - can take anywhere from 2 to 8 weeks.
Financial planning is just as important. Weigh the upfront costs against the long-term savings. Take advantage of incentives like the Investment Tax Credit (30% through 2032), state rebates, and lower electricity bills. Most residential solar systems pay for themselves in about 6–10 years, but this varies based on your location and energy usage.
With these basics covered, you’re ready to start planning and documenting your project.
DIY Project Implementation
Begin by documenting your annual energy usage to correctly size your system for your site’s capacity.
Plan a site assessment timeline that spans at least one full season. Visit the installation area at different times of the day - morning, noon, and late afternoon - to see how shadows shift. Taking regular photos from the same spot can help track seasonal changes.
Keep everything organized. Save energy bills, site measurements, shadow analysis photos, and permit research in one place. This will not only simplify the permitting process but also help contractors provide accurate quotes if you decide to outsource parts of the project.
Safety is non-negotiable. Use proper ladder techniques when inspecting roofs, and consider hiring a structural engineer for older or complex roof designs. Spending a little on professional advice upfront can save you from costly mistakes down the line.
Check with your utility provider about interconnection and net metering requirements early in the process. Some utilities have specific equipment standards or lengthy approval procedures that could affect your system design and timeline.
This kind of detailed evaluation, which usually takes 4–6 weeks, ensures your project is set up for success. For more in-depth step-by-step guides and additional tips on cost-effective solar installations, visit the resources at [DIY Eco Homes](/).
FAQs
How can I tell if my roof is suitable for solar panels?
To figure out if your roof is suitable for [solar panels](/blog/how-to-choose-solar-panels-that-match-your-roof), start by examining its orientation and angle. In the United States, a roof that faces south is ideal for soaking up the most sunlight. When it comes to the slope, a pitch between 15 and 40 degrees works well, with 30–40 degrees being the sweet spot for many areas.
You'll also want to check for any obstructions that might block sunlight, like trees, chimneys, or nearby buildings. A roof with plenty of direct sunlight throughout the day is key. If you're unsure about your roof's potential, a professional solar assessment can provide a clear picture of its energy-producing capability.
What should I consider to determine if a solar installation is financially viable?
When weighing the financial aspects of installing a solar energy system, start by looking at the installation costs, which usually fall between $2.75 and $3.25 per watt. Then, think about the available space on your roof or ground where panels can be installed - this determines how large a system you can set up.
Next, evaluate your region's solar resource potential. Areas with more sunlight naturally produce more energy, making solar systems more efficient and cost-effective. Don’t overlook incentives or tax credits either. Programs like the federal solar tax credit can significantly lower the initial investment, making solar more accessible.
Finally, calculate the expected savings or ROI. Compare your current energy expenses with the projected savings from solar over time. This will give you a clear picture of how long it will take to recoup your investment and start seeing financial benefits.
How can I make sure my roof is strong enough to support solar panels?
Before you [install solar](/blog/how-to-install-solar-tubes-step-by-step-guide) panels, you need to make sure your roof can handle the extra weight. The best way to do this is by having a licensed structural engineer or architect inspect your roof. They’ll evaluate its material, overall condition, and how much weight it can safely support. Key factors like the roof’s age and current structural strength will play a big role in their assessment.
If your roof needs extra support, common fixes include adding support beams or internal bracing to reinforce the structure. These precautions not only protect your home but also help your solar panels last longer.