Outer details, including the first build of the Larsen trusses and getting ready for siding.
This is part 7 of my Nova Scotia build series. Catch up on Build Update 6: The Theory of Passive Houses & Larsen Trusses if you missed it.
---
Last post, I detailed the theory behind Larsen trusses, and why I selected them.
In short: they are supposed to be easy, customizable, and cheap to construct, yet still provide high insulation levels.
---
Stay tuned for the next build update! Browse all articles →
It was time to put that to the test.
Wall Base Detailing
The first step was some of the detailing around the base of the walls, where the foam insulation around the slab meets the bottom of the wall.
There are a couple options for this:
- Adding “parging compound”—basically a mortar-like substance that you trowel/scrape onto the foam
- Adding some other durable barrier, like metal flashing
For the sake of this small shed, I decided to go with metal flashing.
I didn’t know this, but local building supply stores often supply rolls or lengths of metal flashing—basically sheet metal—in 1’ or 2’ wide rolls.
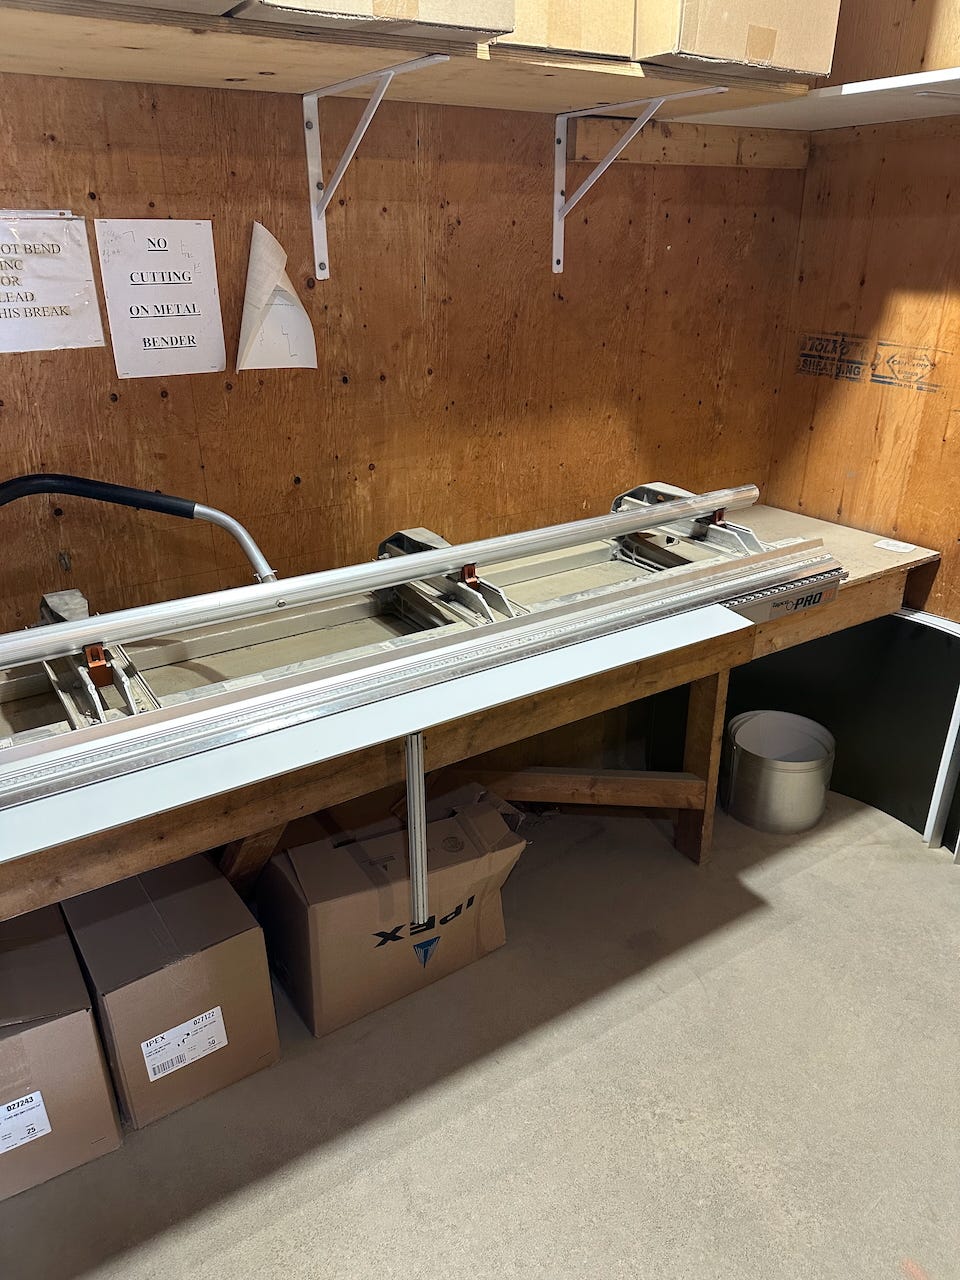
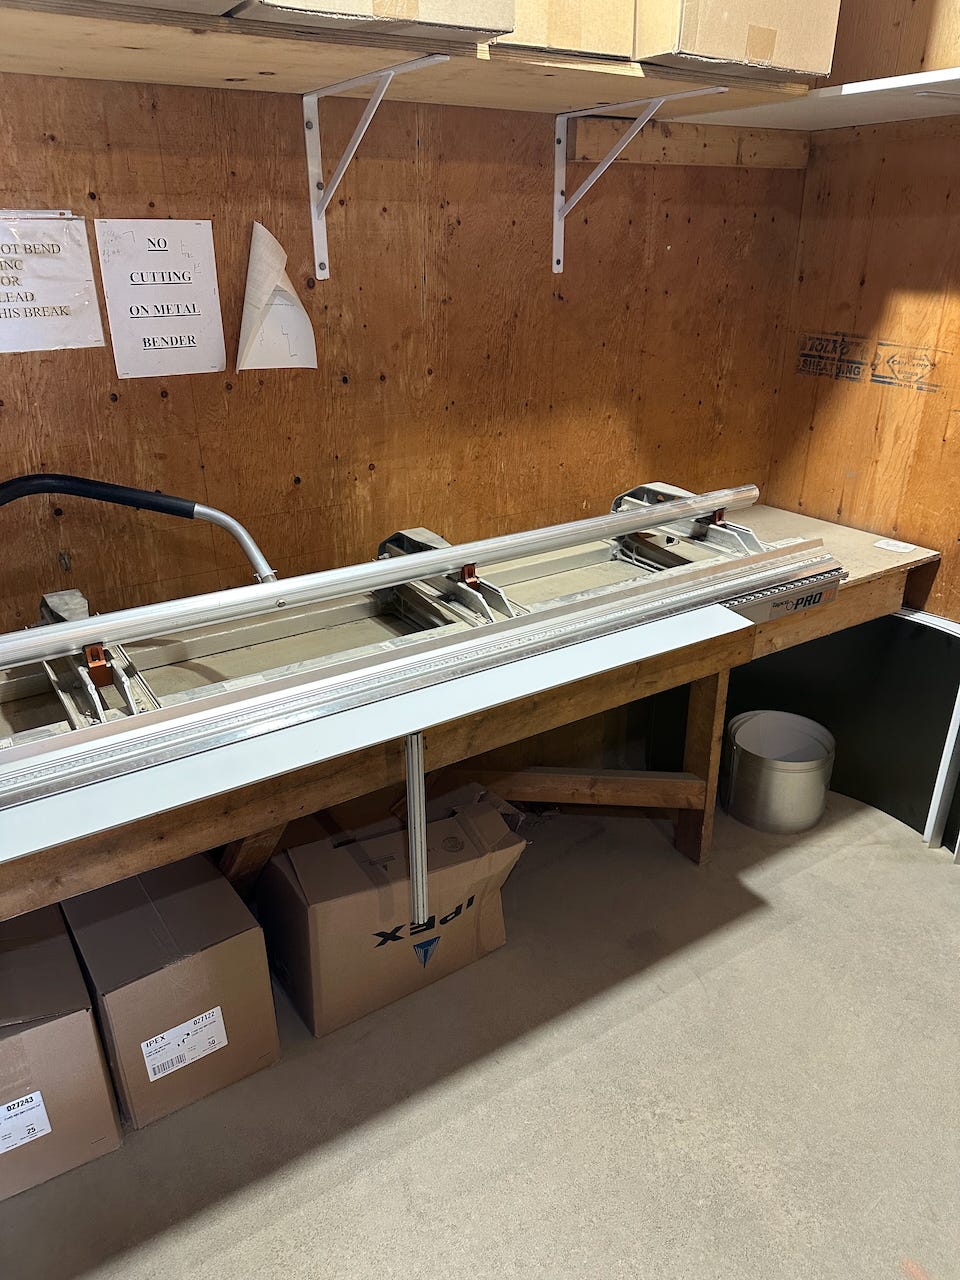
They often also have a “brake”—a big tool used to bend this metal precisely. You can see my local one here:
I later learned they had black as a color option (in wider sheets), but I opted to test things out using the brown metal they had in 1-foot wide rolls. The result wasn’t bad, though I later learned I could have done a better job detailing the corners:
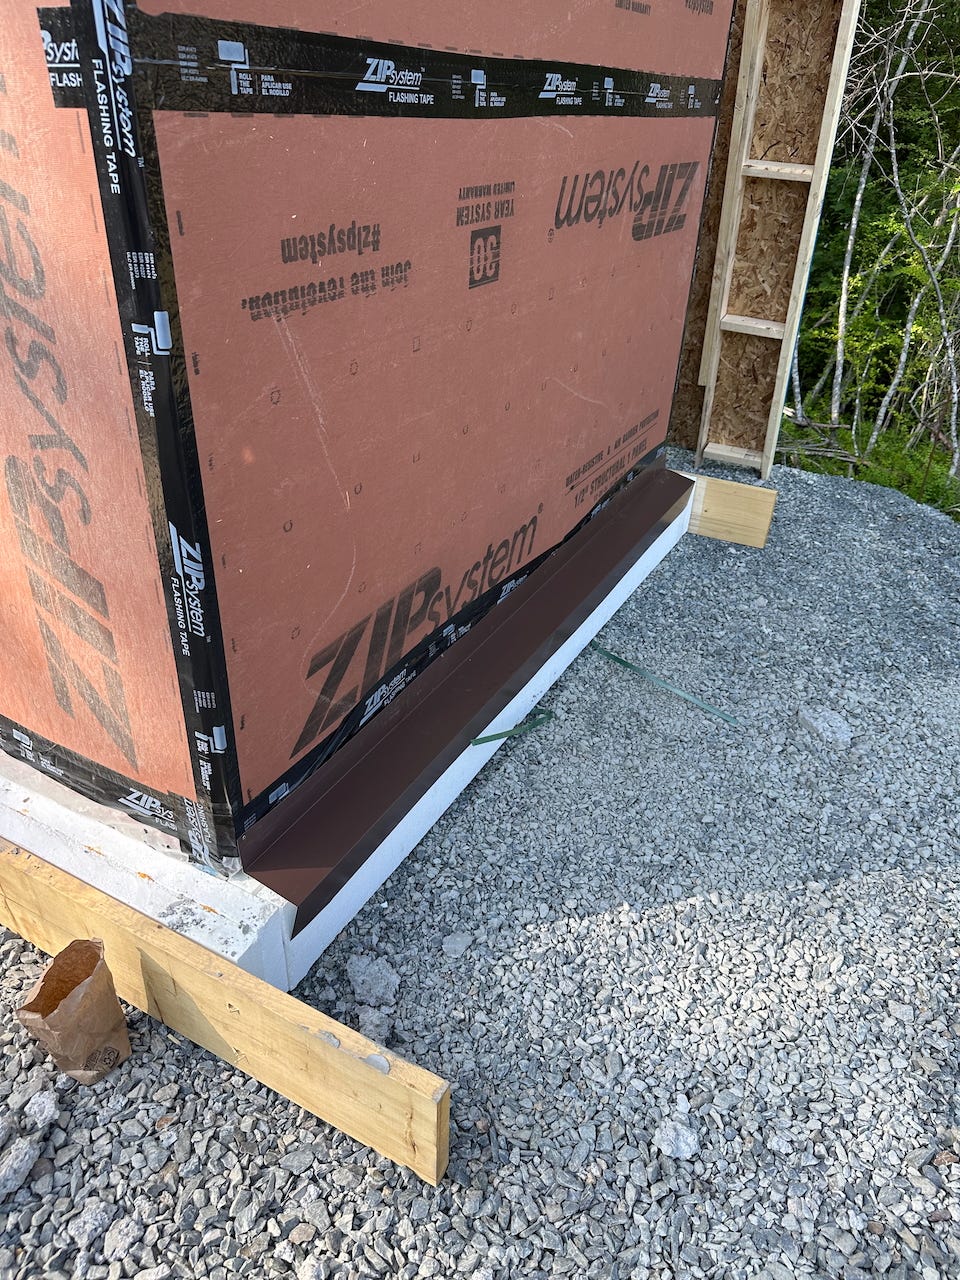
For the purposes of this test build though, it will be fine.
It serves to protect the foam (which will be backfilled in with dirt, once a full foam skirt is added around the shed), and also direct any large quantities of water out and over the foam, instead of down between the poly vapor barrier and the foam insulation.
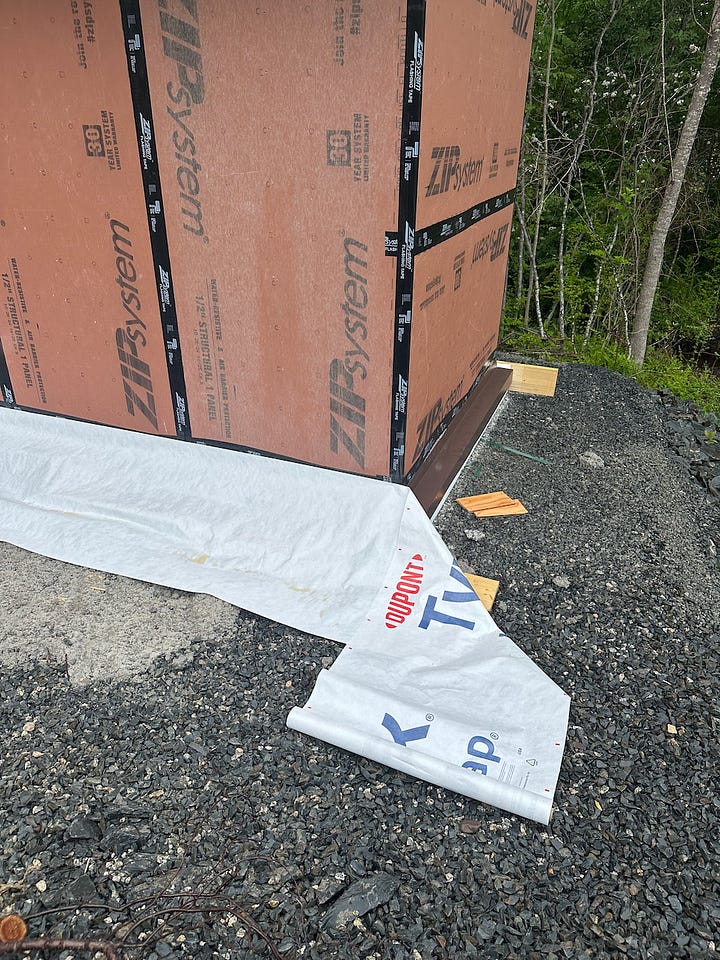
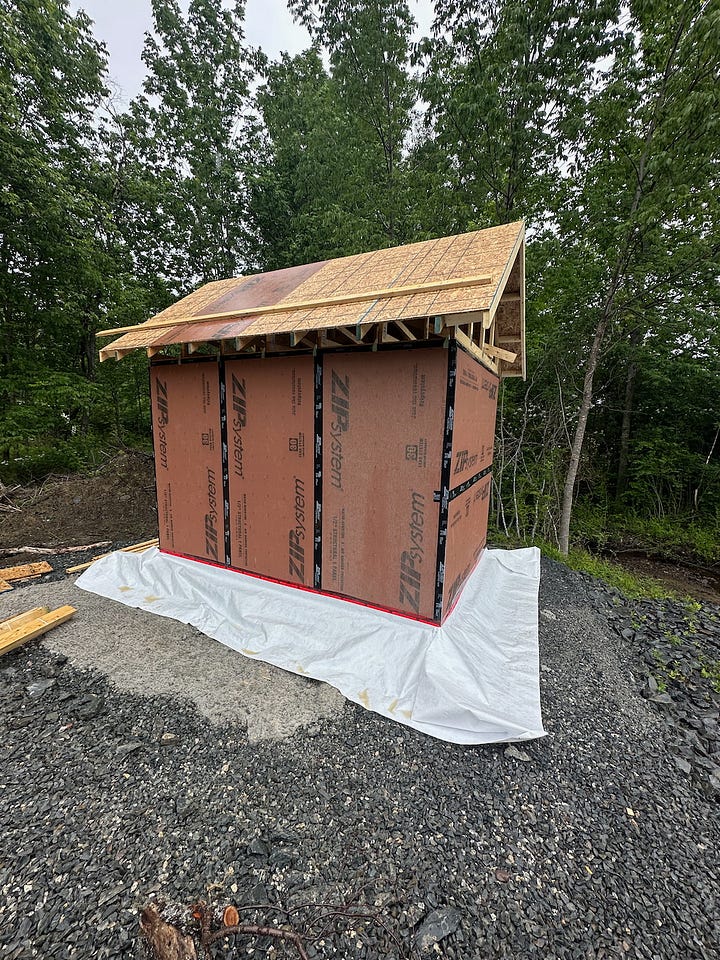
Next up was adding a skirt of 3’ Tyvek housewrap around the bottom of the walls. This is needed before the Larsen trusses are installed, as it will wrap underneath the Larsen trusses and hold the cellulose insulation.
<ImageGallery columns={2} caption="Adding a housewrap (Tyvek) skirt around the bottom, the start of what will enclose cellulose insulation.">
</ImageGallery>
Building the Larsen Trusses
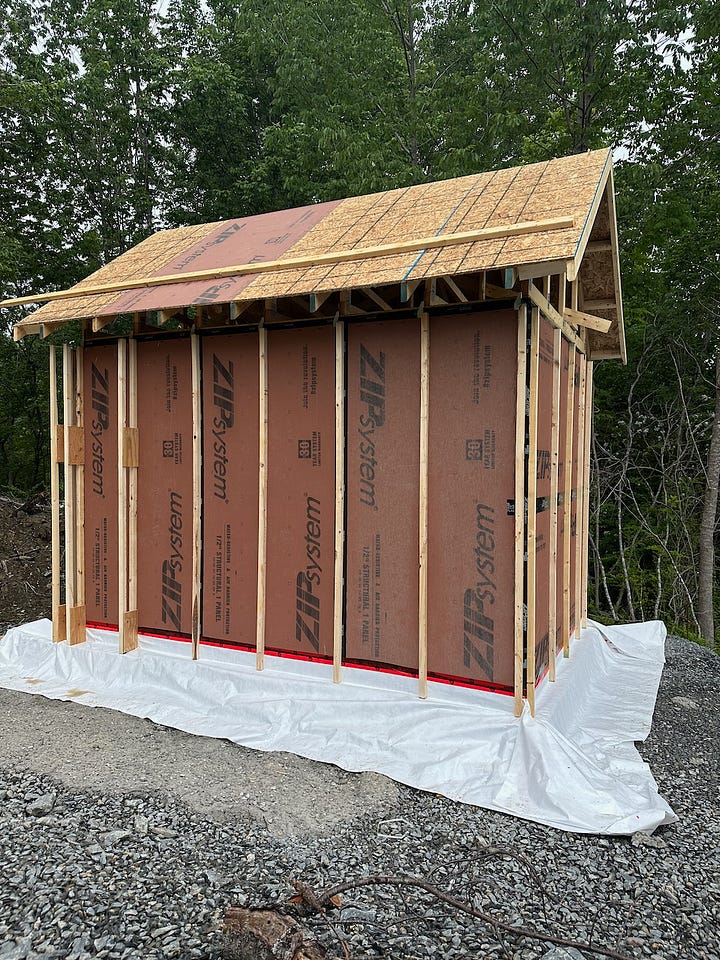
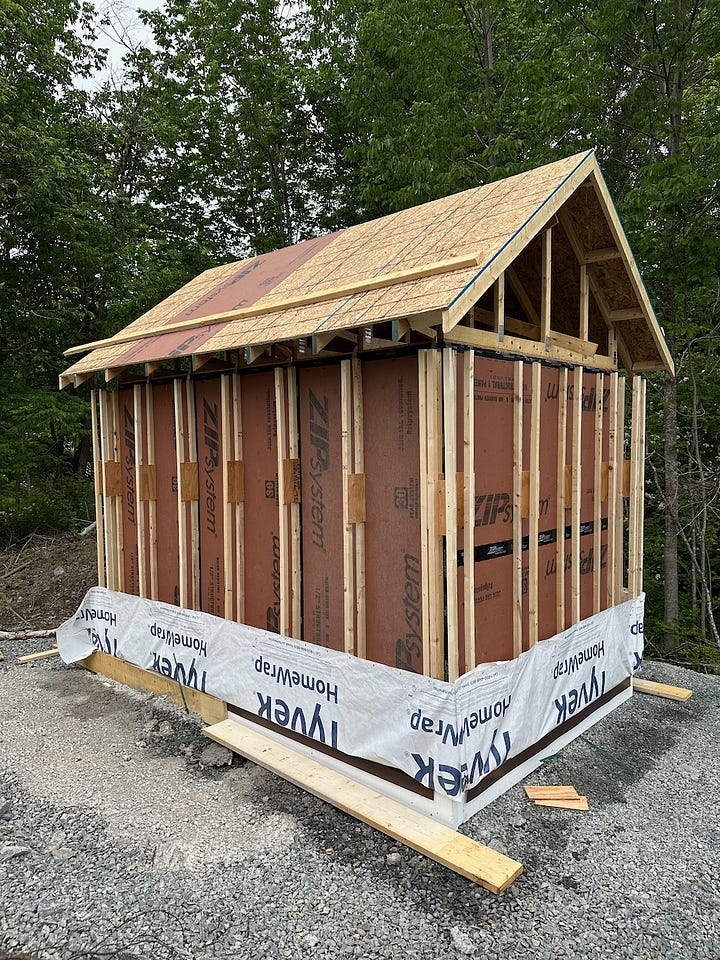
Now it was time to build the Larsen trusses. On this small shed, which I didn’t really need to insulate, I kept the Larsen truss depth to a relatively small 6”.
That will still add more than double the effective insulation compared with the 2x6 wall alone, but to get to passive house levels on future builds, this depth will be more like 12”.
I was moving very carefully here, so I built the initial trusses using mostly screws, later going back and using nails once I was sure things were good.
Nailing the 2x2s to the studs I used standard 3 1/4” framing nails, and then 2” nails (the smallest my nail gun will accept) to attach the 1/2” plywood gussets to the 2x2s.
<ImageGallery columns={2} caption="Building out the Larsen trusses and wrapping the housewrap up the outside.">
</ImageGallery>
On future builds, the building inspector will require engineer approval for this non-standard wall build, one of the downsides of this approach.
But upon consulting with an engineer, the requirements for how to construct these trusses are very flexible, as the loads in terms of weight are very low.
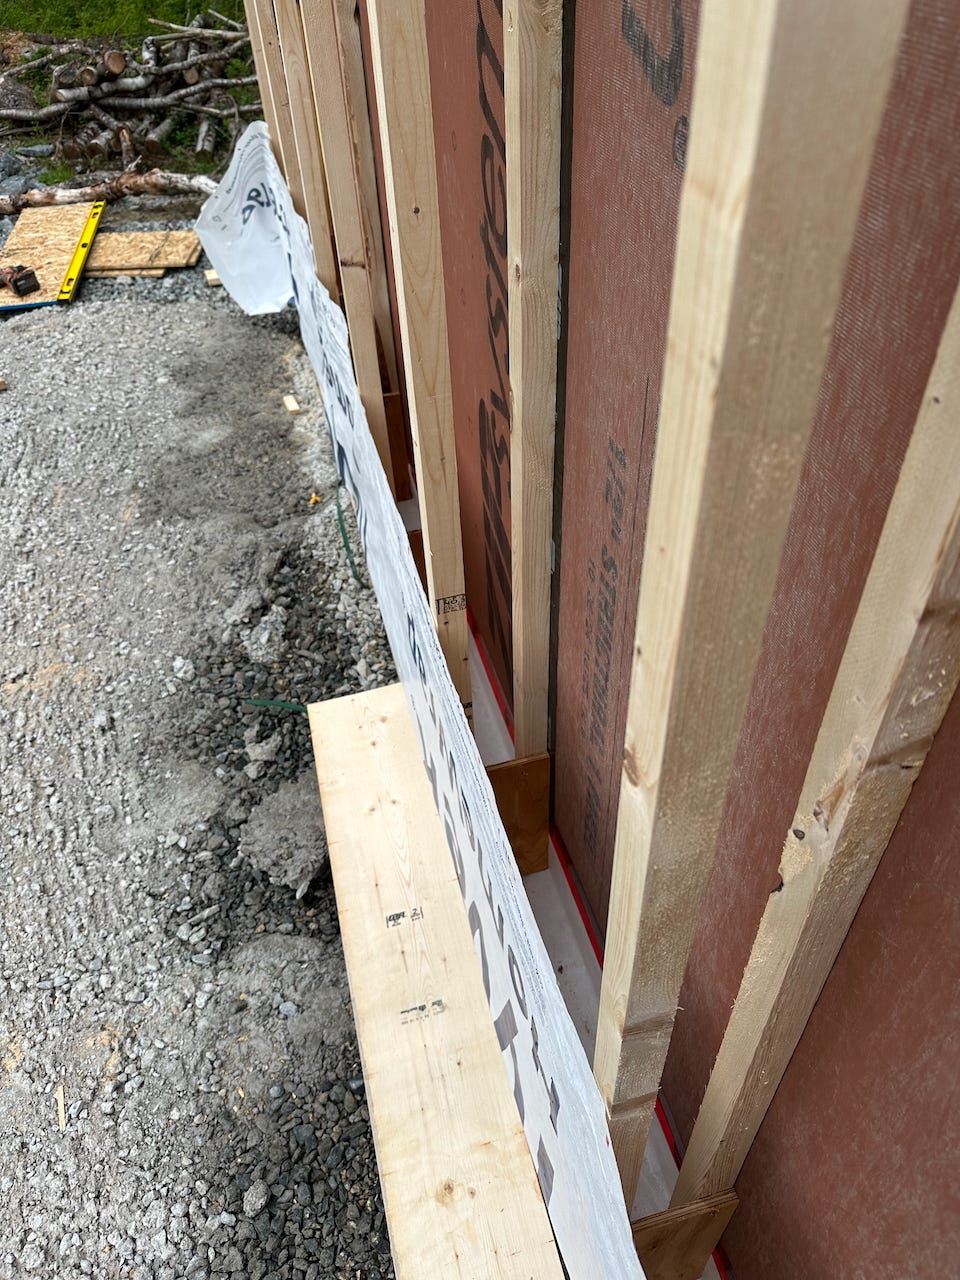
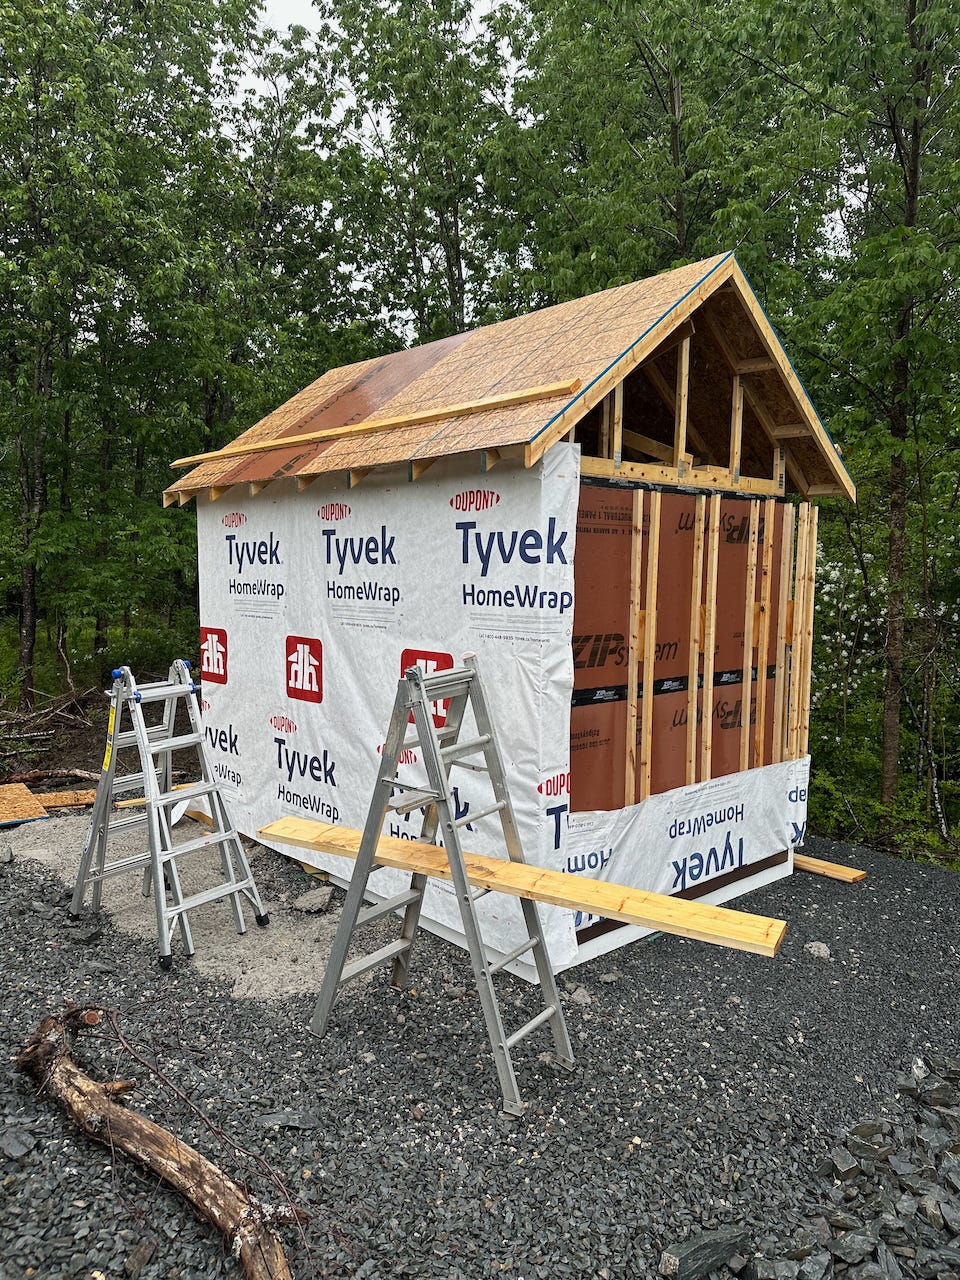
Here you get a good view of the extra cavity created by the Larsen truss, which will eventually be filled with insulation:
I added some final details to the Larsen trusses, attaching the top of them to the roof truss overhangs for added stiffness, and then it was time to finish wrapping with housewrap.
At the gable ends, the Larsen trusses simply get extended up to the overhang, maintaining the 6” depth.
Once Larsen trusses were complete on a wall, we added 9’ Tyvek housewrap again to complete the enclosure of the Larsen truss. This layer will shed any large quantities of water, as well as keeping in the insulation we’ll add later. Layers of housewrap get taped together with red Tuck tape.
Strapping & Siding
Once a wall is wrapped (or all walls), it’s time to add trim and siding.
Strapping consists of the wood “straps” that are attached to the Larsen trusses horizontally, adding some stiffness, an air gap behind the siding for water to escape and things to dry, and serving as an attachment point for the siding.
I opted for exposed-fastener metal siding, the same as I was using for the roof.
The choice for me was simple: metal is very durable, relatively easy to install, low maintenance, and cheap. From an environmental perspective it is recyclable.
It also simplifies suppliers and deliveries, as I can order from the same supplier as the roofing. And I like the aesthetic.
If given an unlimited budget, I might opt for something like burnt cedar cladding (often known as shō sugi ban), but that was overkill here, and that requires some maintenance that metal does not.
Installing the metal siding was a fun puzzle: the supplier I ordered from did not supply instructions, nor did they have any when I inquired.
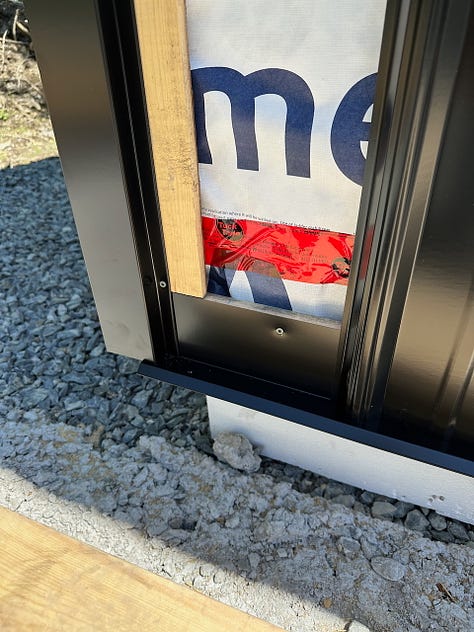
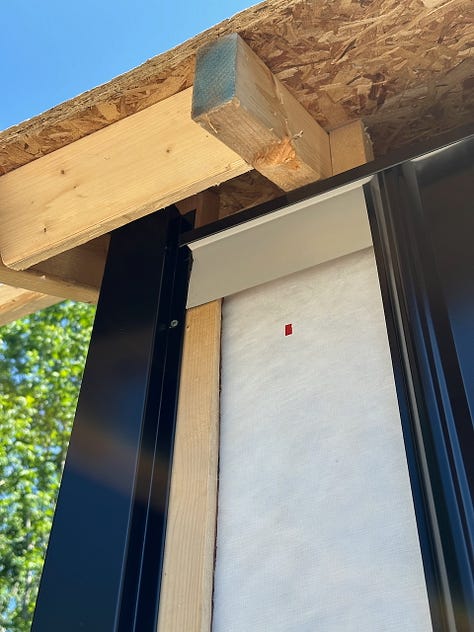
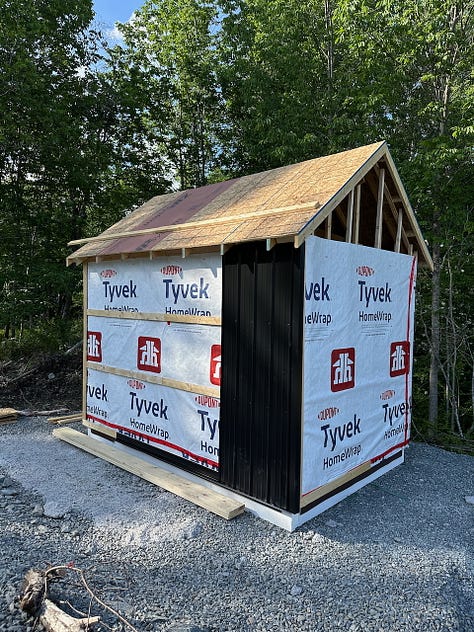
Many Youtube tutorials later, we installed the drip edge along the bottom, corner pieces, and the J-trim edge along the top, then started adding siding panels.
Here you can see the 1x4 strapping and the first siding panel attached, as well as some of the trim:
<ImageGallery columns={3} caption="The first pieces of trim and siding being added over the strapping.">
</ImageGallery>
In terms of fasteners and tools required, the screws for the panels are supplied, with colour-matched black heads and neoprene washers.
A drill with a torque setting is required for proper installation here, so the screws can be driven without being overtightened and squishing the washers too much.
I used regular deck screws to attach the metal trim pieces; this probably isn’t the best, and I’ll be transitioning to stainless screws in future. Some people swear by powered staplers on the forums for this stuff, but it’s not recommended by manufacturers.
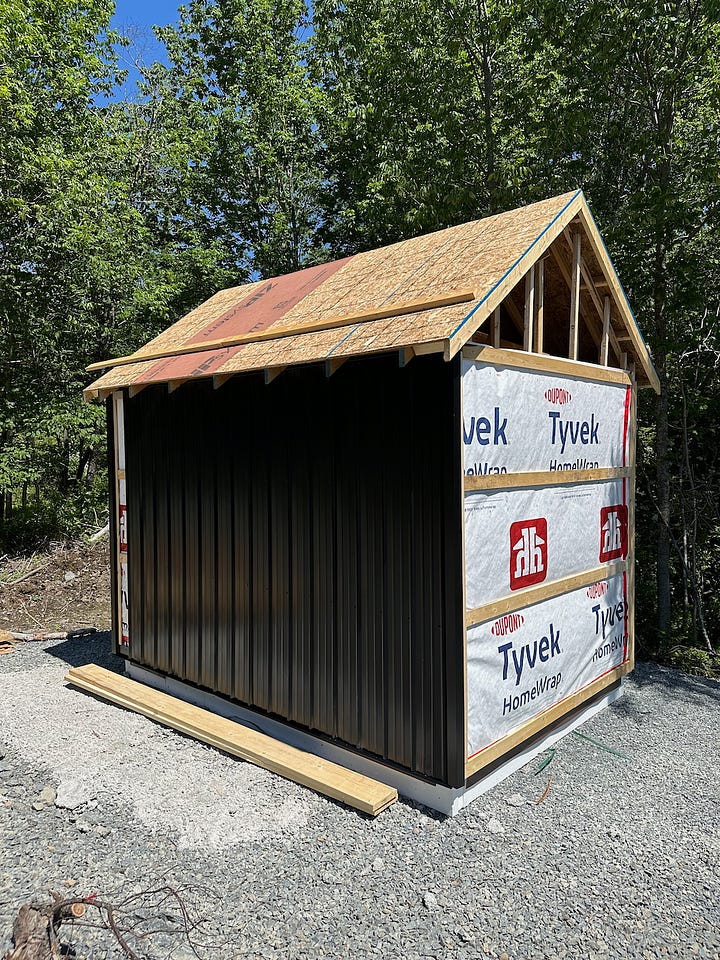
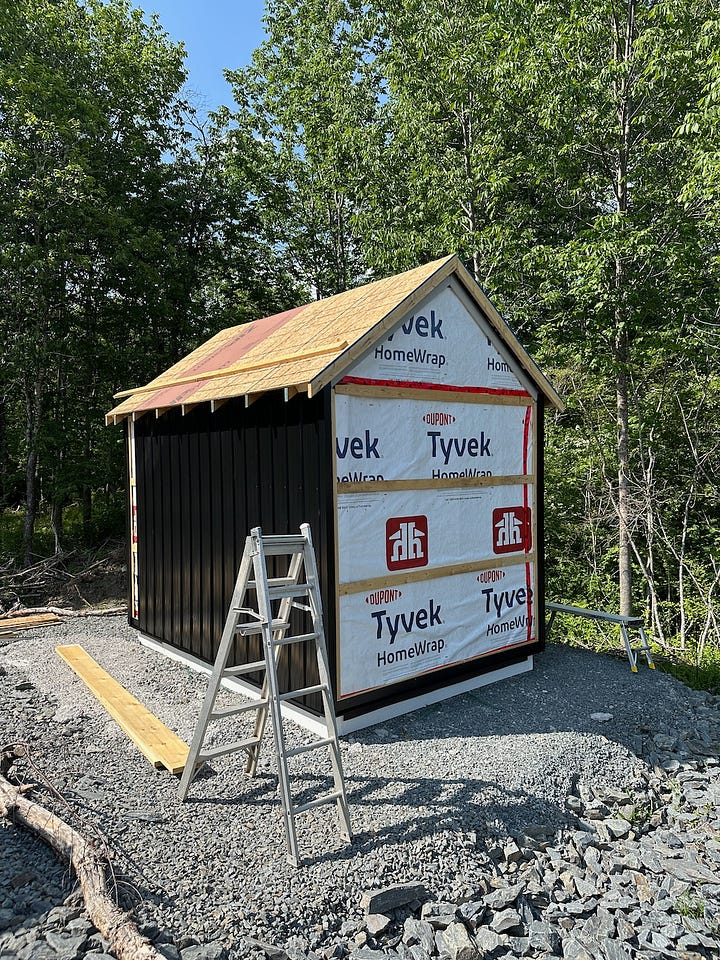
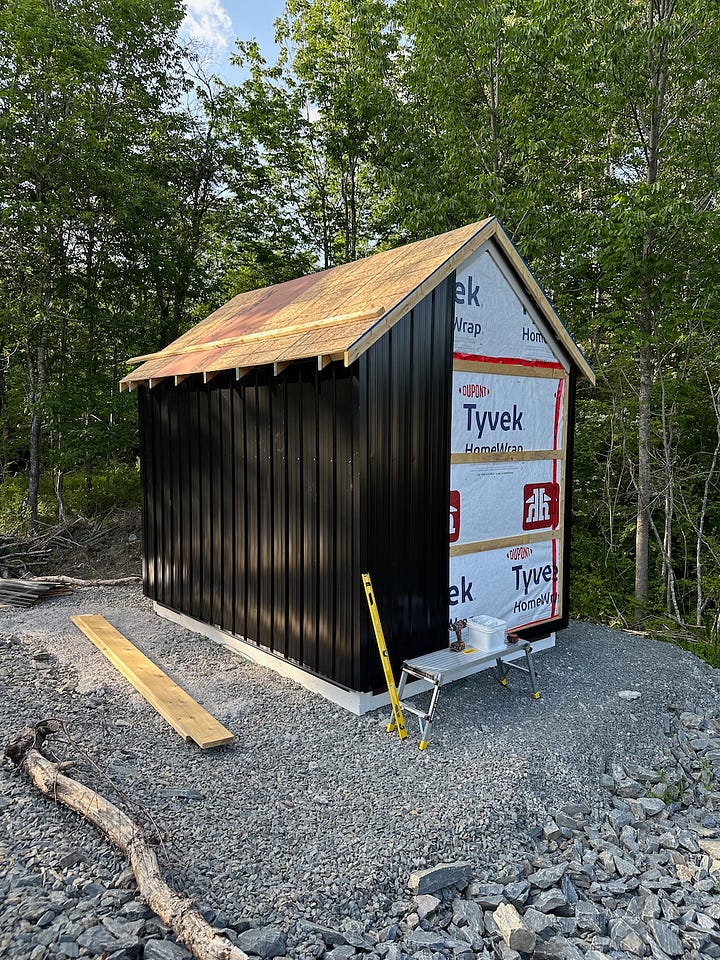
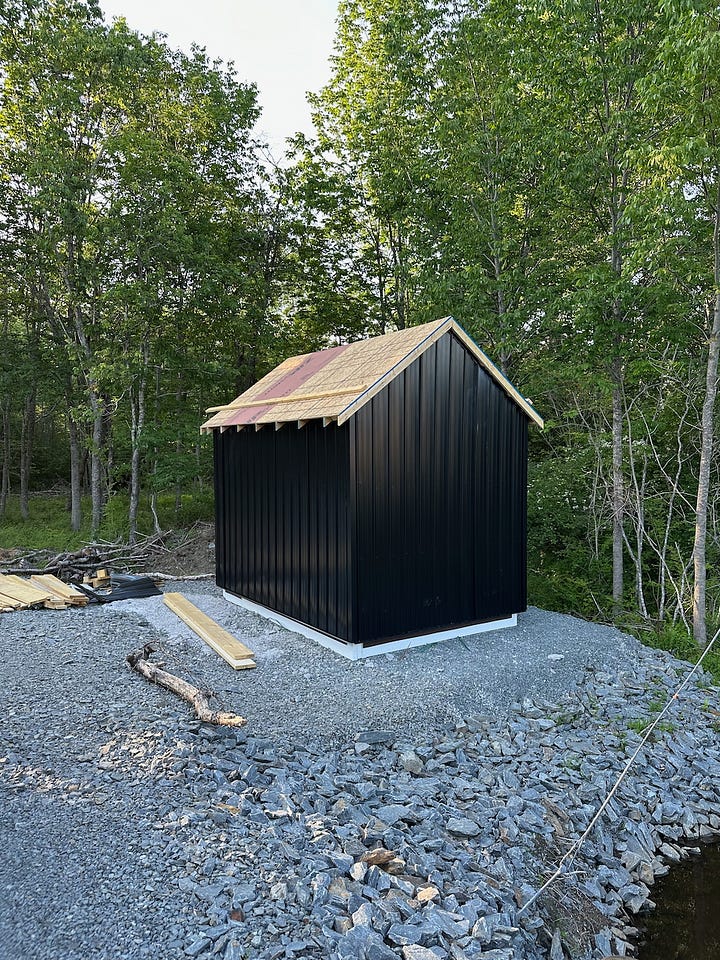
Overall, this process went fairly quickly; working out the gable ends, and cutting the gable end metal panels (mine weren’t supplied pre-cut) was the trickiest bit. Thankfully none of my measurements were too far off, so it wasn’t a bad process.
<ImageGallery columns={3} caption="Adding and completing the siding.">
</ImageGallery>
Learnings & Tools
Aside from learning how to put metal trim together, the process here was relatively straightforward.
I did make some notes for future builds to speed the process:
- Double-check siding heights before ordering: I accidentally spec’d the siding slightly too long, which meant I had to cut every single siding piece, instead of being able to use them straight from the supplier, introducing some inaccuracy and wasting a bunch of time. Better than too short though!
- Pre-build Larsen trusses: I built them on the building itself, which wasn’t very efficient. Building a jig and building them all at once would have been much faster.
- Plan out strapping lengths better: this was an 8’x12’ building, which meant 9’x13’ sides including the Larsen trusses. Yet I only bought 8’ strapping. I could have made things more accurate and required fewer cuts had I bought 10’ and 14’ lengths instead. This was a common mistake for me throughout this build.
- Get pre-cut gable panels if possible: some suppliers do this, and others don’t, and you may spend a small premium, but it’s worth it for the accuracy and lack of headache. Measuring and cutting the panels is tedious and time-consuming.
- Use a center punch for metal panels, and pre-measure hole spots: the metal screws that come with the panels are hard to get to stay in one spot if you haven’t pre-punched the holes. And maintaining a straight line freehand isn’t easy either. It’s easier to measure and pre-punch the holes while the panel is on the ground.
- Put insect mesh up prior to strapping and panels: I realized after that I should have put insect mesh in the eaves and gable ends before the panels went up, as then it can just be draped behind them, and stapled to the Larsen trusses, making the job of keeping insects out much easier.
- Plan door surround spacing better: I didn’t show pictures here, but will in future posts. The planning of Larsen trusses around the door worked out in the end, but they left a lot to be desired, and this should have been planned better.
- Use a magnetic wristband for screws: this speeds things up and makes it much easier, especially when working solo:
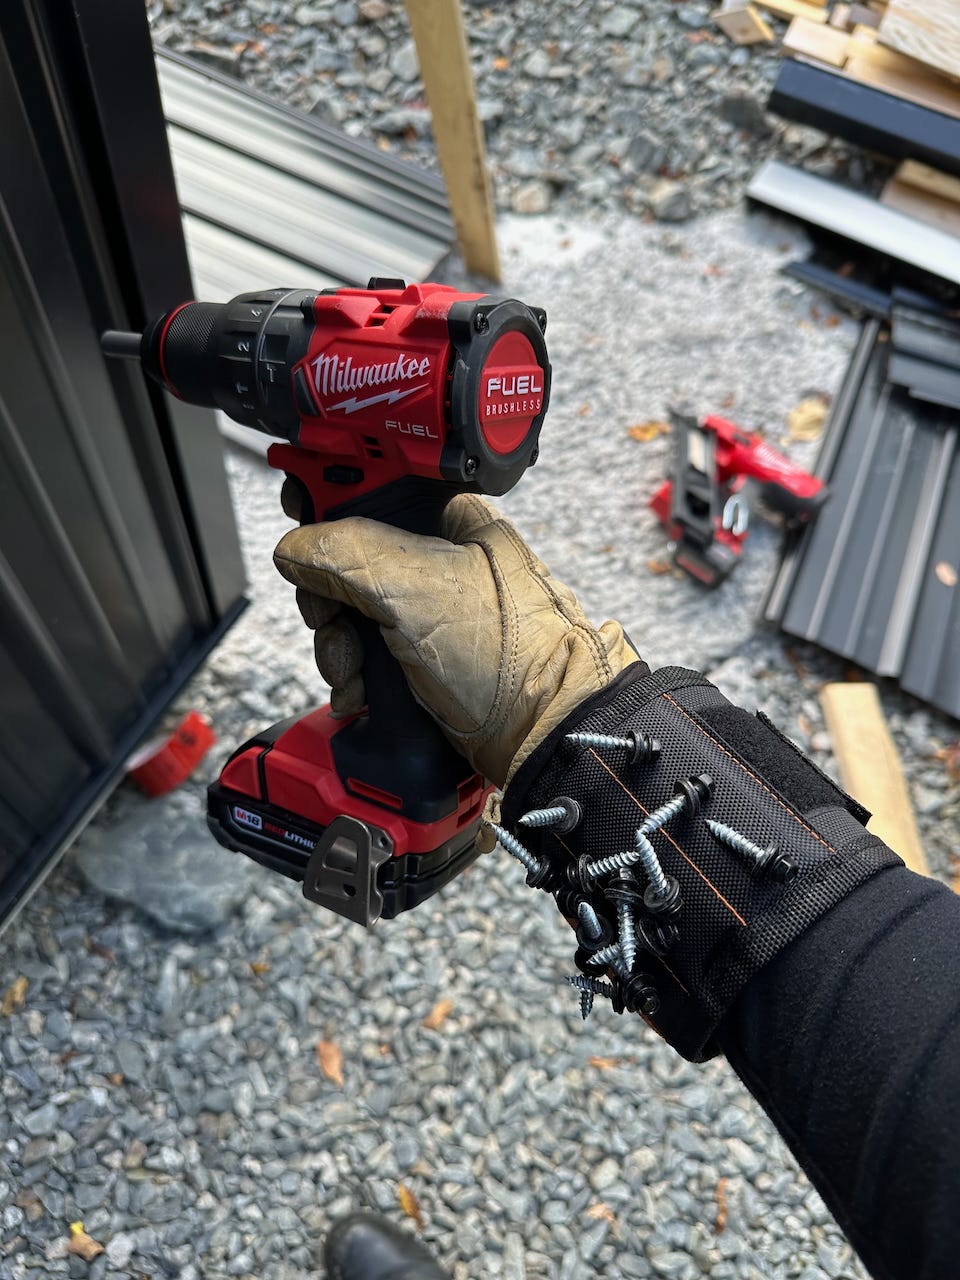
- Buy the power tools: for cutting metal, I got both a nibbler and powered metal shears. They weren’t cheap (no power tools are, though I did manage to find these on Facebook Marketplace), but they saved a ton of headache and time.
---
Stay tuned for the next build update! Browse all articles →