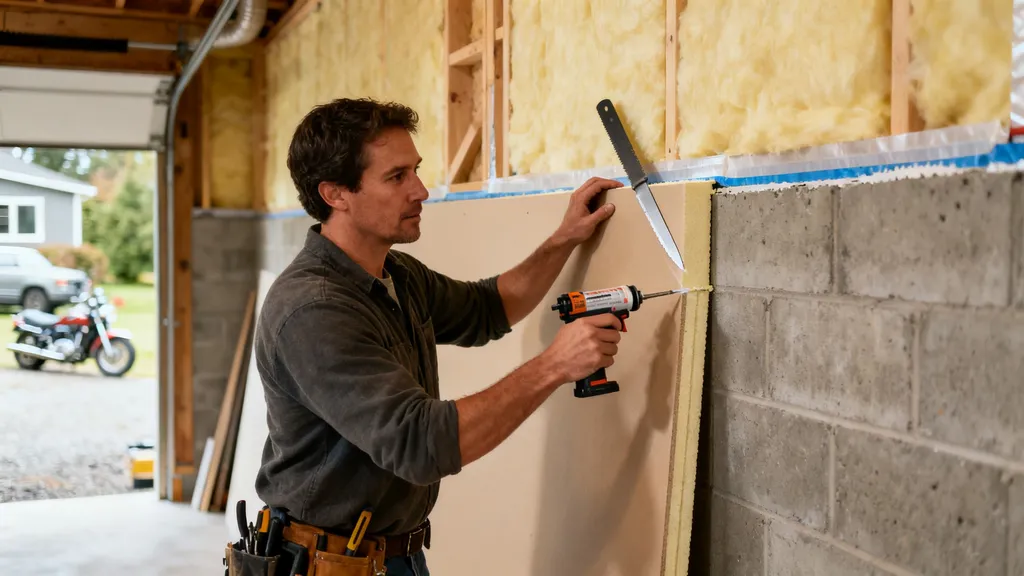
Practical guide to choosing basement insulation: compare materials, typical R-values, moisture control, DIY tips, and cost-performance trade-offs.
Best Insulation for Basement: Materials and R-Values
Basement insulation choices shape comfort, energy bills, and long-term durability. This guide on the best insulation for basement compares common materials, explains R-values and thermal-bridge issues, walks through interior vs exterior strategies, and gives DIY-friendly installation tips so budget-conscious self-builders can pick the right assembly for their site and finishing plans.
TL;DR:
- Rigid foam or closed-cell spray foam give the best moisture tolerance and continuous insulation for below-grade walls.
- Prioritize solving bulk water and draining issues before insulating, and always air-seal rim joists and penetrations.
- Choose the assembly to match your climate, finish plan, and budget: interior foam for DIY retrofits, exterior continuous insulation for long-term performance.
Why Choosing the Best Insulation for Basement Matters
Basement insulation affects whole-house heat loss, finished-floor temperatures, and moisture risk. Many homes lose a measurable share of heat through foundations; the U.S. Department of Energy highlights foundation assemblies as a key area for energy improvement. Insulating a basement properly can reduce heating loads and make basements habitable without oversized HVAC systems.
Comfort and Energy Impacts
- Colder floors and high energy bills: Uninsulated concrete radiates cold into conditioned rooms above. Insulation raises floor surface temperature and reduces furnace runtime.
- Conditioned vs unconditioned basements: If you plan to finish the basement as living space, wall and rim-joist insulation must be continuous and air-sealed to protect interior finishes and HVAC equipment.
Durability and Moisture Risk
- Moisture drives most failures: Water intrusion, capillary rise, and high interior relative humidity are common causes of mold, rot, and failed insulation. Addressing drainage and waterproofing is a prerequisite to insulating.
- Material tolerance matters: Some insulations (closed-cell foam, XPS) resist moisture; others (fiberglass batts) can trap moisture if they contact a wet concrete wall.
How Basement Insulation Fits Into the Whole-house Envelope
- Insulating foundations is one part of a continuous thermal and air barrier that includes walls, attic, and ductwork. For readers who want to compare strategies across assemblies, see the garage insulation guide for a related look at semi-conditioned spaces.
Key points
- Fix bulk water issues first (grading, gutters, exterior drains).
- Protect rim joists and penetrations with air sealing.
- Match insulation choice to finish plan and local climate.
Basement Insulation Basics: R-values, U-values, and Thermal Bridging
Understanding R-value and U-value helps choose the right material and layer it correctly.
What R-value Measures and Why It Matters for Basements
- R-value is a measure of thermal resistance per unit area. Higher R means slower heat flow through the assembly. Different materials have different R per inch; basements often require continuous insulation to avoid cold spots.
- Basement insulation R-value recommendations vary by climate and code. ENERGY STAR and regional code guidance give target assembly R-values for crawlspace and basement walls; consult local code for mandatory minimums. See the Department of Energy overview for common basement insulation systems and innovations: Department of Energy's guide to basement insulation systems.
U-value and Continuous Insulation Considerations
- U-value is the inverse of thermal resistance (lower U is better). When you place a continuous foam layer on the exterior or interior of concrete, you reduce thermal bridging and lower the assembly U-value more effectively than spacing batts between studs.
- Continuous insulation (CI) prevents cold studs or concrete from short-circuiting the thermal resistance. For basements, one or two inches of continuous foam can change how much heat flows through the foundation.
Thermal Bridging at Rim Joists and Penetrations
- Rim joists and service penetrations are common leakage and thermal-bridge locations. Air sealing with spray foam or caulk plus a foam thermal break keeps cold air out and prevents condensation on cold surfaces.
- Example: A 2-inch rigid foam layer (approx R-10 for polyiso in favorable conditions, or R-10–R-11 for closed-cell spray foam) applied continuously across a concrete wall can increase the wall assembly R-value substantially compared with only insulating between studs.
For a deeper primer on R-value and related attic comparisons, see the attic insulation guide.
Top Materials for Basement Insulation: Pros, Cons, and Typical R-values
This section compares common materials and their typical performance for below-grade use.
| Material | Typical R-value per inch | Moisture tolerance | Cost relative | DIY friendliness | Ideal application |
|---|---|---|---|---|---|
| Polyiso rigid foam | ~R-5.6 to R-6.5 | Fair; faces can be foil; less consistent at cold temps | Mid | High | Interior continuous layer, above-grade exterior CI |
| XPS rigid foam | ~R-5 | Good; closed-cell resists bulk moisture | Mid | High | Exterior below-grade, interior foam against concrete |
| EPS rigid foam | ~R-3.6–R-4 | Fair to good (varies by density) | Low | High | Budget installs where thicker board can be added |
| Closed-cell spray foam | ~R-6 to R-7 | Excellent; acts as air and moisture barrier | High | Low (professional recommended) | Rim joists, complicated penetrations, continuous interior layer |
| Open-cell spray foam | ~R-3.5–R-3.8 | Poor in wet areas; vapor-open | Mid | Low | Above-grade framed walls only, not below-grade |
| Mineral wool (rockwool) | ~R-3.7–R-4.3 | Good; water drains and dries better than fiberglass | Mid | Medium | Framed interior walls where a foam layer provides vapor control |
| Fiberglass batt | ~R-2.9–R-3.8 | Poor if compressed or wet | Low | High | Interior framed walls with a dry, protected cavity |
Notes on numbers and selection
- Ranges are typical; consult manufacturer data sheets and code for exact figures. The City of Portland and Building America guidance list acceptable basement insulation assemblies including rigid foam and spray foam options. For material-level comparison of mineral wool vs fiberglass in framed walls, see the rockwool vs fiberglass comparison.
- Less common options like cork, hemp, or aerogel panels offer niche advantages (low embodied energy or very high R per inch for aerogel) but are rarely used in basements due to cost or moisture concerns.
Material-specific notes
- Rigid foam boards (polyiso, XPS, EPS): Best for continuous insulation and to create a moisture-resistant layer against concrete. Tape seams and seal edges.
- Spray foam: Closed-cell spray foam both insulates and air-seals. It is often used at rim joists and for complicated geometries; open-cell is not recommended against foundation walls.
- Mineral wool and fiberglass batts: Can work inside a framed wall separated from the concrete by a foam layer. Avoid placing standard batts directly against damp concrete.
Secondary keyword usage: "rigid foam basement insulation" and "spray foam basement insulation" are discussed here to highlight common choices for DIYers and contractors.
Interior vs Exterior Basement Insulation: Methods, Pros, and Risks
Choosing interior or exterior insulation determines moisture management, cost, and which parts of the structure are protected.
Interior Insulation Strategies (foam Board, Stud Walls, Furring)
- A common DIY approach is to adhere rigid foam board directly to the poured concrete, tape or caulk joints, then attach furring strips or a stud wall for finishing. This creates continuous interior insulation and keeps the slab edge warmer when done correctly.
- Another method is a framed wall with a thin foam layer against the concrete and mineral wool or fiberglass in the stud cavity. That protects the framing from cold and drying stress.
- Common mistakes: leaving gaps at the slab edge, failing to tape seams, and installing vapor-impermeable finishes that prevent drying to the interior.
Exterior Foundation Insulation Benefits and Installation Notes
- Exterior insulation places the thermal break outside the structure and protects foundation walls and framing from thermal cycling and freeze-thaw damage. It also keeps the foundation warmer in cold climates.
- Exterior work usually requires excavation, drainage, and waterproofing coordination. The Department of Energy and Building America research show exterior foam or rigid fiberglass on the outside of basement walls can be effective when installed with proper drainage: see the Department of Energy's basement insulation systems article.
- Exterior CI is less DIY-friendly because it often ties into waterproofing membrane and exterior sitework.
When to Choose Each Method: Climate, Water Table, and Finish Plans
- Dry site, DIY retrofit, finished interior: Interior rigid foam or closed-cell spray foam is often the most practical.
- High water table or recurrent exterior moisture: Exterior insulation combined with proper drainage and waterproofing may be safer; consult local waterproofing professionals.
- Cold climates wanting maximum performance: Exterior continuous insulation shields the structure and can provide the best long-term thermal performance, but it costs more upfront.
Regional guidance such as ENERGY STAR's recommended R-values for basement walls can inform the target assembly for your climate: see ENERGY STAR's recommended home insulation R-values.
For a deeper comparison of interior and exterior approaches, visit the guide on interior vs exterior methods.
Moisture, Vapor Control, and Indoor-air Considerations for Basement Insulation
Address moisture control before installing insulation. That reduces mold risk and protects finishes.
Addressing Bulk Water and Capillary Rise Before Insulating
- Inspect for signs of bulk water: efflorescence, peeling paint, visible leaks, or a musty smell. Fix grading, gutters, and exterior drains first. In many cases, an interior drain system and sump pump are prudent before insulation.
- Capillary rise from the slab edge is common. Leaving a small gap between foam and slab edge, or installing a sill gasket and sealing at the slab, helps prevent wicking into framing members.
Vapor Barriers, Smart Vapour Retarders, and Where to Place Them
- A true vapor barrier (e.g., 6-mil polyethylene) stops vapor diffusion but can trap moisture if liquid water is present. Smart vapor retarders (e.g., vapor-variable membranes) change permeability with humidity and are useful in many framed assemblies.
- For interior rigid foam directly against concrete, the foam itself often acts as a vapor control layer; avoid double-impermeable layers that prevent drying to either side.
- Building Science Corp and regional code guidance caution against installing vapor-impermeable layers on the interior of a cold concrete wall in some climates; the recommended approach depends on climate zone and water conditions. See the Building America solution details on basement wall insulation at the Building america solution center.
Indoor Air Quality: Off-gassing, Radon, and Ventilation
- Some spray foams can off-gas during cure; manufacturers recommend proper ventilation and waiting periods, and professional installers follow safety protocols. Mineral wool and rigid foams are relatively inert once installed.
- If radon is a concern in your area, an air-tight insulation strategy should be coordinated with radon mitigation (passive vent pipes or active fans). Insulating without addressing radon can reduce natural dilution and make mitigation more important.
- Mechanical ventilation (HRV/ERV or supply/exhaust systems) is recommended for finished basements to maintain healthy indoor air and control humidity.
For examples of moisture-control strategies in tough assemblies, consult the insulation for container home discussion on condensation and vapor control.
DIY Installation Tips, Tools, and Common Mistakes
This section presents a practical, beginner–intermediate DIY path: installing rigid foam on interior poured concrete walls and finishing with furring strips.
Pre-install Checklist: Inspect, Repair, and Dry the Space
- Inspect: Look for cracks, efflorescence, visible leaks, mold, or high humidity.
- Repair: Seal cracks with hydraulic cement or appropriate epoxy; fix long-term water issues first.
- Drying: Use a dehumidifier for several days to get the space to a stable dryness before installing impermeable materials.
- Permits: Check local building code for insulation and fire-protection requirements (e.g., foam often requires a 15-minute thermal barrier like 1/2" gypsum when used in living spaces).
Tools, materials, and PPE
- Utility knife or foam saw, straightedge, tape measure, adhesive (compatible foam adhesive), high-quality seam tape for foam, low-expansion spray foam for small gaps, furring strips or metal channel, screws and washers for mechanical fastening, caulk or joint sealant, safety goggles, gloves, and an N95 respirator for cutting dust.
- Use a compatible tape and sealants approved by the foam manufacturer to maintain a continuous air barrier.
Step-by-step: Installing Rigid Foam on Foundation Walls
- Measure and plan: Cut boards to fit from floor to ceiling. Start at a corner and work along the wall.
- Apply adhesive and/or fasteners: Use panel adhesive and mechanical fasteners where needed. Hold boards tight to the concrete.
- Tape seams: Use foil or specially recommended tape on board seams. Seal edges where the foam meets the slab and rim joist with low-expansion spray foam or caulk.
- Seal penetrations: Use spray foam around pipes and conduits for air seal.
- Install furring strips: Fasten vertical furring strips through the foam into the concrete using long masonry screws or through the foam into the sill plate if present. Ensure strips are flush and plumb.
- Finish: Install drywall or other finishes over the furring strips. For code compliance, cover foam with the required thermal barrier like 1/2" gypsum board.
Air sealing, fastening, finishing, and safety tips
- Do not leave gaps at the top or bottom of foam panels where air can short-circuit. Tape and spray-foam those joints.
- Protect foam from combustion hazards and mechanical damage.
- Avoid high-expansion spray foam where it can bow thin foam boards or push against finishes.
- Common mistakes include placing fiberglass batts directly against damp concrete, not sealing rim joists, and failing to provide a thermal barrier over foam where codes require it.
Watch this step-by-step guide on insulating a basement with foam board:
For finishing tips that maintain insulation performance, see our article on basement finishing tips. For spray-foam-specific trade-offs, review the spray foam vs cellulose comparison.
Cost, Performance, and Sustainability Trade-offs
Budget-conscious builders must balance upfront cost, energy savings, and embodied carbon.
Upfront Cost vs Lifetime Energy Savings (how to Compare)
- Compare material and installation costs to projected heating savings; because costs vary regionally, present ballpark tiers instead of fixed prices.
- Example (illustrative): If an upgrade reduces annual heating use enough to save a hypothetical $300 a year, a higher-cost insulation system with a 10-year simple payback may be worth it for long-term use. This is an illustration, not a guarantee—actual savings depend on climate, fuel cost, and house specifics.
Embodied Carbon, Recycled Content, and Green Choices
- Foam boards (polyiso, XPS, EPS) typically have higher embodied carbon than mineral wool or natural-fiber insulations. Mineral wool often contains recycled slag or rock content. Natural options like cork or cellulose have lower embodied carbon but have limitations for wet basement walls.
- If sustainability is a priority, consider combining a thin continuous foam layer (for moisture control and thermal break) with mineral wool in framed cavities to reduce foam volume while retaining performance.
When It's Worth Hiring a Pro
- Hire a professional if the project includes excavation for exterior insulation, complex water intrusion repairs, full-depth spray foam, or radon mitigation coordination. Professional installers also ensure spray foam is applied at proper density and cure characteristics.
- For typical interior rigid-foam installs in a dry basement, DIY is common and feasible with the right tools and permit checks.
For a deeper material carbon and performance comparison, review the spray foam vs cellulose article and linked lifecycle sources.
The Bottom Line: Choosing the Right Basement Insulation for Your Project
Choose insulation that matches site moisture risk, finish plans, and budget. For many DIYers on a dry site, continuous rigid foam or targeted closed-cell spray foam at rim joists plus a framed finish provides a reliable balance of performance and cost. In high water-table conditions or where long-term protection is desired, exterior continuous insulation plus professional waterproofing is the safer route.
Quick Decision Checklist for Diyers
- Site dry and minor water issues? Consider interior rigid foam with taped seams.
- Planning a finished living space in cold climates? Prioritize continuous insulation and air sealing; closed-cell foam at rim joists is helpful.
- High water table or chronic exterior moisture? Consult a pro for exterior insulation and drainage solutions.
One-paragraph Recommended Approach by Common Scenarios
- Unfinished cold storage: Use insulated subfloor or minimal foam to keep floors from freezing; prioritize drainage and simple rigid foam where practical.
- Finished living space in a cold climate: Install continuous rigid foam against the wall or use closed-cell spray foam, air-seal rim joists, and add a thermal barrier over foam.
- Damp/high-water-table foundation: Address exterior waterproofing and drainage first; avoid trapping moisture with impermeable interior finishes unless an exterior solution is infeasible, in which case consult specialists.
Frequently Asked Questions
Can I insulate a basement myself, or do I need a pro?
Many interior rigid-foam projects are suitable for capable DIYers: measuring, cutting, adhering, taping seams, and adding furring strips are straightforward with common tools. However, hire a professional for exterior insulation, full-depth spray-foam work, major waterproofing, or if radon mitigation is required. Professionals also ensure spray foam is applied at correct densities and that waterproofing integrates with insulation.
Should I insulate my basement ceiling or walls?
Insulating walls keeps the basement space warmer and ties the foundation into the conditioned envelope. Insulating the basement ceiling (between basement and living area) reduces heat loss to the basement but leaves plumbing and ductwork outside the conditioned space and can increase the risk of frozen pipes. For finished living spaces, walls are typically the better target; for unconditioned storage, ceiling insulation may be acceptable.
Is spray foam worth it for a basement?
Closed-cell spray foam provides high R-value per inch, excellent air sealing, and good moisture resistance, making it attractive for rim joists and difficult details. However, it costs more and often requires professional installation. For many DIY budgets, rigid foam board plus careful sealing offers comparable practical performance at lower cost.
How thick should basement insulation be for my climate?
Thickness depends on material, climate zone, and whether insulation is continuous. ENERGY STAR and local codes provide climate-specific recommendations; as an example, many zones aim for the equivalent of R10–R20 continuous insulation on basement walls, achieved with 2–4 inches of rigid foam depending on the product. Check local code and manufacturer guidance before specifying thickness.
Will insulating my basement cause moisture or mold?
Insulating itself doesn't cause mold; unmanaged bulk water and poor drying pathways do. If insulation traps moisture or blocks a needed drying direction, problems can follow. Always fix drainage, manage exterior water, allow assemblies to dry in at least one direction, and use materials appropriate for the moisture risk. Mechanical ventilation and proper air sealing help control indoor humidity in finished basements.