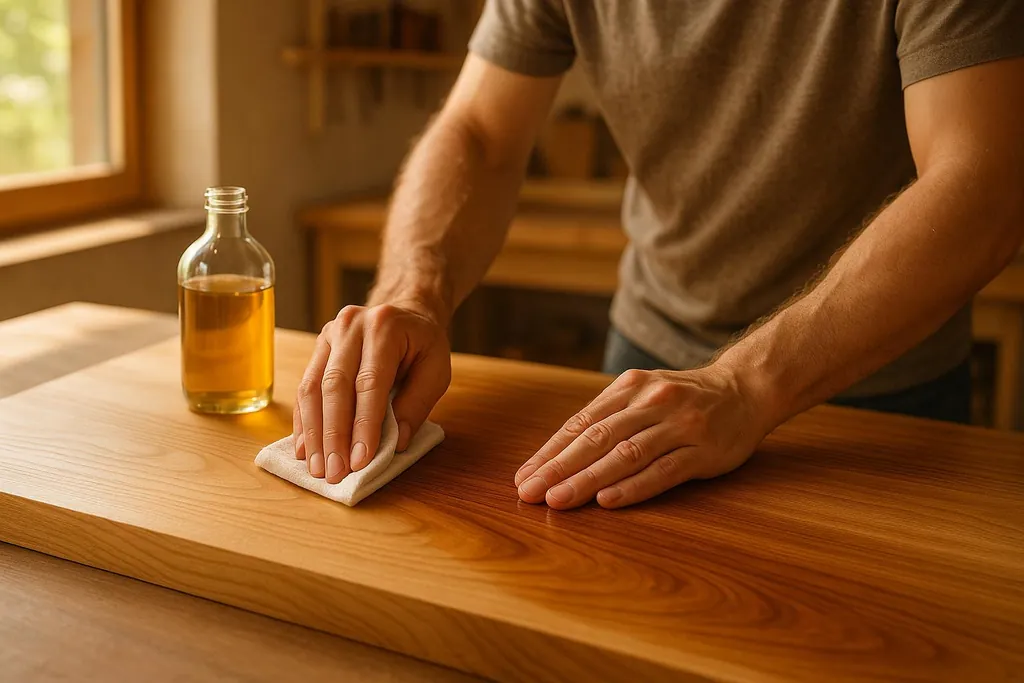
Learn how to achieve a durable and beautiful natural oil finish for wood with this step-by-step guide on preparation and application.
How to Apply Natural Oil Finishes Step by Step
Natural oil finishes are a great way to protect wood while keeping its natural texture and beauty intact. Unlike synthetic finishes, these oils penetrate deep into the wood, making them durable, safe, and easy to maintain. Here's what you need to know:
- Choose the Right Oil: Options like linseed, tung, walnut, and hemp seed oil vary in drying time, water resistance, and best uses.
- Prepare the Surface: Clean thoroughly, sand evenly, and fill any holes or gaps for a smooth base.
- Apply Thin Coats: Use a cloth or brush, wipe off excess, and let each layer dry fully before adding more.
- Maintain the Finish: Clean gently, reapply oil when needed, and fix scratches with spot repairs.
Natural oil finishes are an excellent choice for furniture, countertops, and cutting boards, offering protection without a plastic-like coating. Follow these steps for a long-lasting, beautiful finish.
Natural Oil Finishes Explained
What Are Natural Oil Finishes?
Natural oil finishes are plant-based coatings designed to protect wood by soaking into its fibers rather than forming a surface layer. Extracted from seeds, nuts, and other plant sources, these oils offer a safer, non-toxic option compared to synthetic finishes, which often contain volatile organic compounds (VOCs).
Here’s how they differ: Synthetic finishes create a hard, protective shell on the wood’s surface, while natural oils penetrate deep into the wood grain, hardening from within. This approach not only strengthens the wood but also preserves its natural feel - you can still run your fingers over the texture of the wood, a feature many woodworkers and homeowners find appealing.
Common natural oils include linseed oil, tung oil, walnut oil, and hemp seed oil. Each oil is derived from a different plant source and offers unique characteristics depending on its application.
These finishes work by curing when exposed to air. As the oil molecules bond, they form a protective layer throughout the wood fibers. Depending on the oil type, temperature, and humidity, this curing process can take anywhere from 24 hours to several days.
One of the standout benefits of natural oil finishes is their easy repairability. Got a scratch or worn spot? No need to strip the entire surface - just sand the damaged area lightly and reapply the oil. This feature makes them a favorite for high-use items like kitchen countertops and dining tables.
Selecting the right oil is key to achieving the finish you want, so let’s explore how to choose the best option for your project.
Picking the Right Oil for Your Project
The way natural oils cure and their specific properties will guide your choice. Your decision should depend on the project’s purpose, desired drying time, and the level of protection needed. Here’s a quick comparison of popular natural oils:
| Oil Type | Drying Time | Water Resistance | Best Uses | Color Change |
|---|---|---|---|---|
| Raw Linseed Oil | 3-7 days | Moderate | Interior furniture, decorative pieces | Amber tint over time |
| Boiled Linseed Oil | 24-48 hours | Moderate | General woodworking projects | Light amber tint |
| Tung Oil | 3-5 days | Excellent | Outdoor furniture, kitchen surfaces | Minimal yellowing |
| Walnut Oil | 2-4 days | Good | Cutting boards, food surfaces | Enhances natural grain |
| Hemp Seed Oil | 24-36 hours | Good | Quick projects, light woods | Very minimal |
- Linseed Oil: A budget-friendly option, linseed oil works well on interior furniture and decorative items. Raw linseed oil takes longer to cure, while the boiled version - treated with drying agents - speeds up the process.
- Tung Oil: Known for its excellent water resistance, tung oil is perfect for surfaces exposed to moisture, such as bathroom vanities, outdoor furniture, and kitchen countertops. It cures into a hard, durable finish with minimal yellowing.
- Walnut Oil: This is the go-to choice for food-contact surfaces like cutting boards and salad bowls. It’s food-safe and doesn’t go rancid, making it ideal for kitchen items.
- Hemp Seed Oil: If you’re short on time, hemp seed oil cures quickly - usually within 24-36 hours. It provides good water resistance and durability while maintaining a clear, natural finish.
Drying times can vary based on temperature and humidity. Oils cure faster in warm, dry conditions (70-80°F with low humidity) and slower in colder, more humid environments.
The type of wood also plays a role. Dense hardwoods like maple or cherry absorb oil slowly and benefit from thinner coats, while porous woods like oak or ash soak up oil quickly and may need extra applications for full protection.
For high-traffic surfaces, tung oil offers the most durability over time. For quick projects, hemp seed oil lets you finish faster. And for kitchen items, walnut oil provides food safety and reliable protection.
A Better Way To Apply Oil Finishes!
Wood Surface Preparation
Preparing your wood surface is absolutely essential for achieving a flawless natural oil finish. This step ensures the oil penetrates evenly, resulting in a durable and visually appealing finish. Skipping or rushing this process can lead to uneven absorption, blotchy spots, and a finish that won’t stand the test of time. By dedicating time to cleaning, sanding, and addressing imperfections, you’ll set the stage for a professional-quality result.
Checking and Cleaning the Surface
Begin by inspecting your wood surface under bright lighting, like natural daylight or a strong LED work light. Look for any old finishes, wax residue, dirt, grease, or damage that might interfere with the oil application.
If the wood has an existing finish, you’ll need to figure out what type it is. Polyurethane and lacquer finishes must be completely removed because natural oils can’t penetrate them. To test, place a small drop of water on an inconspicuous area. If the water beads up and doesn’t soak in after 10 minutes, there’s still a finish present that needs to be stripped away.
For bare wood or surfaces previously treated with oil, the cleaning process is simpler. Wipe the surface down with a tack cloth or a microfiber cloth dampened with mineral spirits to remove dust, fingerprints, and light grime. Always work with the grain to avoid scratches. Pay close attention to areas that are frequently touched, as skin oils can block proper absorption.
Grease stains require extra care. Kitchen countertops or workshop pieces often have oil or grease spots that can ruin the finish. Clean these areas with a TSP solution (1 tablespoon per quart of warm water), then rinse thoroughly with clean water. Allow the wood to dry completely - this can take up to 24 hours.
Also, check for mold or mildew, particularly on wood that’s been stored in damp conditions. A solution of 1 part bleach to 10 parts water works well for removing mold. Let it sit for 15 minutes, rinse thoroughly, and allow the wood to dry for at least 48 hours before sanding.
Once the surface is cleaned and dried, you’re ready to sand for a smooth, even texture.
Sanding for Smooth Results
Sanding is a key step that prepares the wood for even oil absorption while removing imperfections. Natural oils will highlight every scratch and flaw, so thorough sanding is non-negotiable.
For rough lumber, deep scratches, or mill marks, start with 80-grit sandpaper. If you’re working with furniture-grade wood or previously finished pieces, begin with 120-grit sandpaper. Use a random orbital sander for flat surfaces, and switch to hand sanding with a sanding block for curves and detailed areas to ensure consistent pressure.
Work your way through the grits systematically: 120-grit, then 150-grit, and finally 220-grit. Each step should remove the scratches left by the previous grit. Skipping grits will leave visible scratches that will show through the finish.
Between each grit, vacuum the surface thoroughly to remove dust. Don’t just brush it off - coarse particles can scratch the wood when you move to finer grits. A shop vacuum with a brush attachment is ideal for cleaning dust out of the wood’s pores.
For open-grained woods like oak, ash, or mahogany, stop sanding at 180-grit to avoid burnishing the wood fibers, which can reduce oil absorption. For close-grained woods like maple, cherry, or birch, you can sand up to 220-grit for an ultra-smooth feel.
To check your progress, wipe the surface with mineral spirits. This will temporarily darken the wood, highlighting any scratches or imperfections you might have missed. Let the mineral spirits evaporate completely - usually within 15-20 minutes - before moving on.
For the final sanding step, hand-sand with the last grit, even if you’ve been using power tools. This eliminates any swirl marks left by orbital sanders and ensures the sanding follows the grain perfectly. Use a sanding block to apply even pressure and avoid creating low spots.
When the wood is smooth and free of scratches, it’s time to address any holes or gaps.
Filling Holes and Gaps When Needed
Small defects like nail holes or gaps can detract from the finished look. Using wood filler ensures a smooth, even surface that absorbs oil just like the surrounding wood.
Choose a filler that works well with natural oil finishes. Water-based fillers are a good choice because they don’t contain solvents that might interfere with the oil’s curing process. Reliable brands include Bondo Wood Filler and Famowood.
For small nail holes (1/8 inch or smaller), use a putty knife to press the filler into the hole, slightly overfilling it to account for shrinkage as it dries.
For larger gaps or gouges, clean out any debris and apply the filler in thin layers. Each layer should be no more than 1/8 inch thick and allowed to dry completely before adding the next. This method prevents cracking and ensures a solid fill.
Drying times for most fillers range from 2 to 4 hours, depending on the temperature and humidity. The filler should feel hard and resist pressure from a fingernail. Don’t rush this step - wet filler can clog your sandpaper and create a mess.
Once the filler is fully dry, sand the area flush with the surrounding wood using 150-grit sandpaper, then work through the finer grits. When done correctly, the filled areas should blend seamlessly with the rest of the surface.
Color matching can be tricky. Most fillers dry to a light tan, which works well under darker oils like tung oil or boiled linseed oil. For lighter finishes, mixing sawdust from your project with wood glue creates a filler that matches the wood perfectly.
For open-grained woods, skip filling the grain pores if you want to maintain their natural texture. The oil will settle into the pores, creating the characteristic look that makes these woods so appealing.
Finally, vacuum the entire surface one last time and wipe it down with a tack cloth to remove every trace of dust. Your wood is now perfectly prepped and ready for oiling.
How to Apply Natural Oil Finishes
Once your wood is prepped, you’re ready to apply the natural oil finish. The key to achieving a smooth, lasting result lies in applying _thin layers_ and allowing proper drying time between coats.
Applying the First Coat
Start by applying a thin, even layer of oil. Use a lint-free cloth, rag, shop towel, or a high-quality brush. Work the oil into the surface using circular motions or follow the wood grain - whichever feels more natural for you. Be thorough to cover the entire surface, but avoid overloading it with oil. Afterward, immediately wipe off any excess with a clean, dry cloth to prevent sticky spots or uneven patches.
Drying Time Guidelines
Patience is essential here. Let each coat dry completely before moving on to the next. Natural oil finishes cure through oxidation, so giving each layer enough time to set ensures a durable and long-lasting finish.
Adding Additional Coats
If you want to deepen the finish, you can apply more thin coats. Just remember to wipe away any extra oil after each application. This slow, gradual process not only enhances the wood’s natural beauty but also ensures an even and smooth finish. Once you’re satisfied with the build-up, you’re ready for the final curing stage.
Final Curing Steps
After applying all the coats you need, allow the finish to cure fully. Once cured, the oil finish will protect the wood while bringing out its natural grain in a way that’s both durable and visually appealing.
Care and Maintenance
Taking proper care of an oil finish can keep your wood surfaces looking beautiful for years. The secret lies in cleaning gently and knowing when it’s time to refresh the finish.
Cleaning Oil-Finished Surfaces
Oil-finished wood needs a soft touch. Use a soft, damp cloth with plain water to wipe away dust and dirt. For regular cleaning, add a bit of mild dish soap to the cloth, or for tougher grime, try a diluted vinegar solution. Always dry the surface immediately to avoid water spots.
Skip harsh cleaners like bleach, ammonia, or anything abrasive - they can strip the oil and harm the wood. Also, avoid abrasive tools like steel wool or rough sponges, as they can scratch the surface and create dull spots. Instead, dust regularly with a microfiber cloth or soft cotton rag to keep particles from scratching the finish over time.
To protect furniture, use coasters, placemats, or table runners to shield surfaces from liquids and heat. While regular cleaning goes a long way, eventually, you’ll need to refresh the finish to keep it in top shape.
When to Reapply and Make Repairs
Oil finishes naturally wear down over time, especially on high-use areas like tabletops, counters, and floors. Plan to reapply every 6 to 12 months, depending on how much use the surface gets. For instance, kitchen tables and bathroom vanities might need more frequent attention than a bedroom dresser or decorative item.
Reapplying oil is straightforward and follows the same steps as the initial application - apply thin coats, let them dry properly, and build up the finish gradually.
Here’s how to tell when it’s time for a touch-up: the wood starts to look dry or dull, water doesn’t bead on the surface anymore, or you spot light scratches and wear marks. Don’t wait until the finish is completely gone - keeping up with maintenance is much easier than starting from scratch.
For spot repairs, lightly sand the damaged area with 220-grit sandpaper, always moving along the grain. Once the dust is cleared, apply a thin layer of the same oil used originally. Blend the edges carefully to match the surrounding finish. Let the oil soak in for the recommended time, then wipe off the excess.
If the finish needs a full reapplication, start by cleaning the entire surface thoroughly. Apply a thin, even coat of oil over the piece. Sanding isn’t necessary unless there are scratches or rough spots. The fresh oil will seamlessly bond with the existing finish, restoring the wood’s natural luster.
Keep track of your maintenance schedule to stay ahead of wear and tear. With regular care, your oil-finished wood can remain stunning and last for many years.
Fixing Common Problems
Slow Drying Issues
Getting the drying time right for natural oil finishes can be tricky, especially when environmental conditions aren't ideal. These finishes dry through a process called polymerization, where oxygen interacts with the oil. If the drying seems to drag on, it's likely that this reaction is being slowed down. To help things along, make sure the area is well-ventilated, keep the temperature between 70–80°F, and aim to lower humidity levels. Tackling these factors quickly can ensure your finish stays in great shape and looks its best.
Conclusion
Using natural oil finishes is all about attention to detail. Start by thoroughly cleaning and sanding the surface, then apply thin, even coats, allowing each layer to fully cure. This method ensures a durable and attractive finish that lasts.
Natural oil finishes bring clear advantages, especially for health-conscious individuals and DIYers. Unlike synthetic options, they’re free from harmful volatile organic compounds (VOCs) and chemical off-gassing, making them a safer choice for indoor projects where air quality is important. Plus, their ability to deeply penetrate the wood enhances both its appearance and durability.
For the best results, it’s essential to maintain consistent conditions during application. Work in a warm, well-ventilated area and steer clear of high-humidity days. Keep in mind that these finishes do require upkeep - typically every 2 to 3 years - to keep the wood looking its best.
For those dedicated to eco-friendly building practices, natural oil finishes are a perfect fit. They’re renewable, biodegradable, and often come from sustainably sourced materials. Whether you’re working on reclaimed wood floors, custom cabinets, or outdoor furniture, mastering this approach not only boosts the wood’s longevity but also supports environmentally conscious craftsmanship. It’s a win-win for creating beautiful, healthy spaces that will endure for years to come.
FAQs
What makes natural oil finishes a better choice than synthetic finishes for wood projects?
Natural oil finishes bring a range of benefits that make them a favorite for wood projects. One standout feature is how they highlight the wood's natural grain and texture, giving it a rich, organic appearance that synthetic finishes often struggle to match. These oils seep into the wood, creating a smooth, touchable surface that emphasizes its inherent beauty.
Another big plus? They're kinder to the environment. Made from renewable resources, natural oils are biodegradable and emit low levels of VOCs (volatile organic compounds). This makes them a healthier choice for indoor spaces and a more eco-conscious option overall. While synthetic finishes might offer extra durability and scratch resistance, they can leave behind a plastic-like look that lacks the warmth and charm of natural oil finishes.
How do I choose the right natural oil for my woodworking project?
When selecting a natural oil for wood, it's essential to think about the type of wood, the level of protection required, and the kind of finish you're aiming for. Tung oil is a standout choice because it offers strong [moisture resistance](/blog/cost-strength-moisture-resistance-plywood-vs-osb-showdown) and penetrates deeply, making it a reliable option for most furniture and wooden surfaces. If you're working on food-related items like cutting boards or wooden utensils, pure tung oil or walnut oil are excellent, food-safe alternatives.
Match the oil to your project's specific requirements - whether you prioritize durability, water resistance, or a more natural appearance. Before committing to a full application, test the oil on a small, hidden section of the wood. This step ensures you achieve the look and finish you want without surprises.
What can I do if my natural oil finish is taking too long to dry?
If your natural oil finish is taking longer than expected to dry, there are a few ways to help move things along. Start by improving air circulation - position fans around the area to keep the air moving. Also, make sure the environment is warm and dry. Ideally, the temperature should be above 60°F, with low humidity levels.
For an extra boost, you can carefully introduce some heat. Use a heat gun on a low setting or relocate the piece to a warmer spot. Just be cautious - too much heat can lead to surface problems, so keep it gentle.
These steps work by increasing oxygen exposure and minimizing moisture, two key factors for proper curing. And don’t forget to check the specific instructions for the product you’re using to ensure the best results.